An Important Note on Data Storage
Churner Pro stores all data in an encrypted file on your local filesystem. Your account credentials are never sent to any server other than the one on which authentication occurs. For example, Fluz credentials are exclusively sent to Fluz owned and operated servers.
The only data that is communicated to the Churner Pro server is that which is used for license verification:
- Email address
- License key
If you have any questions, please contact info@churner.pro at any time.
An Important Note on Fluz Accounts
Please note, Churner Pro is most useful with a Fluz Business Account. While some of the functionality will be useful for those without a Business Account, the majority of features require a Business Account to maximize their utility.
Please note, with the exception of installation instructions, all screenshots are captured while running Churner Pro on Windows. With very few exceptions, the interface is identical between platforms.
License Management
Upon purchasing Churner Pro, a user account will be provisioned for you to manage your license. If you are already a subscriber or have subscribed previously, a new license purchase will be attached to your existing user account.
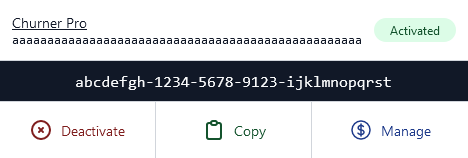
When you log in to the licensing portal, you'll see all of your attached licenses. Each license displays its key, activation status, and subscription status. When a license has yet to be activated, it will look like this:

When a license is activated, the unique device id associated with the license will be shown and the badge will change to indicate it is activated.
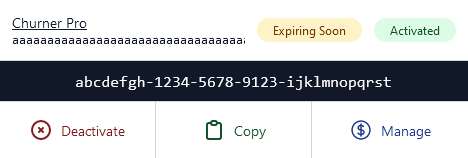
If you have canceled your subscription and there is time remaining in your subscription term or a subscription payment has failed and you are in the grace period allowing you to address payment issues, your license will display a badge indicating that the license key will be expiring soon.
If your license is no longer valid, either because you have explicitly canceled your subscription and your subscription term has ended or because a payment repeatedly failed, the license will display a banner indicating its state.

To move your license from one device to another, press the Deactivate button. This will remove the license's association with the current device and allow you to use the license on a difference device.
To manage your subscription, including canceling it if you desire, press the Manage button.
Installation
Installation steps vary by platform. In each case, you must first download the latest release for your platform before continuing. Your platform will be auto-detected when you visit the download server.
macOS
After downloading the application, open both your Downloads and Applications folders. You must move the download to the Applications folder in order to ensure that notifications and updates work appropriately.
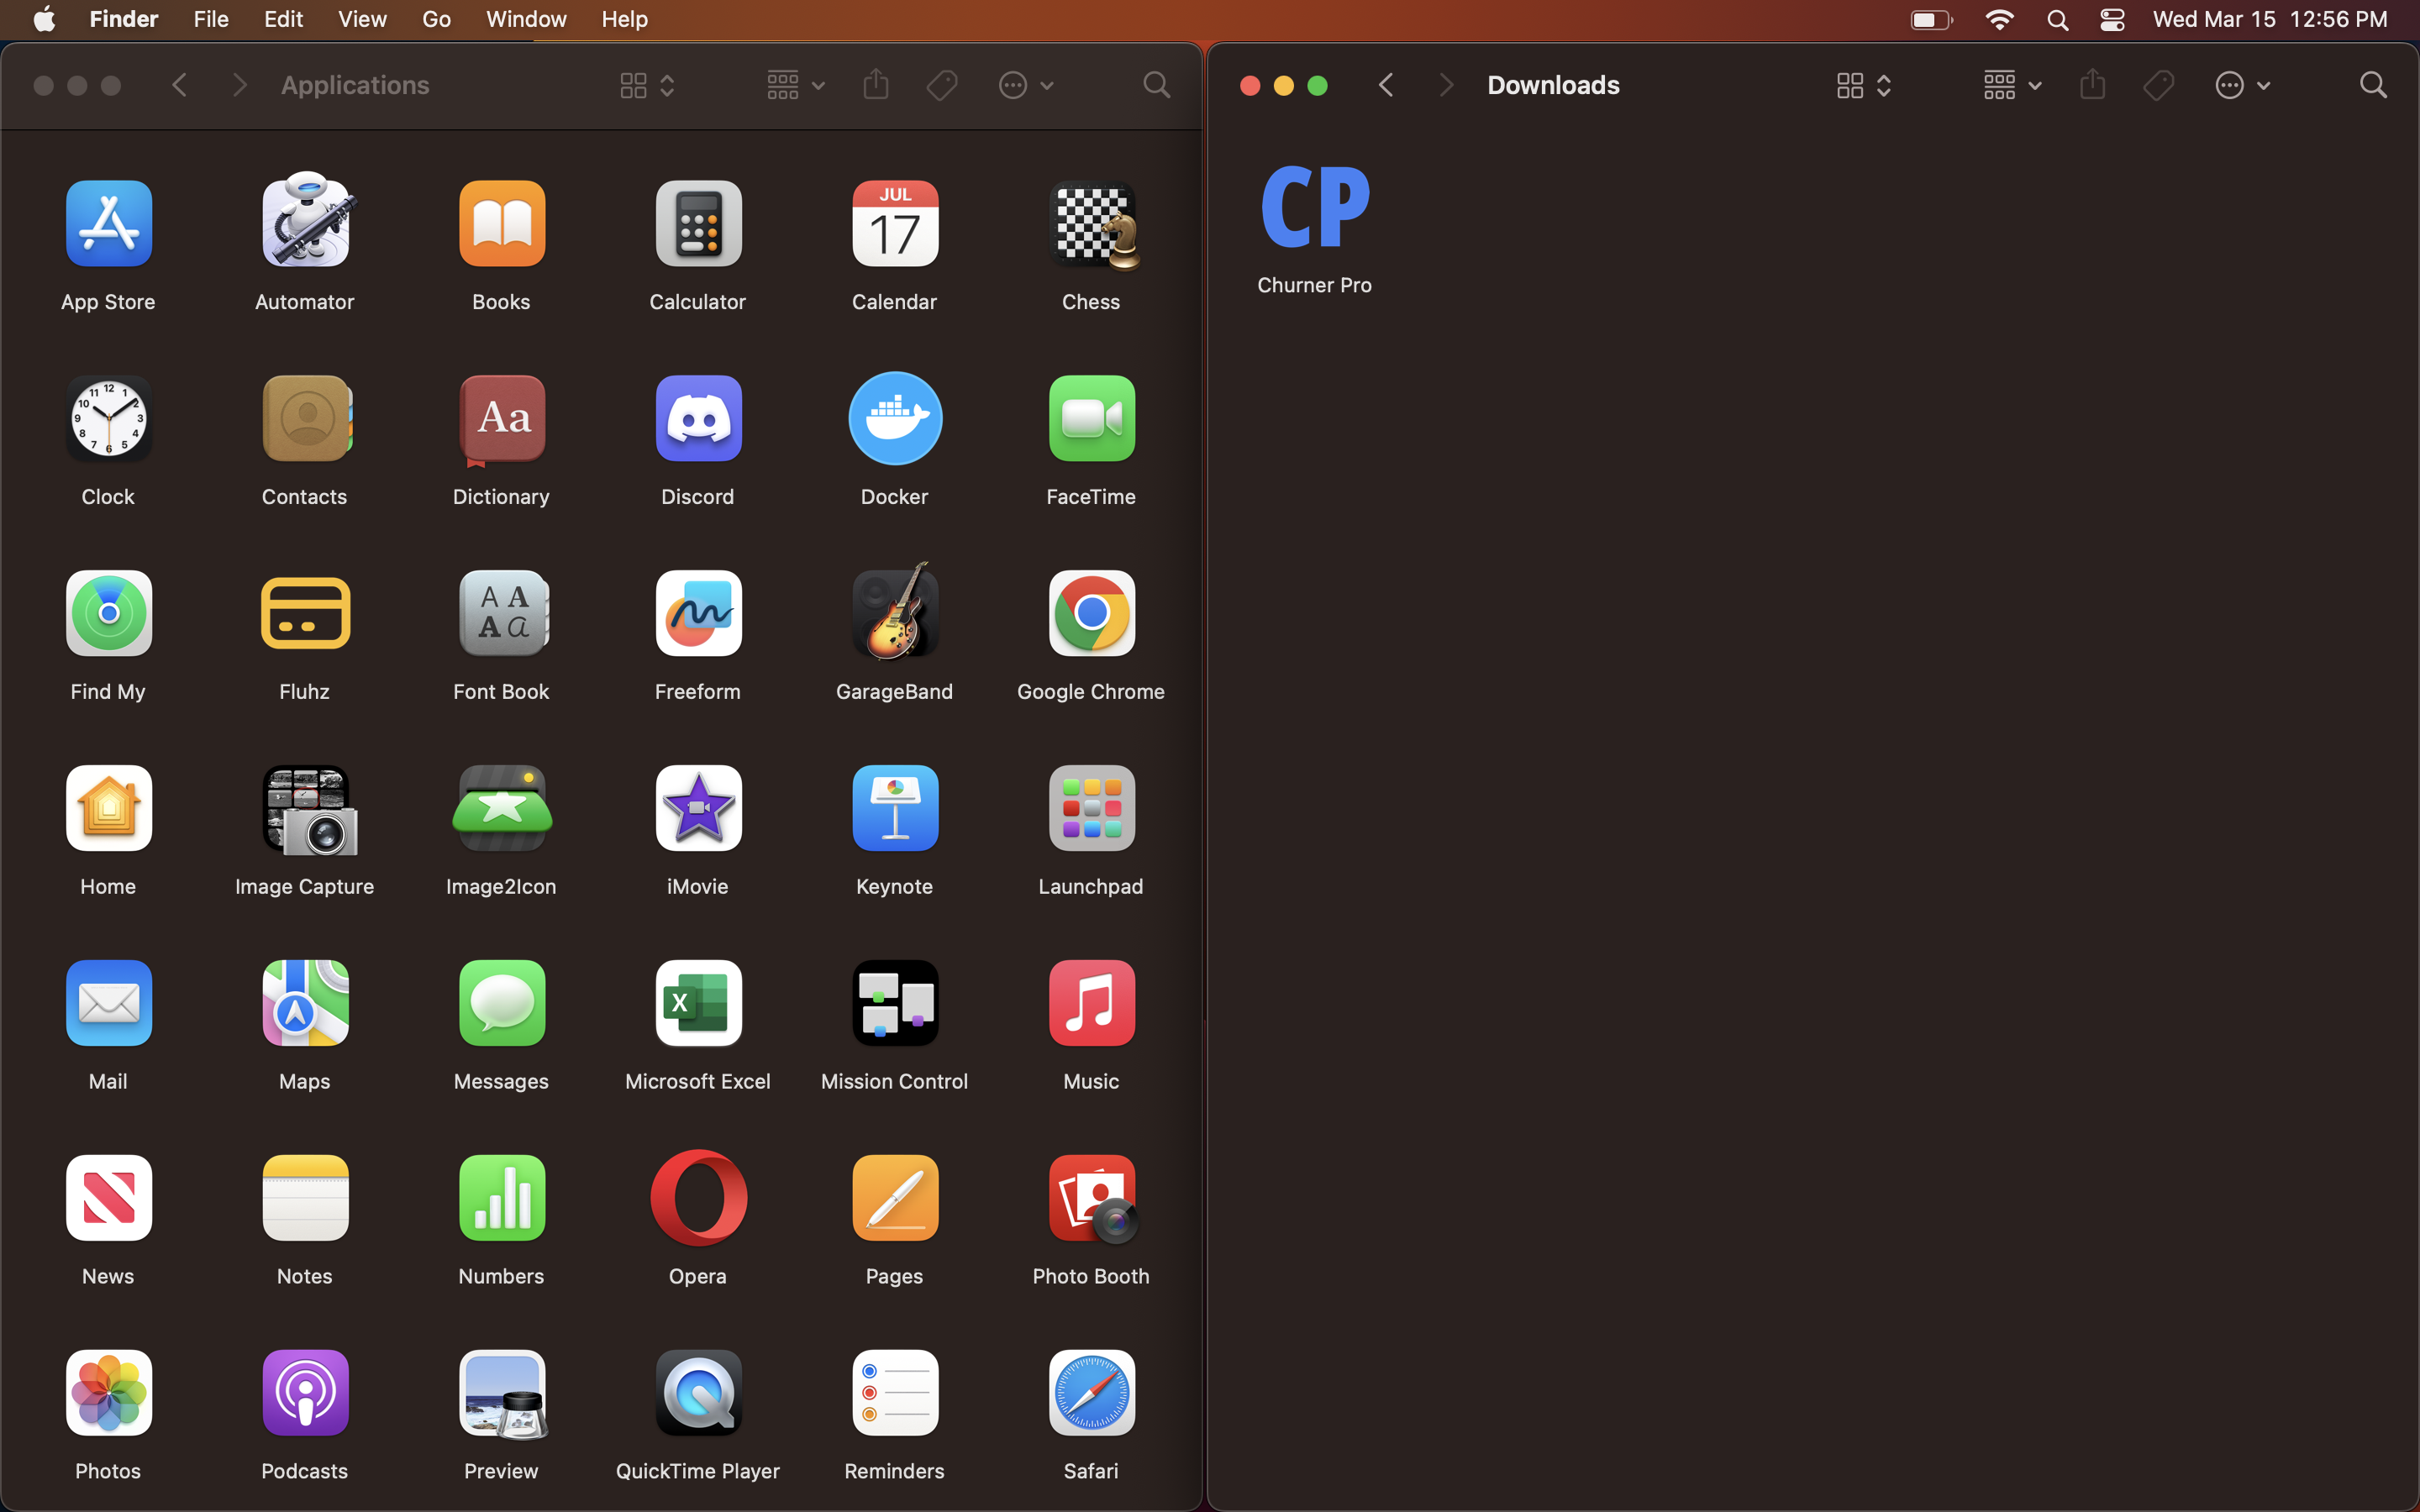
Once both folders are open, drag the application from Downloads to Applications as shown:
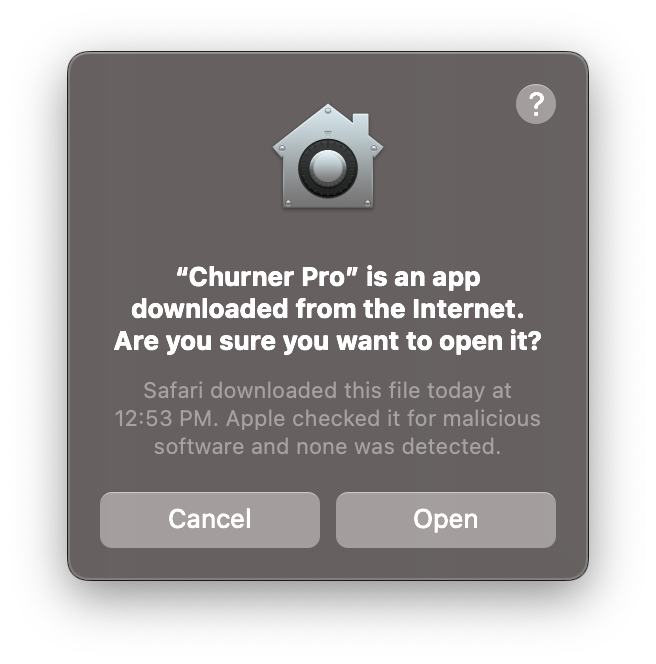
Once you have copied the application, double click on the icon to open it. You'll be prompted to confirm you wish to run the application. Click Open.
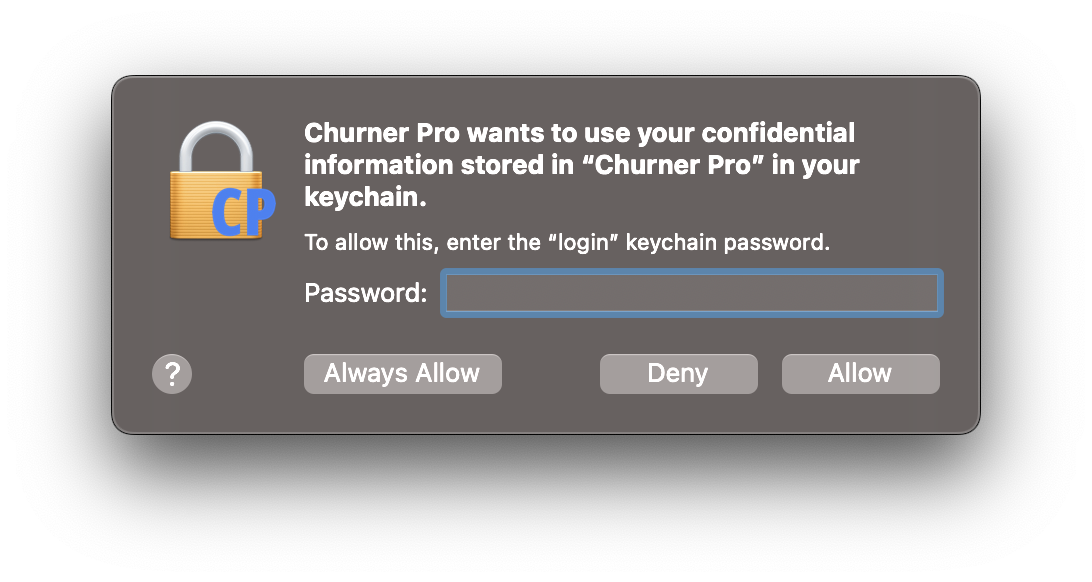
It will take some time for the application to launch the first time. You may be prompted to allow access to your keychain as Churner Pro uses this to store an encryption key for local data. If you are prompted to do so, enter your password and click Always Allow.
You'll also be prompted to allow notifications from Churner Pro the first time the application launches. Please do so to be notified of available updates and other important information.

Windows
After downloading the application, open the file to start installation. The application will launch immediately after installation.
License Verification
The first time you launch the application, you will be prompted to enter your license for verification purposes. You can retrieve your license key from one of two places:
- The email you received after purchasing your license
- Your licensing dashboard
After opening Churner Pro, enter the email you used when purchasing your license into the Email field. Then, copy your license into the License Key field.
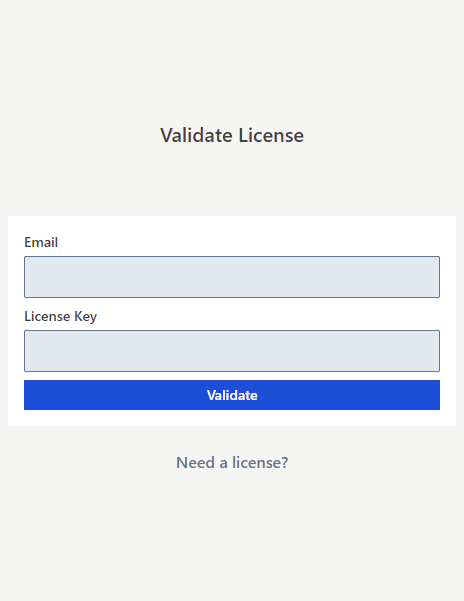
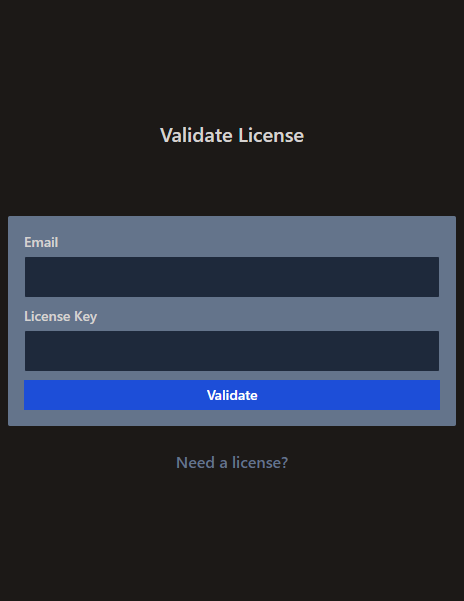
If your system settings specify that you wish to use dark mode, you'll see a dark interface instead. This will persist throughout the rest of the Churner Pro interface unless you change the theme setting after validation. From here on out, all screenshots will showcase dark mode.
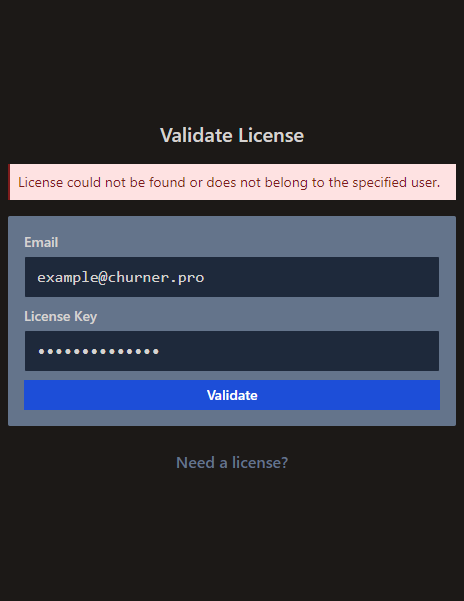
If you enter incorrect information, you'll receive an error like the following:
After entering a valid Email and License Key, the application will load.
Fluz
Churner Pro can be used to operate across multiple Fluz accounts. Before proceeding, you must sign up for a Fluz account in their mobile app. Once you have an account configured with Fluz, please proceed.
Accounts
If you have not added an account, you should do that first.
Dashboard
Your accounts dashboard displays information about all authenticated accounts, including the bank cards that you have registered to each account and their associated nickname and preferred category. When you first visit your accounts dashboard, you should collapse all of your accounts by clicking the Double Chevron. After you do so, you'll see something like this:
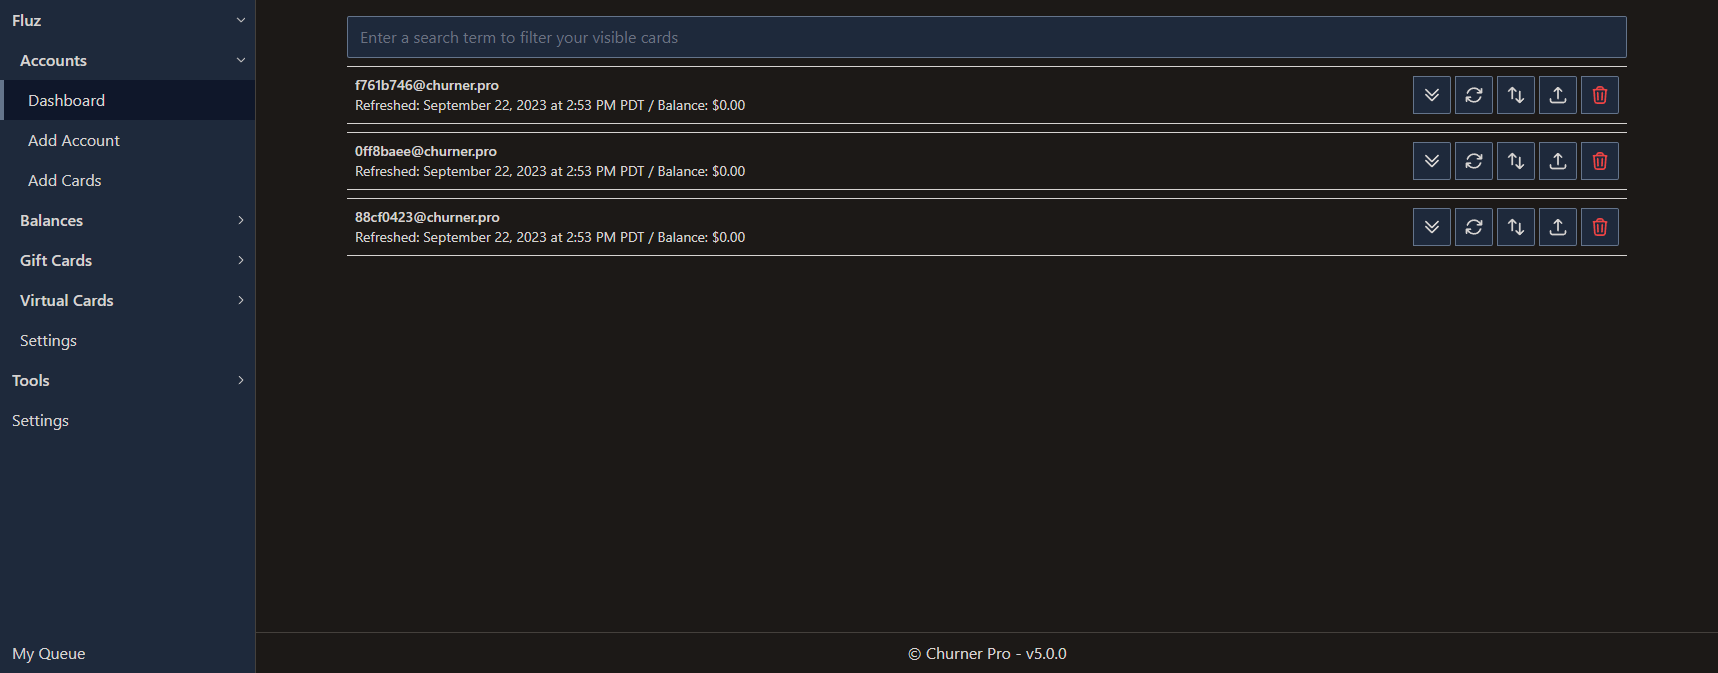
Each of the icons on your accounts dashboard corresponding to a particular action. From left to right, they are:
- Toggle display of associated cards
- Refresh account
- Drag to sort
- Save all card nicknames and categories for this account
- Delete account
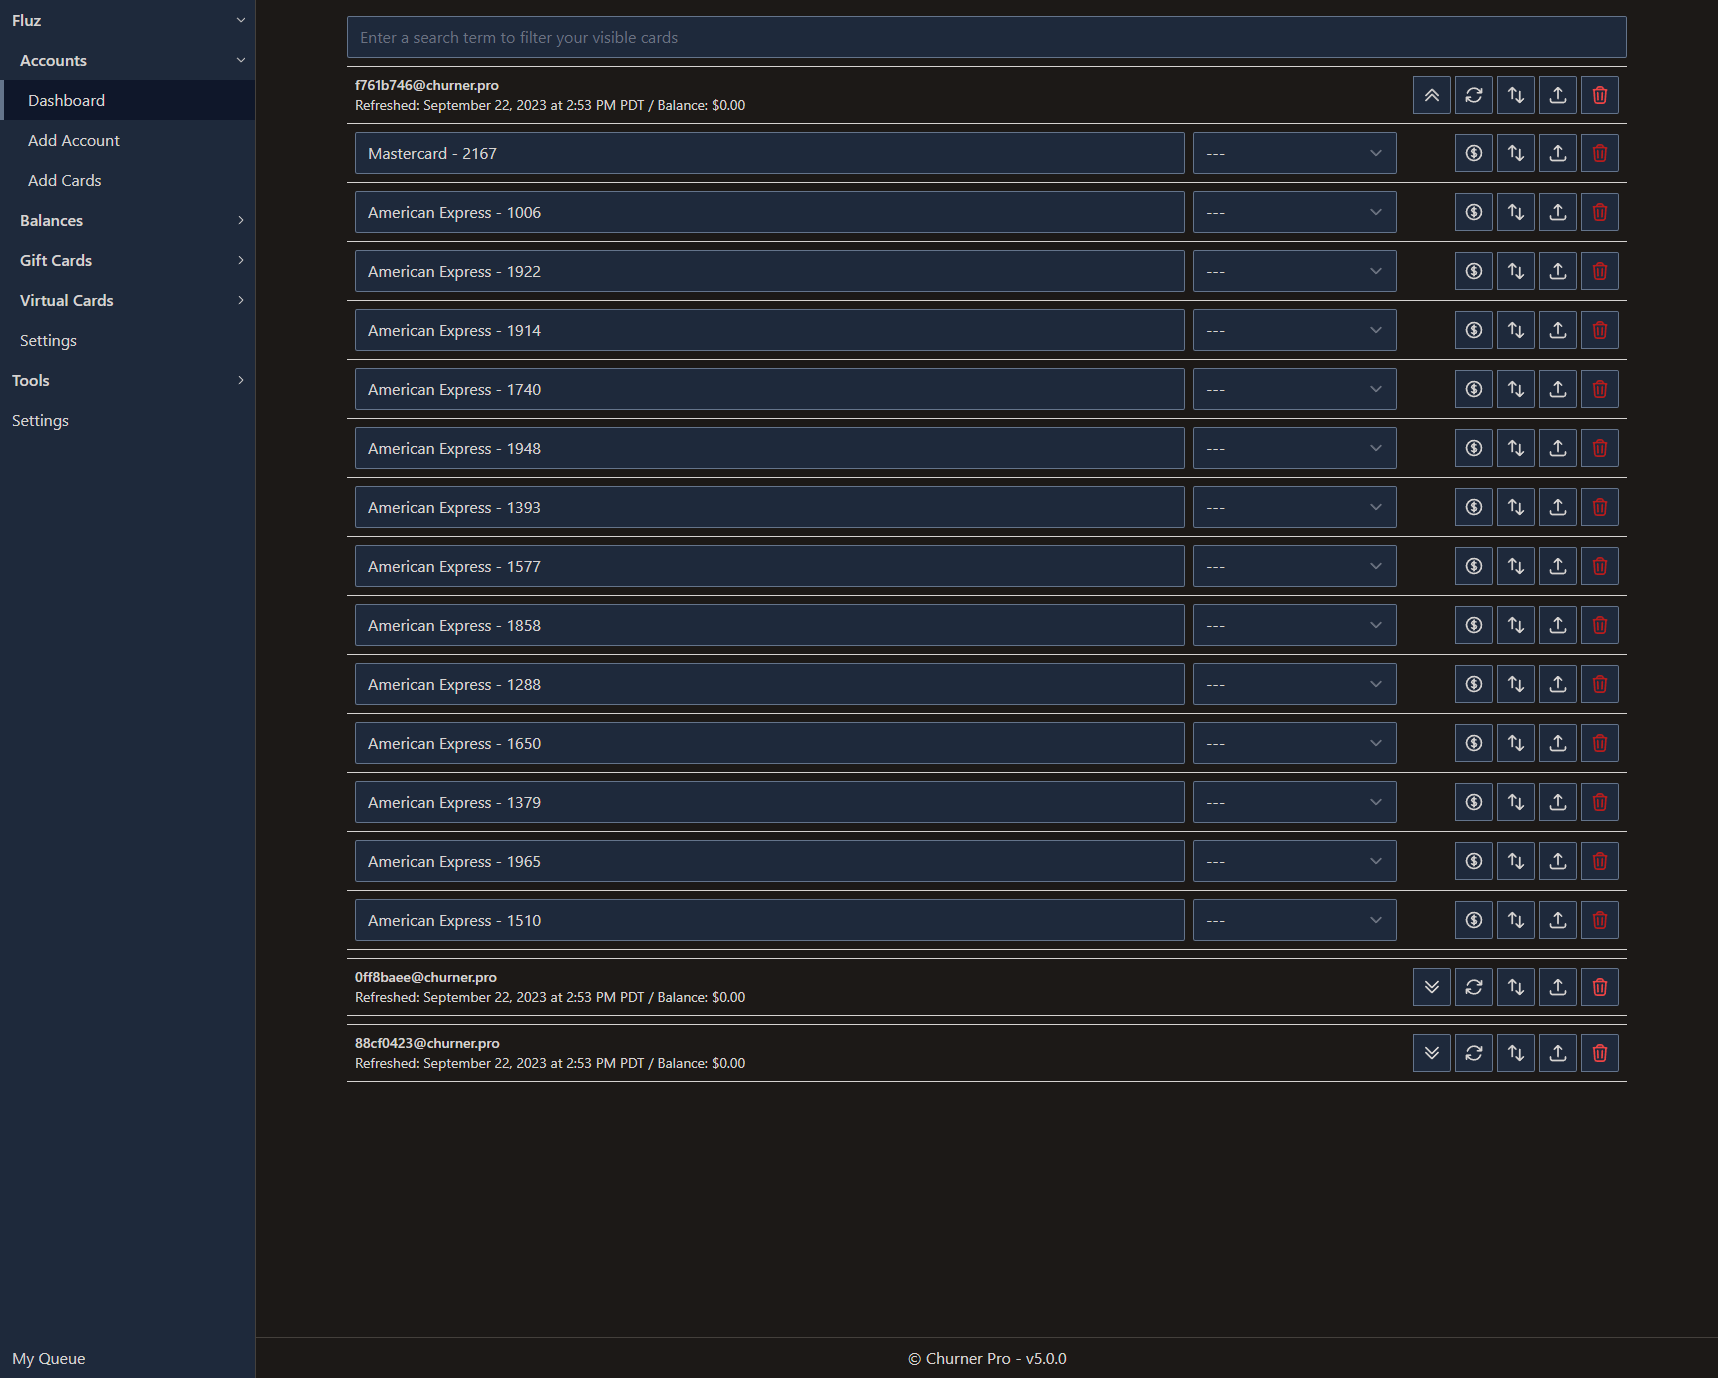
If you click the Double Chevron button to expand your accounts, you'll see all of your card data. Here, you can set your card nickname and preferrered category with ease. The icons you'll see in each card row are:
- Start a deposit with the card
- Drag to sort
- Save card nickname and category
- Delete card
Add Account
To start using Churner Pro's Fluz integration, you'll need to authenticate and store your accounts. If you have not authenticated any accounts, you will be presented with the interface to do so. After you have authenticated your first account, you can authenticate additional accounts by navigating to Fluz > Accounts > Add Account.
The account authentication interface will guide you through entering the information needed for Churner Pro to work with Fluz, including storing your email, password, and purchase code in encrypted storage on your local disk. To start, enter your email and password into the corresponding fields and click Authenticate.
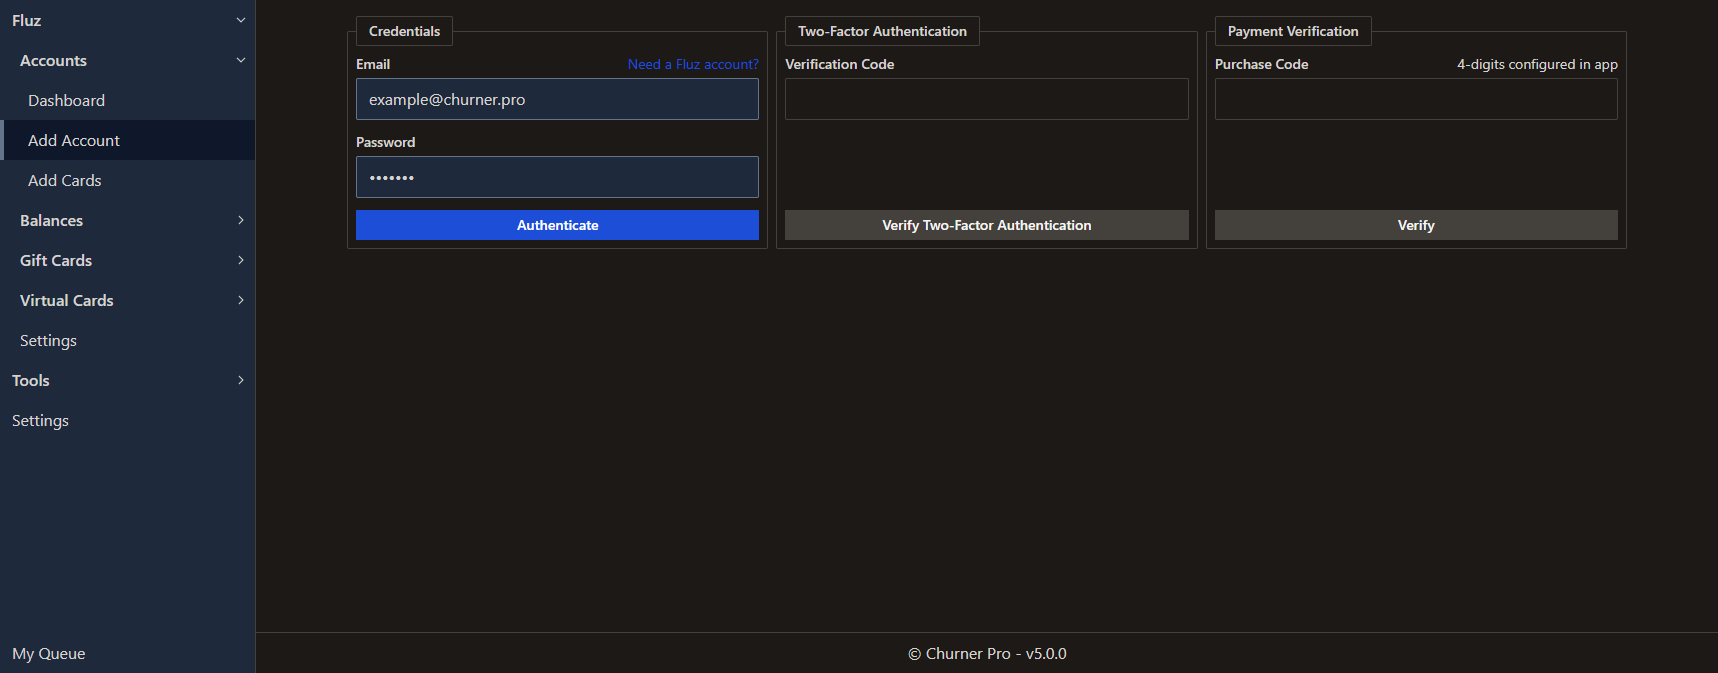
The first time you add an account to Churner Pro, you must perform Two-Factor Authentication using your registered phone number. Enter the code you receive from Fluz into the corresponding field and click Verify Two-Factor Authentication.
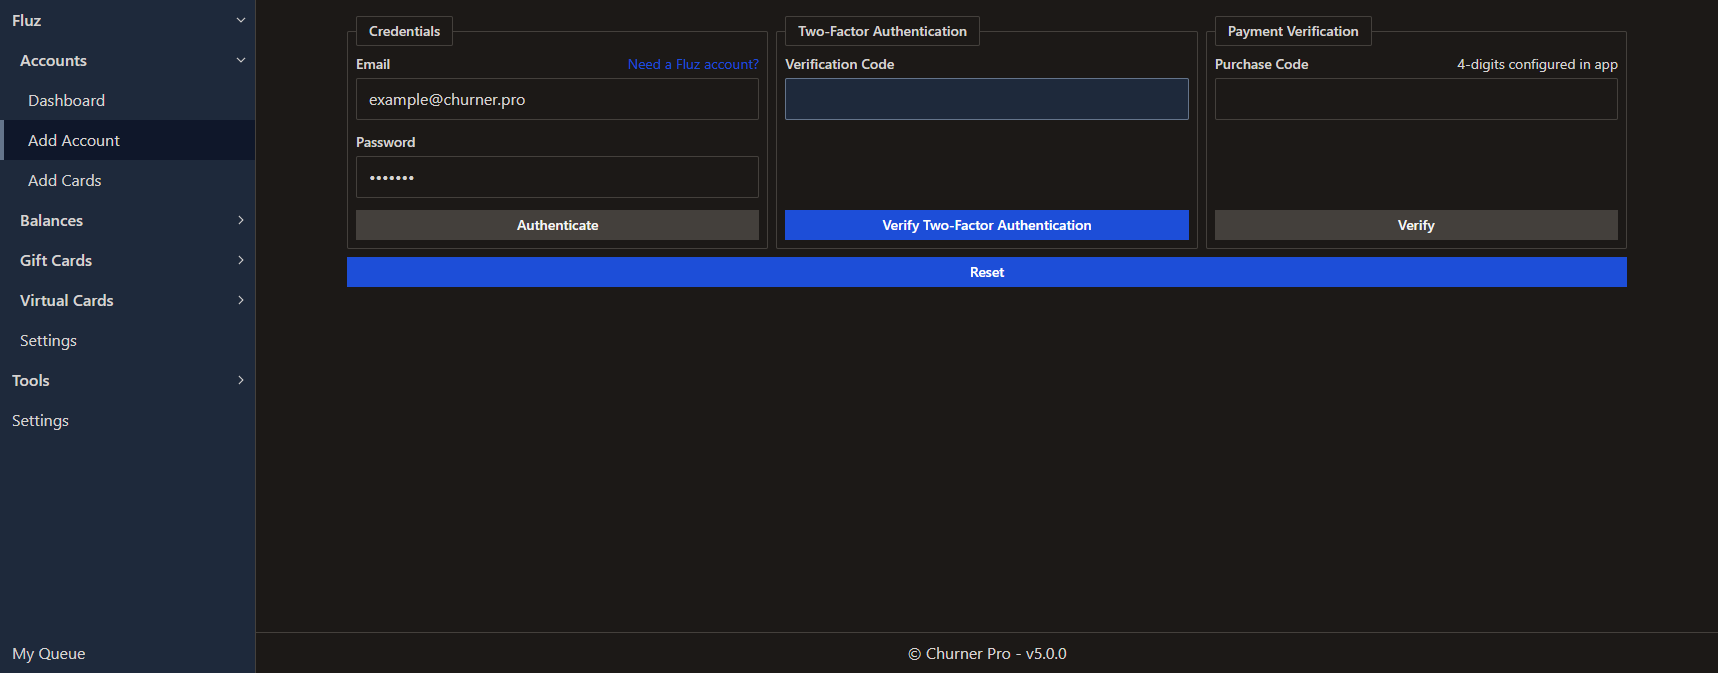
Finally, enter your purchase code in the final field before clicking Verify. Your purchase code is your 4-digit pin that you use to verify actions in the Fluz mobile app and Power Portal.
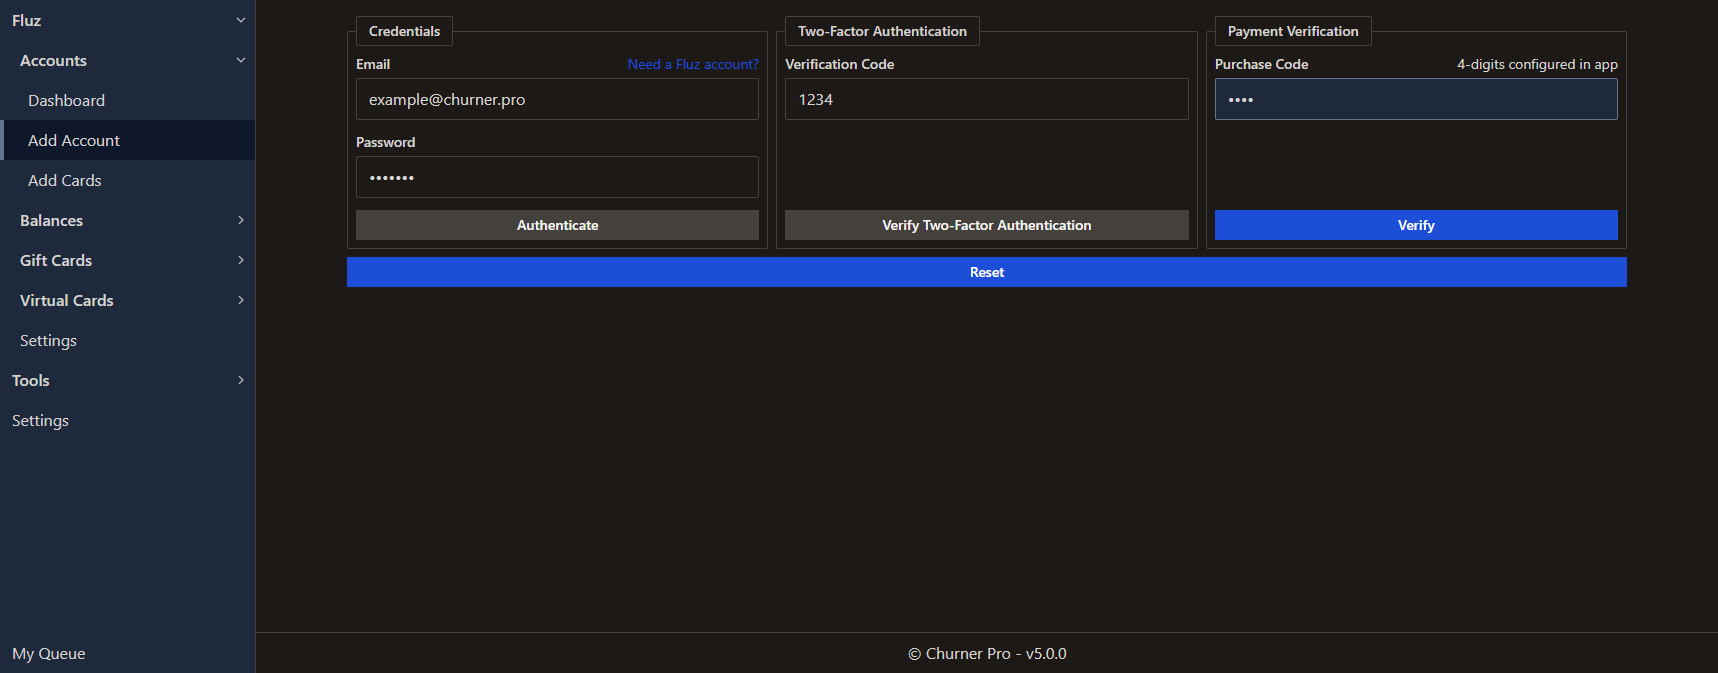
If you enter incorrect information at any point, you'll see an error message like the following:
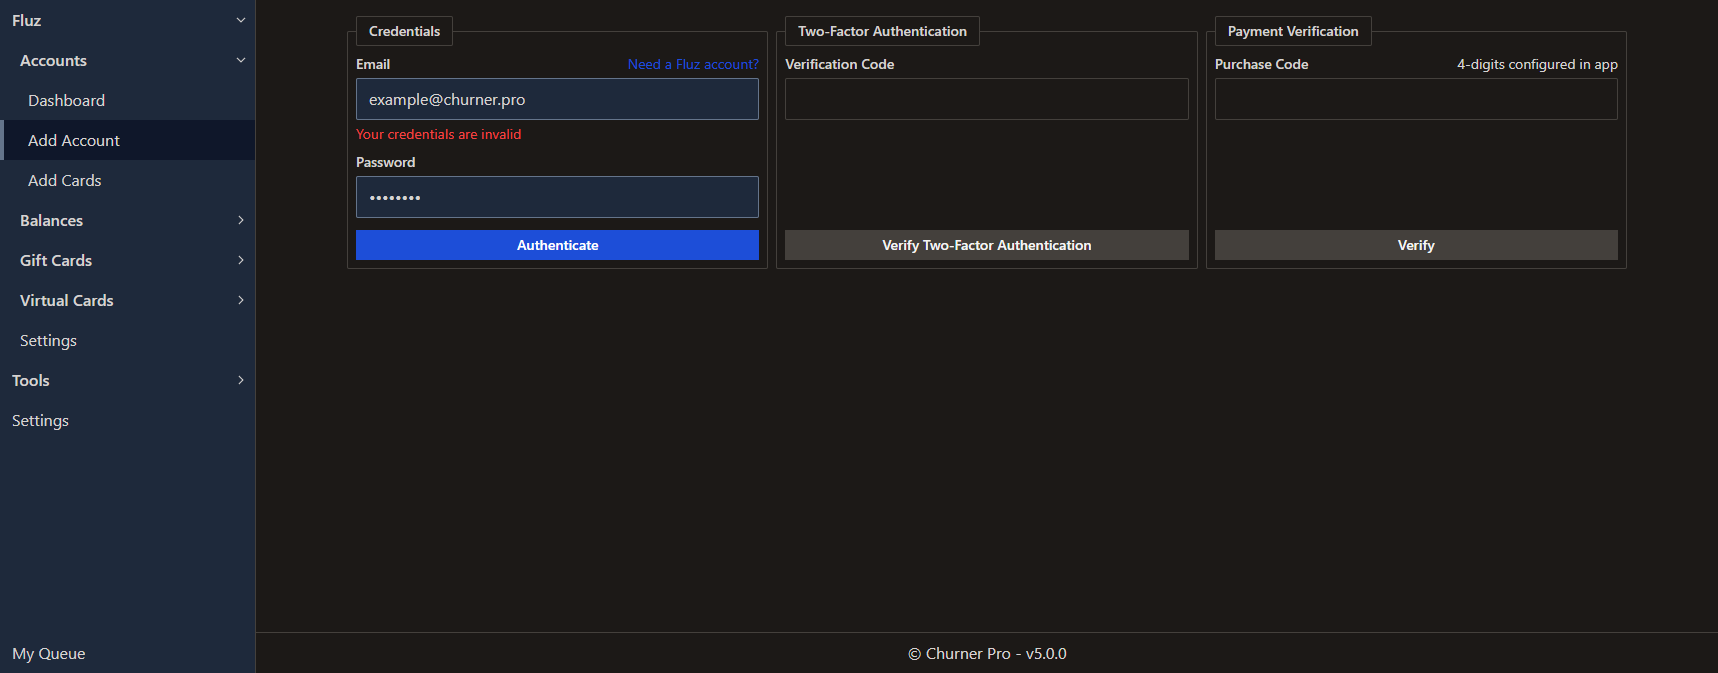
Assuming all of your information was entered correctly, your account details will refresh and you'll be redirected to the Fluz > Accounts > Dashboard page. Your registered credit cards will be displayed along with information about your account.
Add Cards
You can add an arbitrary number of credit cards to your authenticated accounts at any time. You can choose to add each card you configure to a single account or multiple accounts. To start, navigate to Fluz > Accounts > Add Cards.
On this page, you'll see all of your authenticated accounts and all of their associated addresses. If you don't see any addresses for an account, please be sure to configure one through the Fluz mobile app or Power Portal.
In addition, you'll see controls that allow you to easily templatize the cards that you're adding during this session and, optionally, use a card reader to easily add many cards at once. These controls are particularly helpful if you have many employee cards to add.
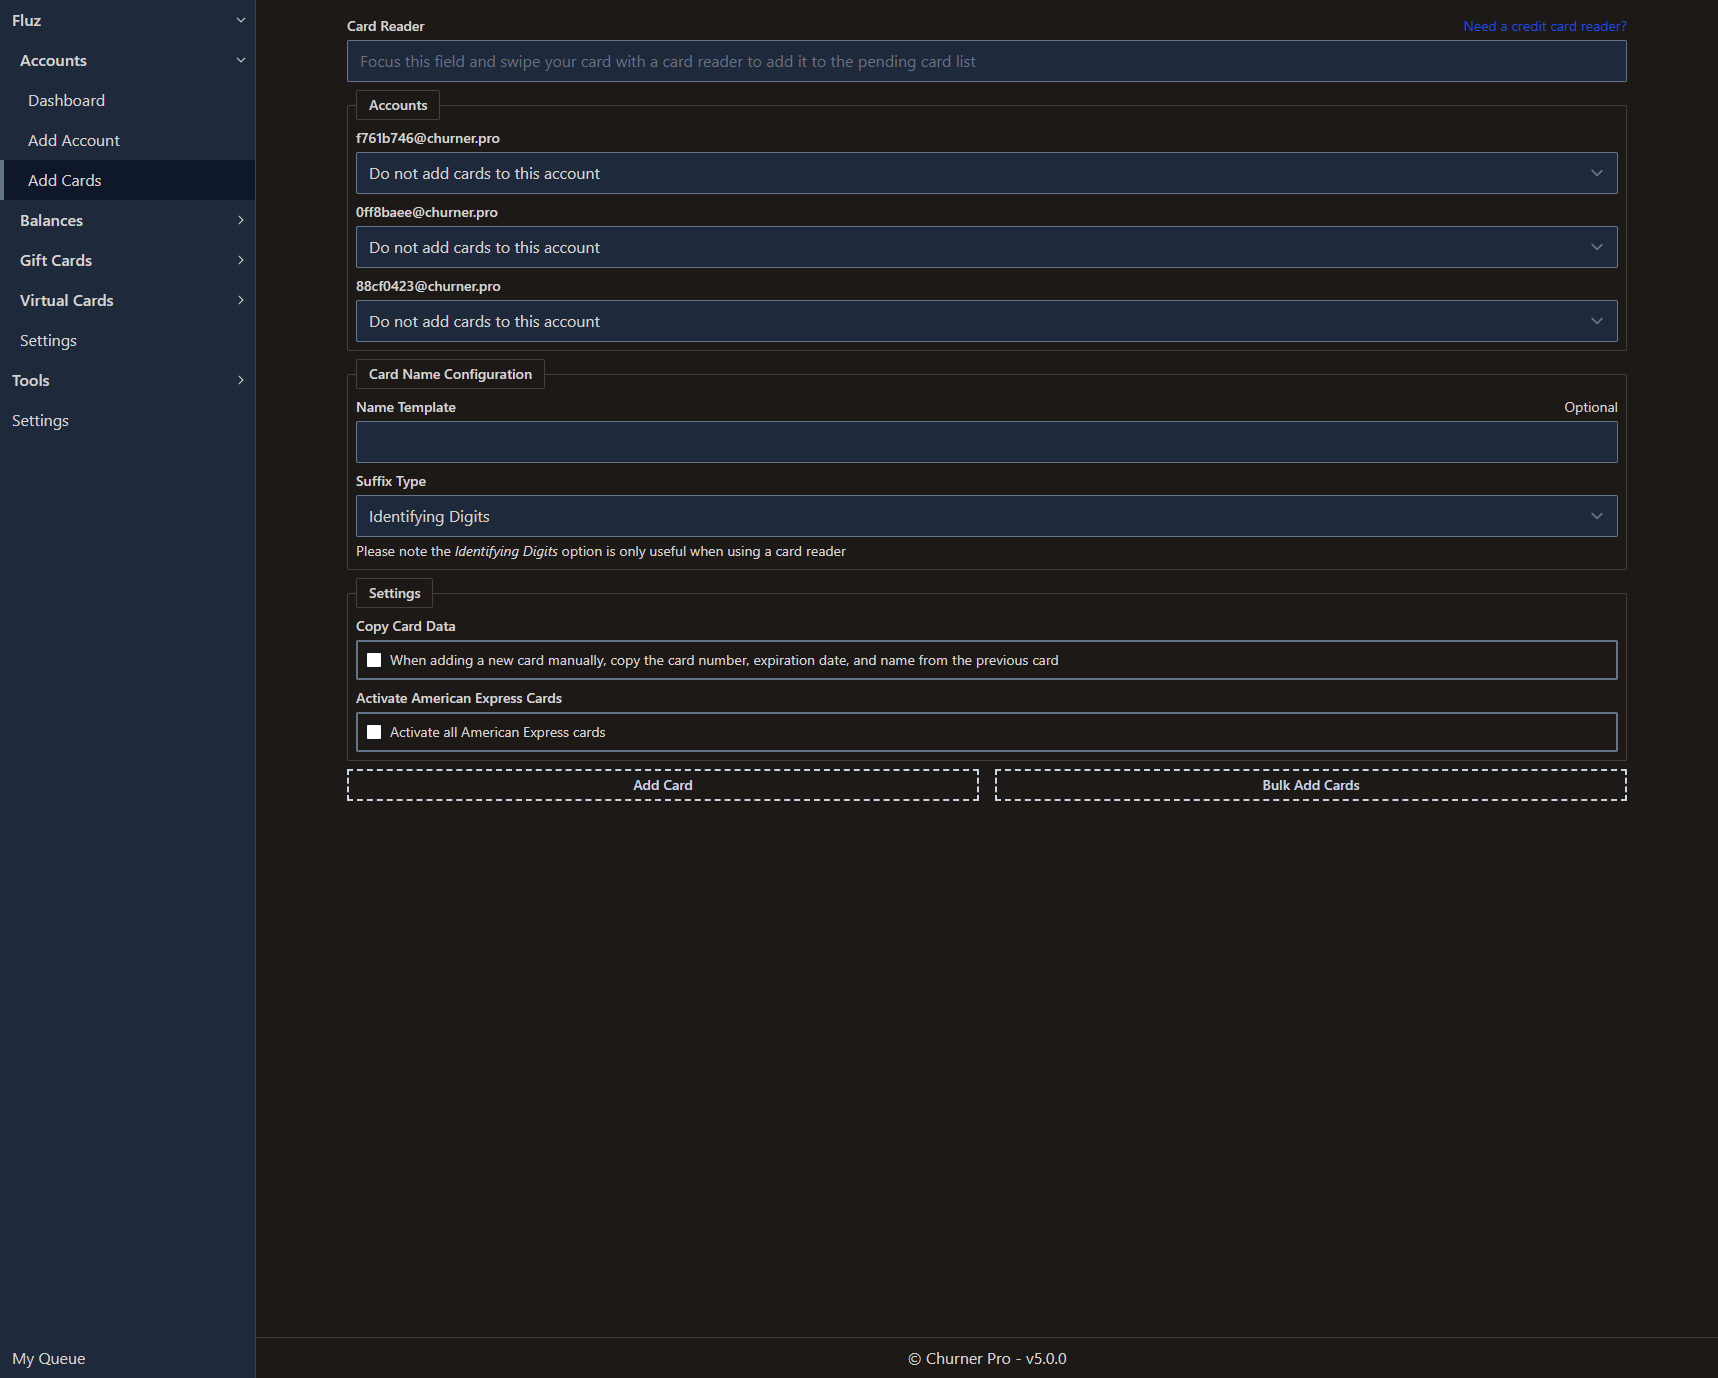
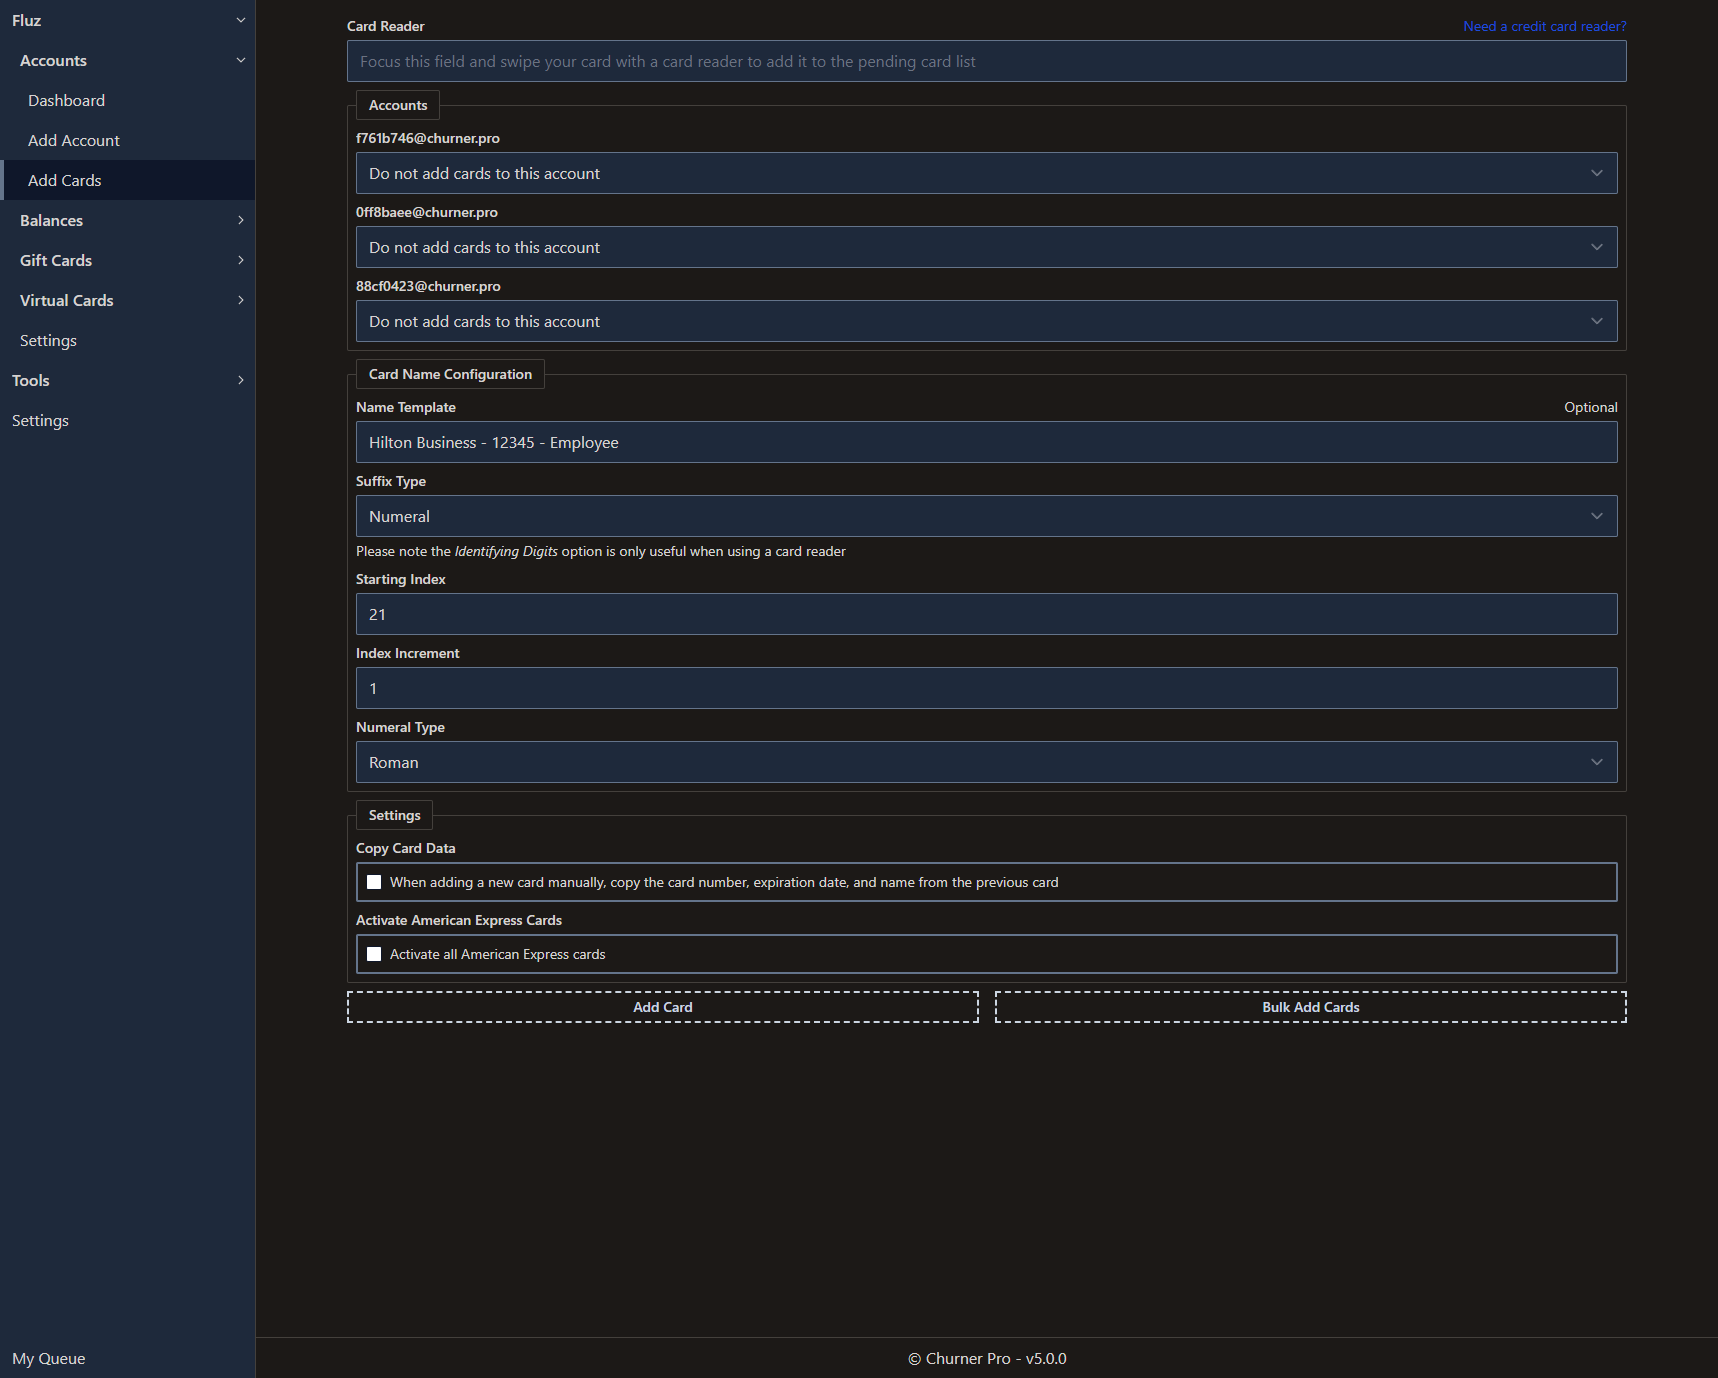
To start adding cards, select addresses for each of the authenticated accounts that you wish to add the cards to. For any account that you wish to skip, please select Do not add cards to this account.
Next, configure your name template if you wish. In the following example,
you can see that the Name Template has been set to
Hilton Business - 12345 - Employee, the Starting Index
has been set to 21, and the Suffix Type has
been set to Roman. We will see the effect of these fields
when we start adding cards.
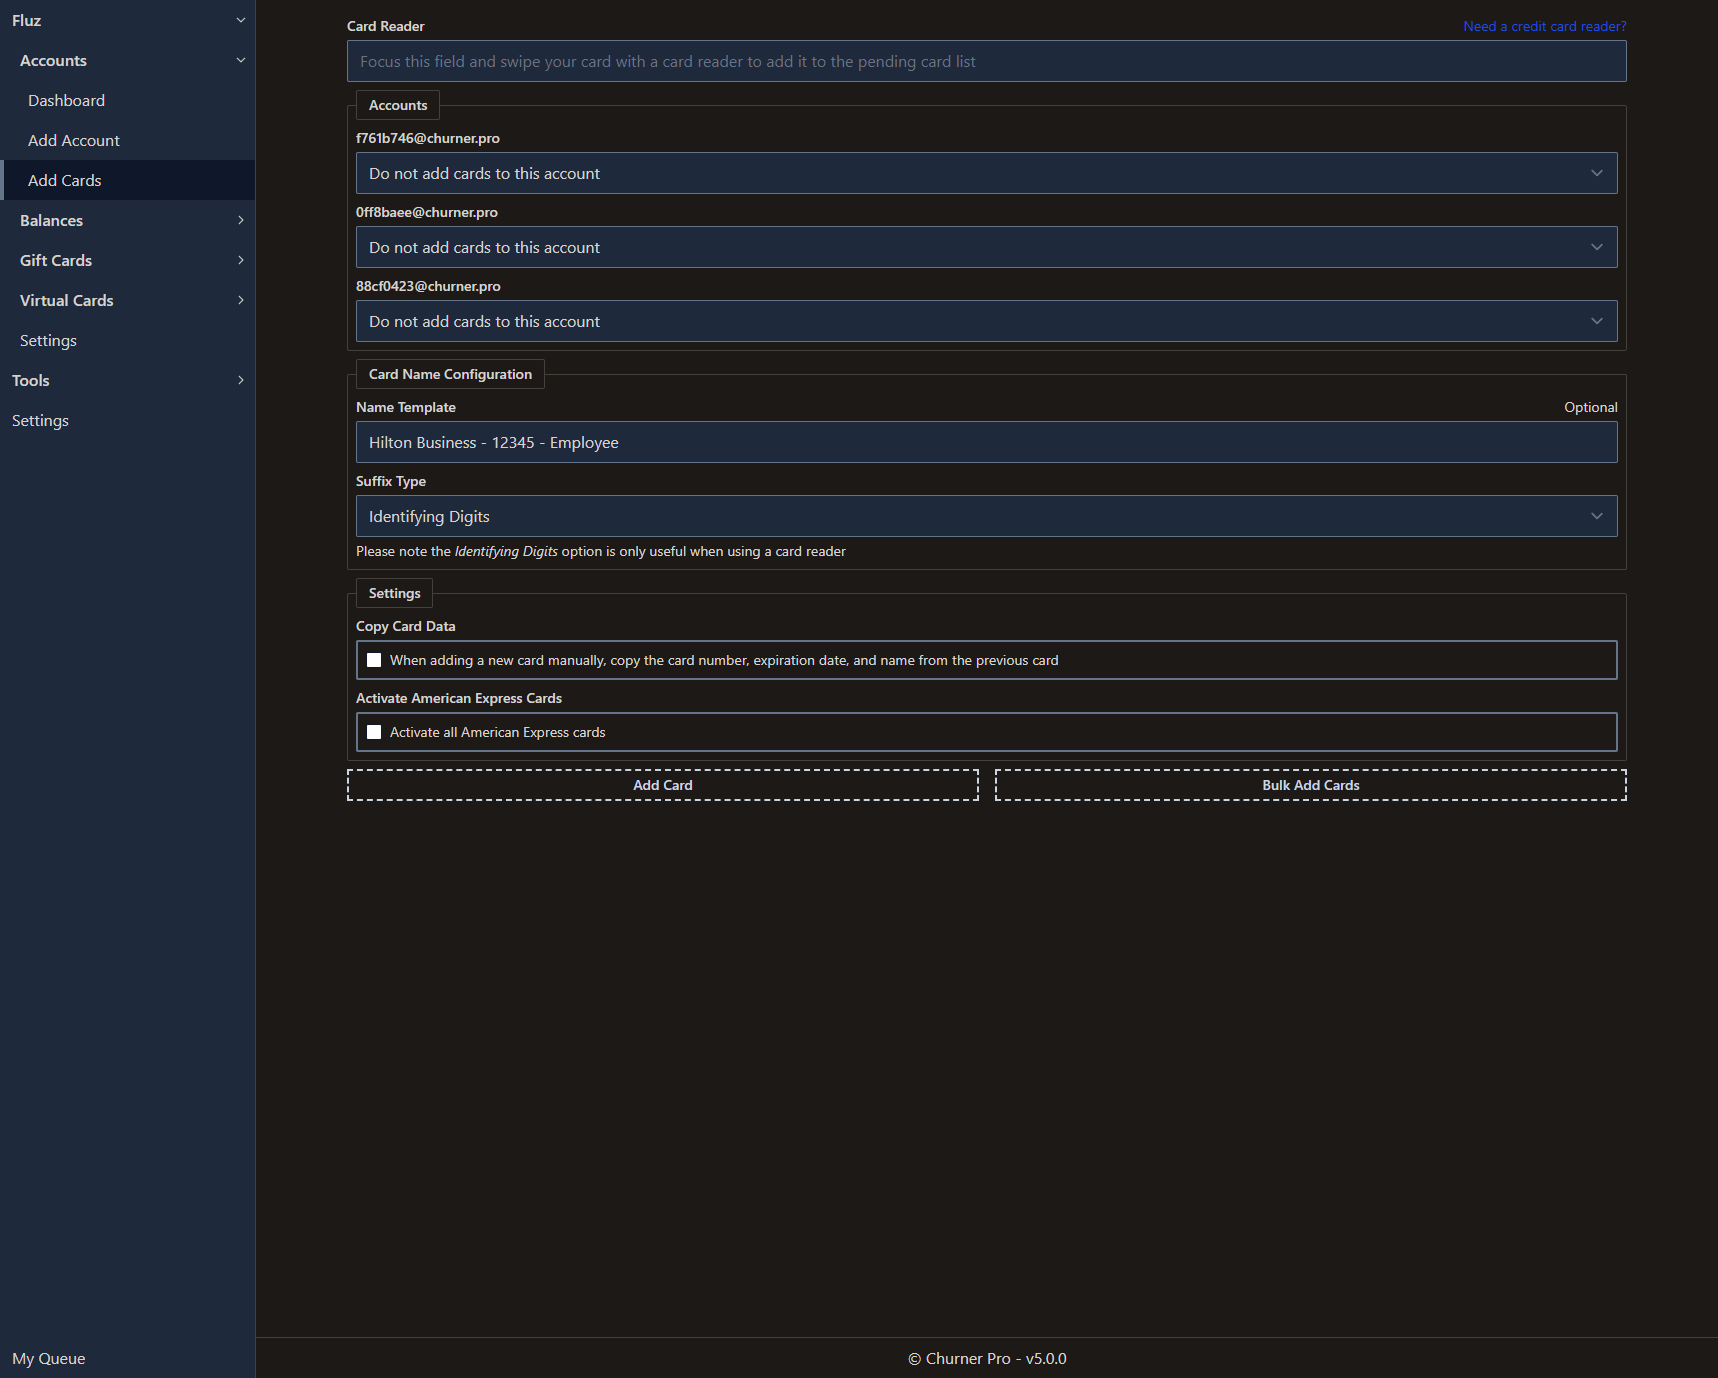
If you are adding cards using a card reader, it is suggested that you select
Identifying Digits as the Suffix Type to easily
identify each card. Please note, Identifying Digits has no effect
if you are not adding cards using a card reader.
If you are using a card reader, focus the Card Reader field and swipe your card through the reader. This will automatically add a card to the configured list. You will still need to enter the CVV for each card.
If you are not using a card reader, click the Add Card button as many times as you have cards to add. In the following screenshot, you can see that four cards have been added to the list with the index being incremented and name being appropropriately assigned for each one.
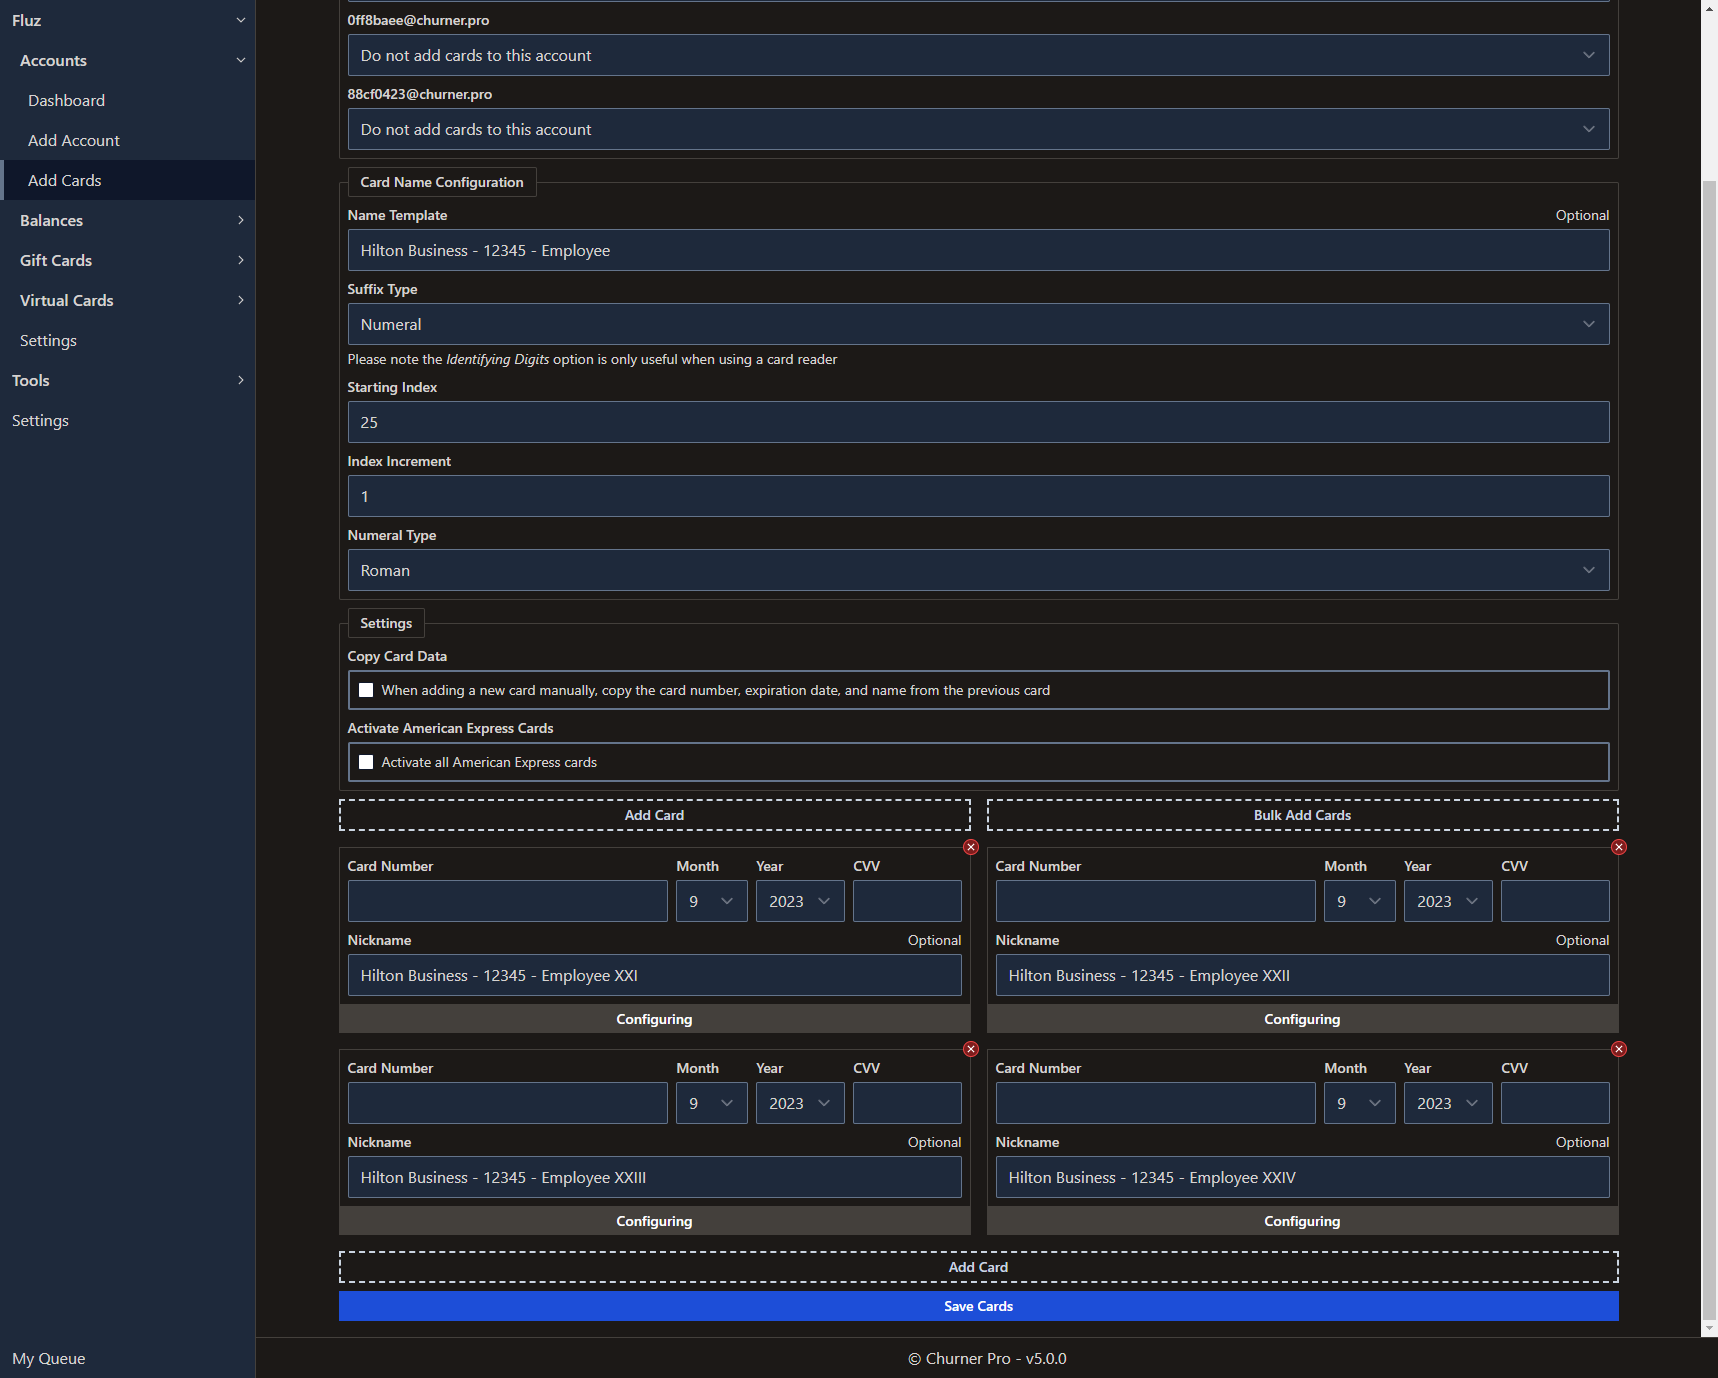
Fill out the details for each card and then press Save Cards. If you make a mistake, Churner Pro will attempt to catch it before trying to save cards to your Fluz account. There are several possible error states, many of which are demonstrated in the following:
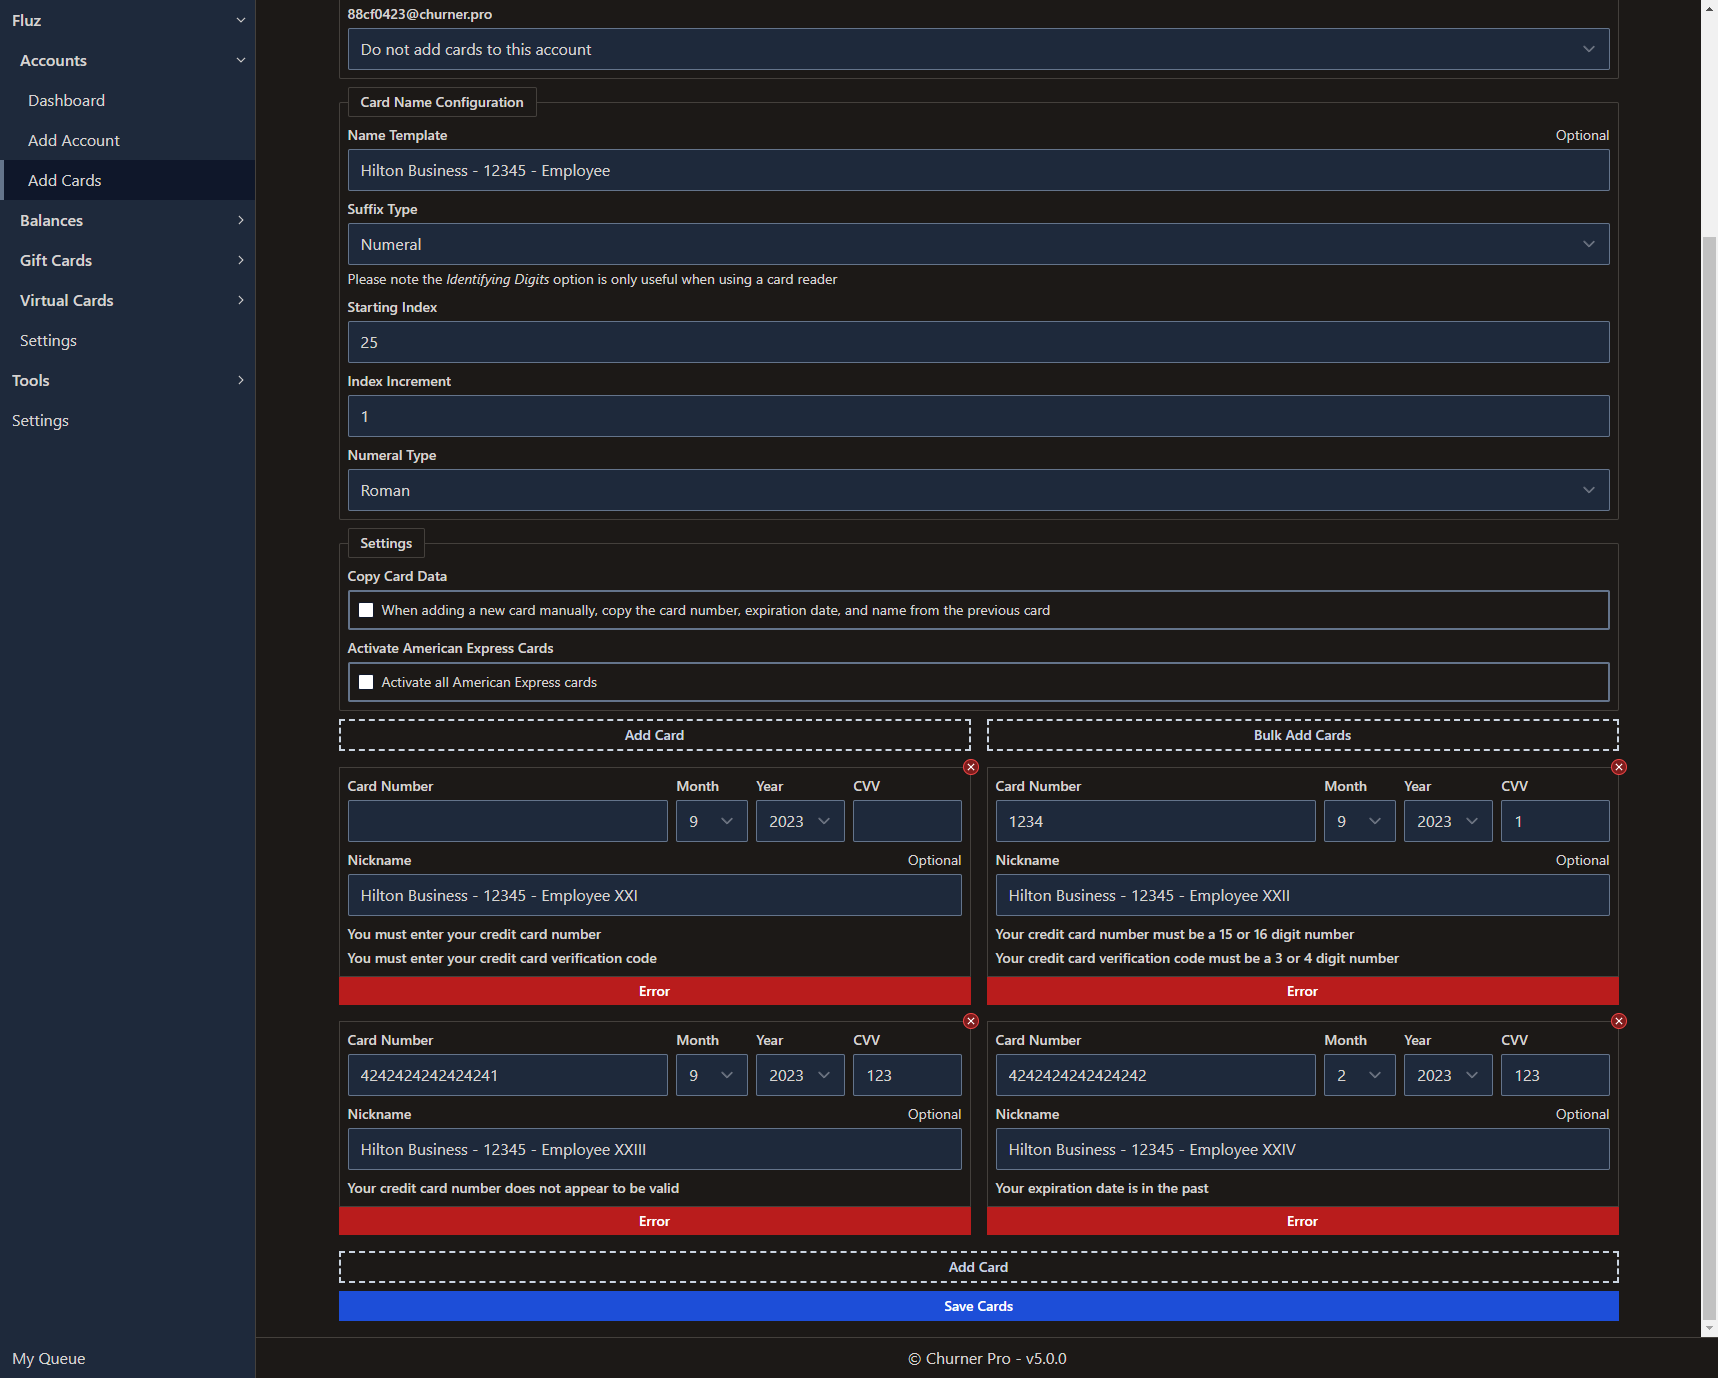
If no errors are detected, each card will be added to the selected Fluz accounts. A configuration can be in one of the following states:
- Configuring
- Pending
- Processing
- Error
- Complete
The current state is shown in a status bar at the bottom of the card configuration. If an error is encountered, Churner Pro attempts to continue with the next card until all configurations are saved. You can see the processing demonstrated in this video:
As you can see, you can view your currently queued items for processing by visiting My Queue, clicking the link at the bottom of the Sidebar. This applies to card additions as well as deposits and card activations, as will be covered later in this guide.
It is strongly recommended that you name each card so that you can choose the correct one when performing various actions.
If you are adding American Express cards and have configured your automation
settings, you can specify the card member's date of birth and Social Security number and
Churner Pro will attempt to activate the cards for you before adding them to Fluz. Being by checking
the box labeled Activate all American Express cards.
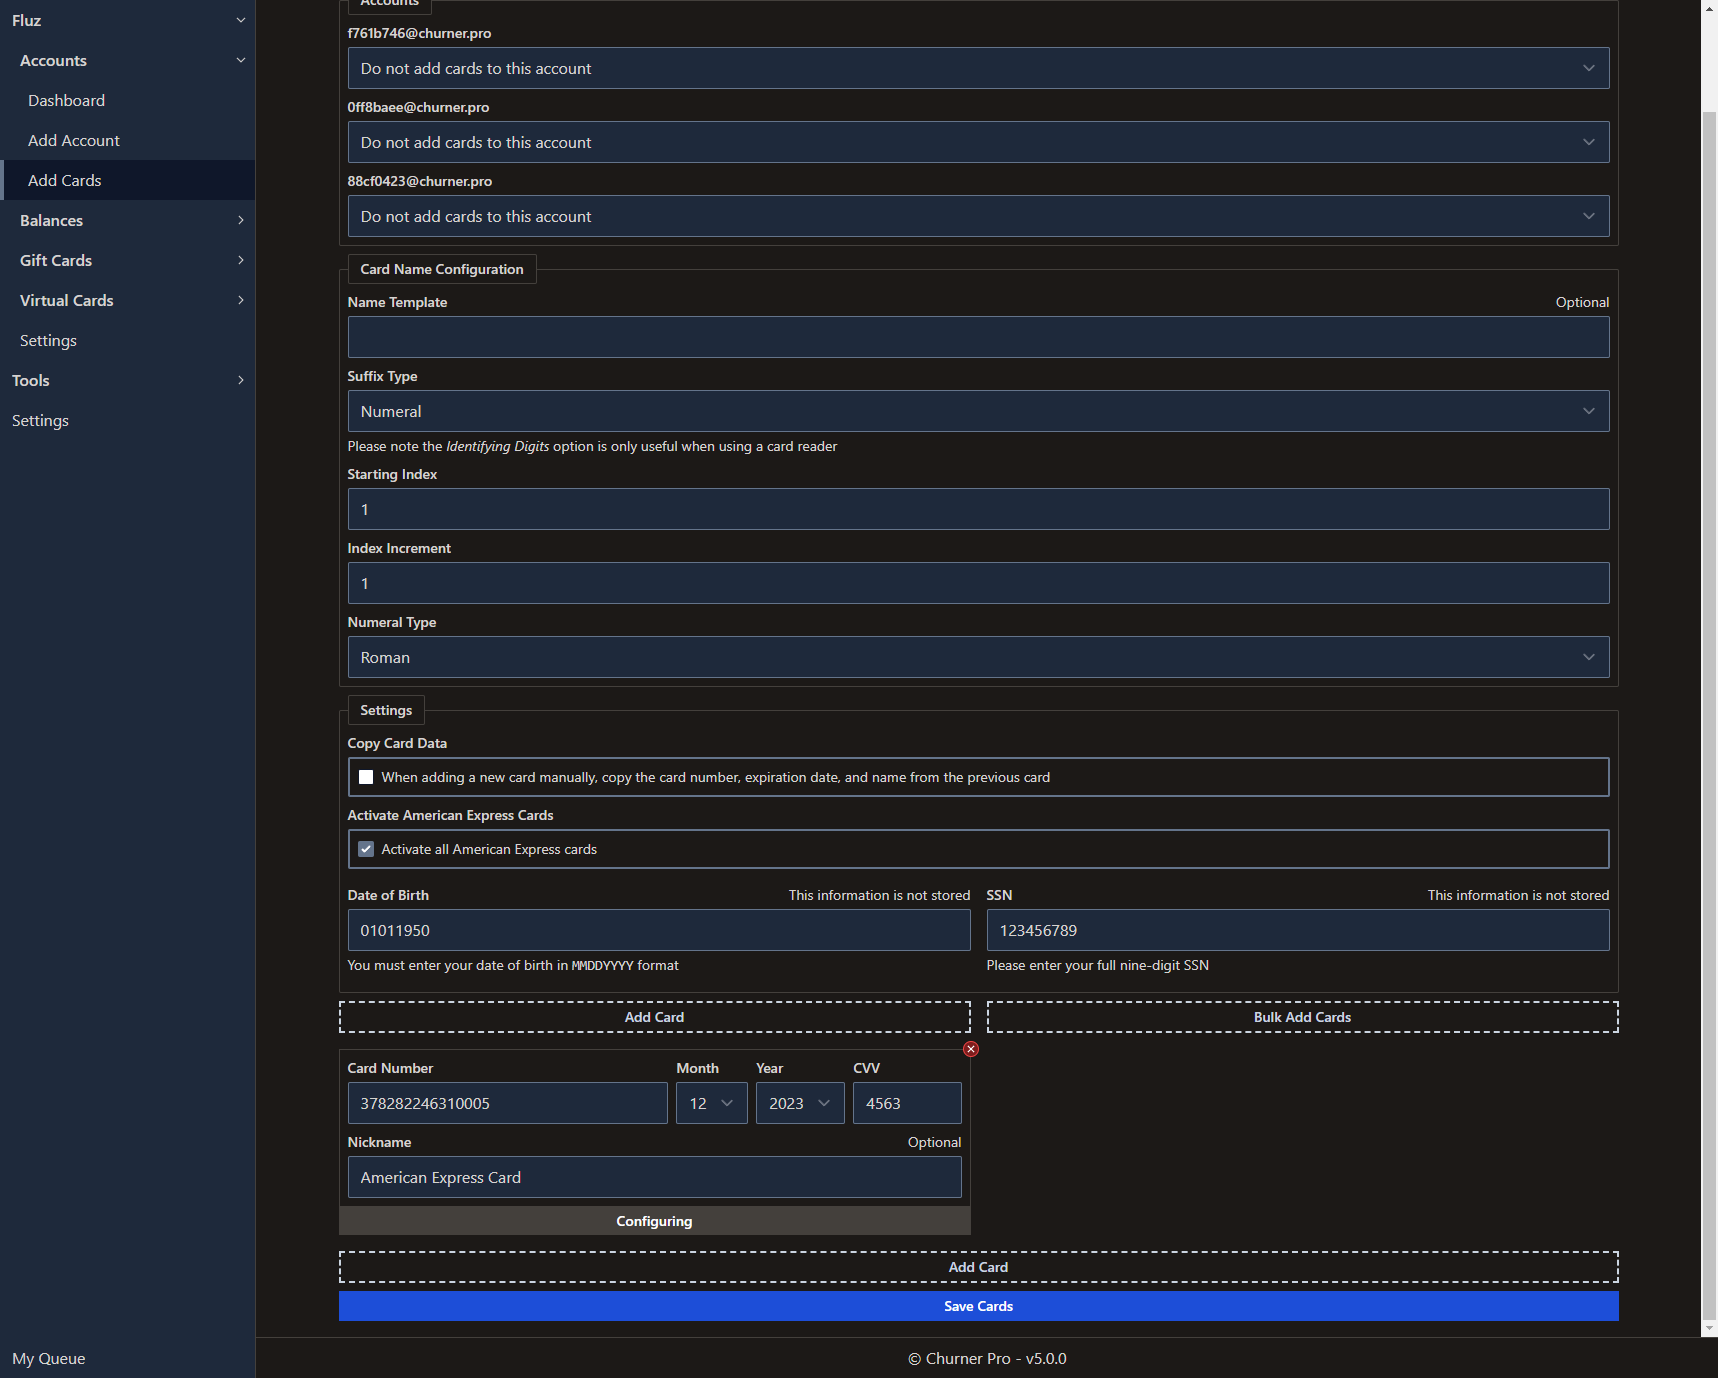
Assuming the card is successfully activated, you'll see a message like the following:
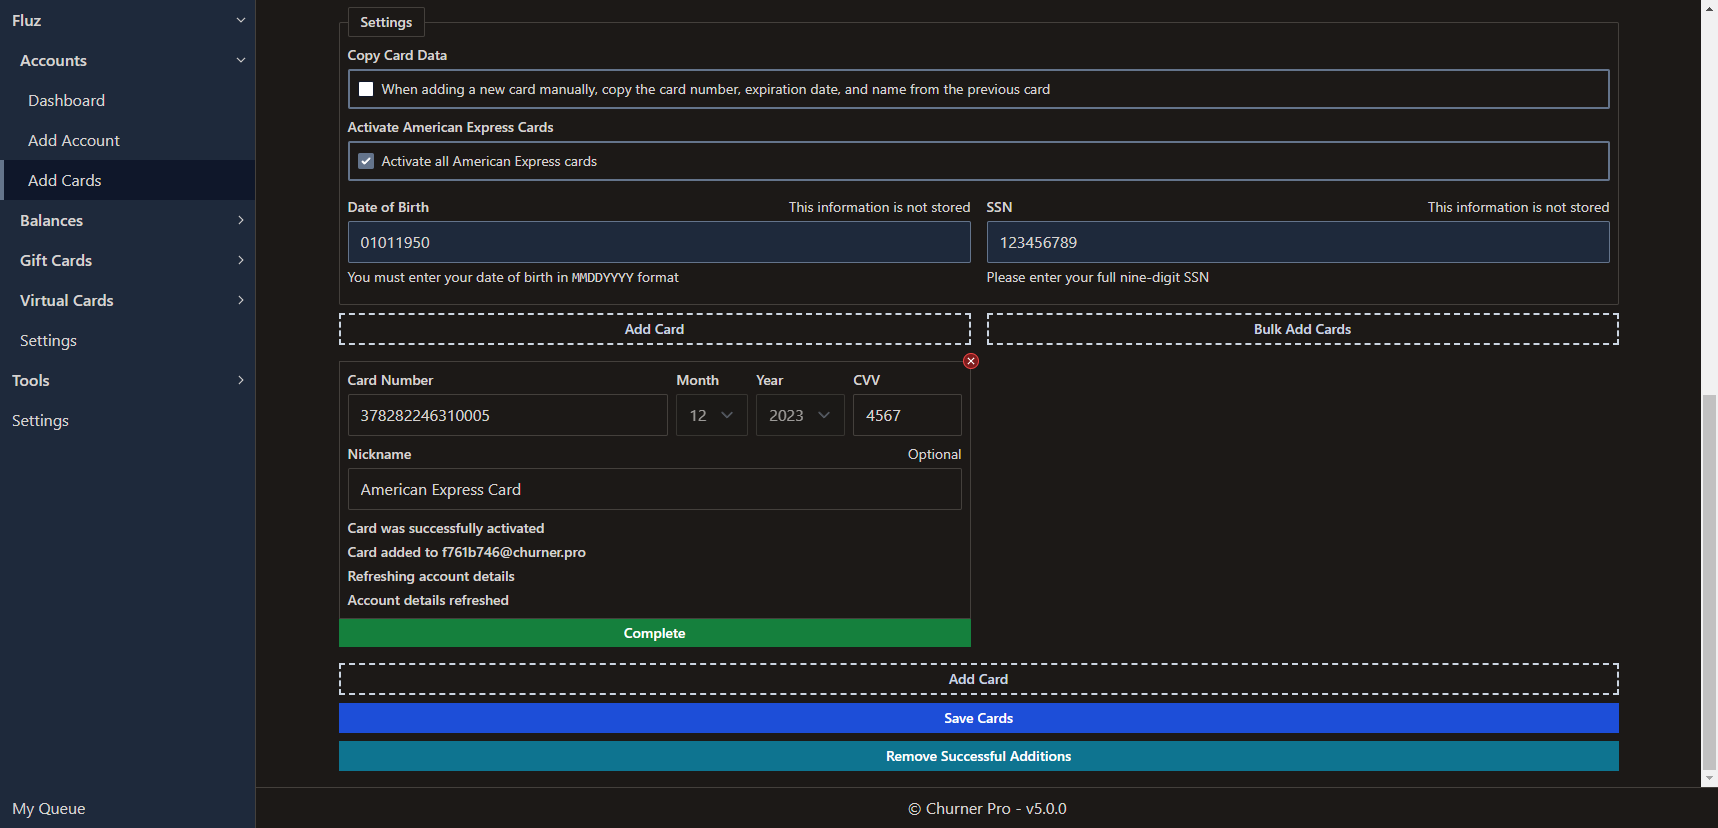
Gift Cards
Purchase
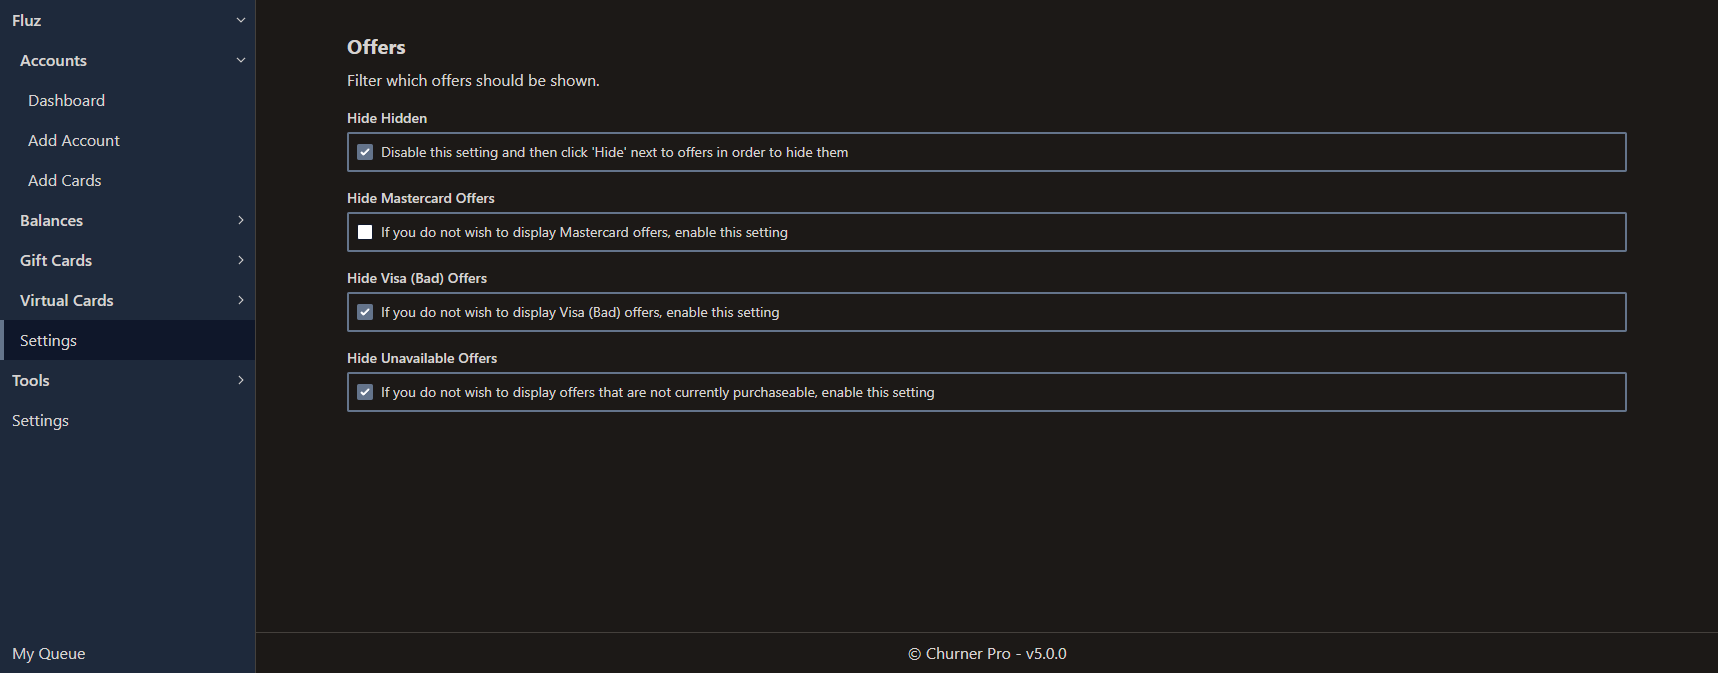
Churner Pro allows you to purchase Mastercard and Visa gift cards from Fluz. Before proceeding, you should check your Fluz > Settings page to ensure it is configured appropriately. It is strongly suggested that you use the following:
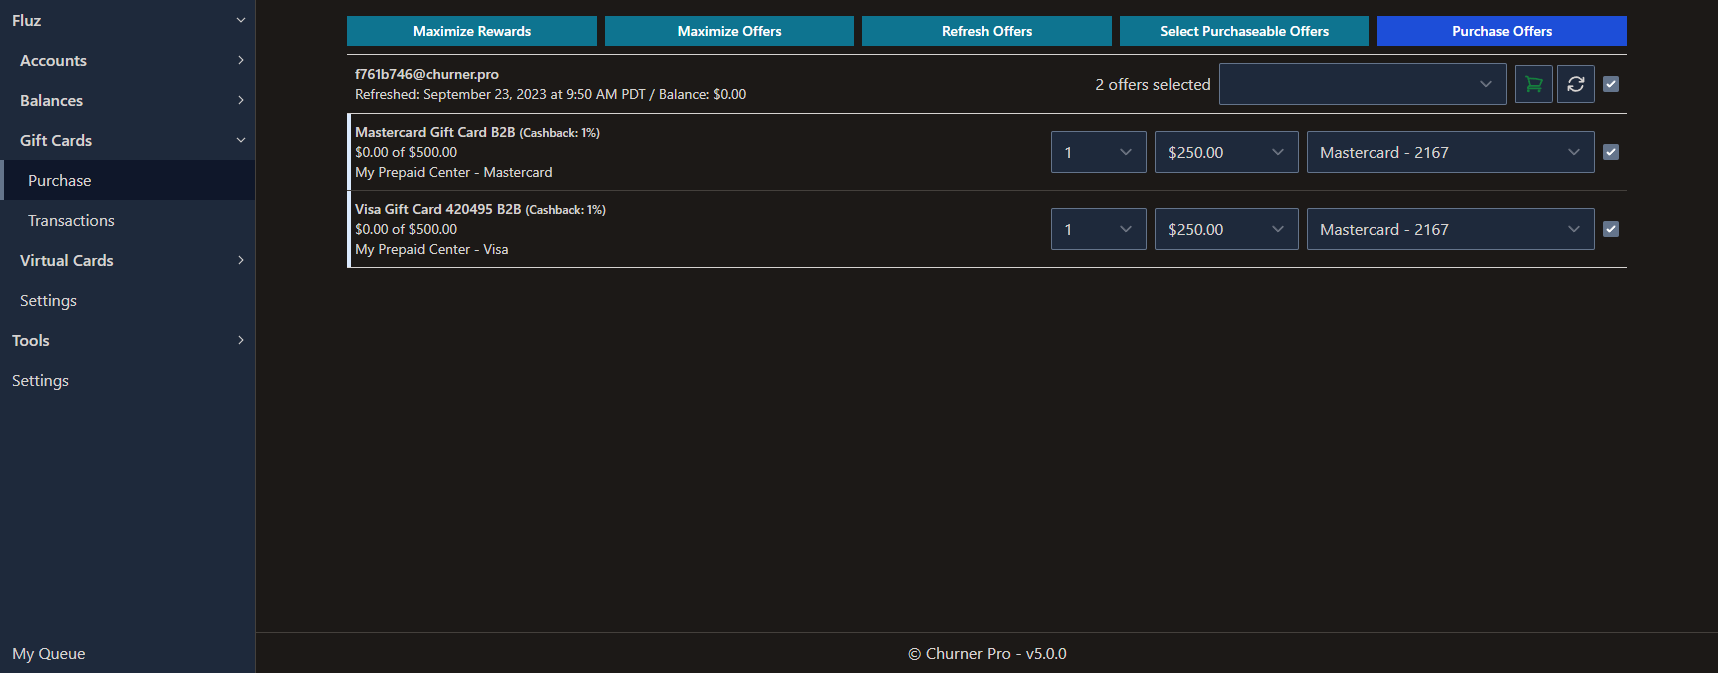
Afterwards, visit Fluz > Gift Cards > Purchase. To start, click Refresh Offers to refresh all accounts or the Arrow Loop icon in each account header to refresh that account only. If any gift cards are available to purchase, you'll see an item appear in the table indicating the name of the merchant, the vendor, and your current daily status limit.
In addition, you'll see controls that, from left to right, allow you to specify the amount of Fluz balance to use, the quantity you wish to purchase, the denomination you wish to purchase, and the card you wish to use. If you enter an amount into the Fluz balance input, Churner Pro will attempt to use that amount for all enqueued purchases. The checkbox in each row allows you to indicate you would like to purchase the offer.
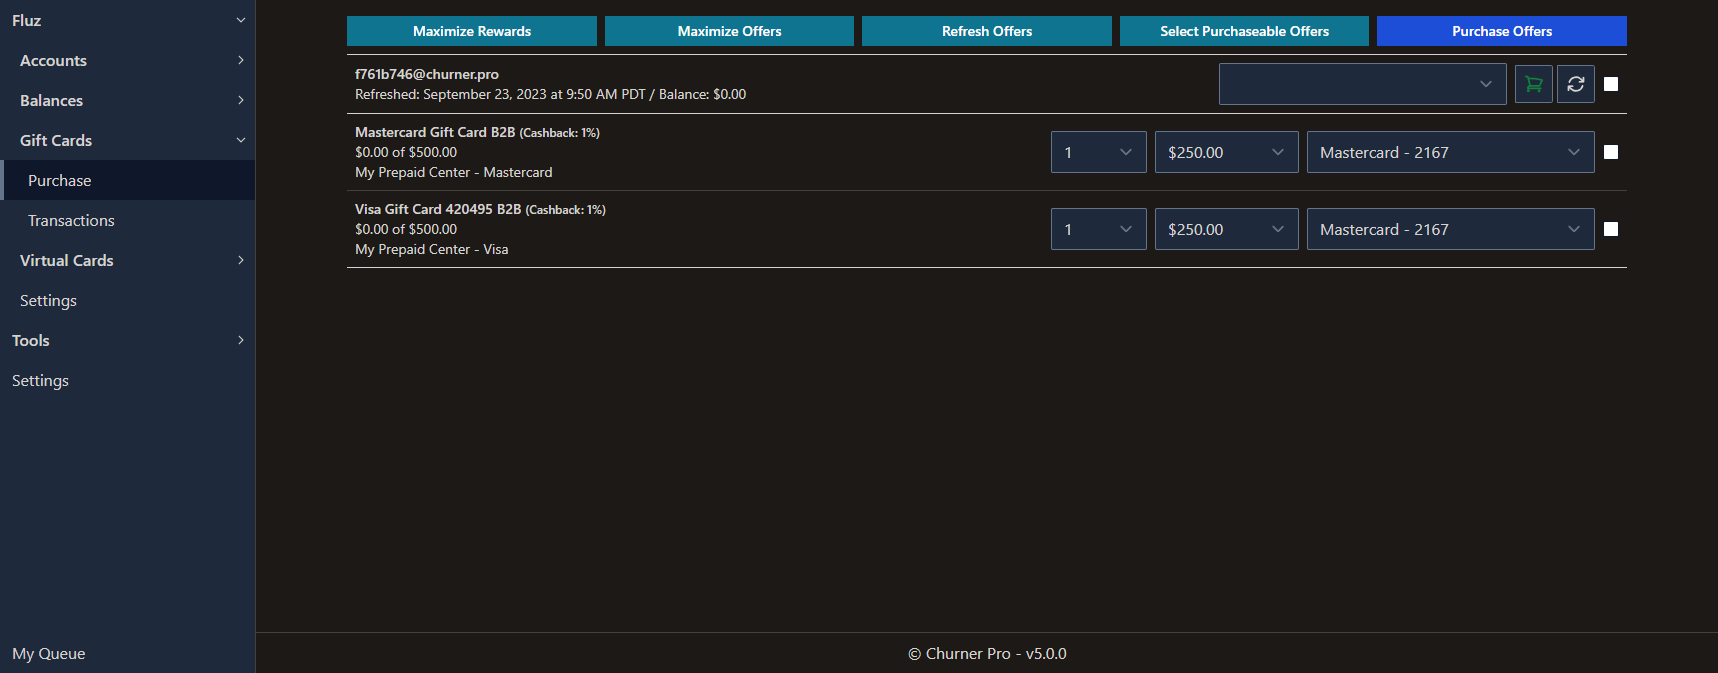
When you have your purchase settings to your liking, check the box on the right and click either Purchase Offers to process all accounts or the Shopping Cart icon in each account header to purchase for that account only.
History
After purchasing Mastercard or Visa gift cards, you should navigate to the Fluz > Gift Cards > Transactions page to redeem your cards. When you first arrive on this page, you'll see the following if you haven't previously refreshed:
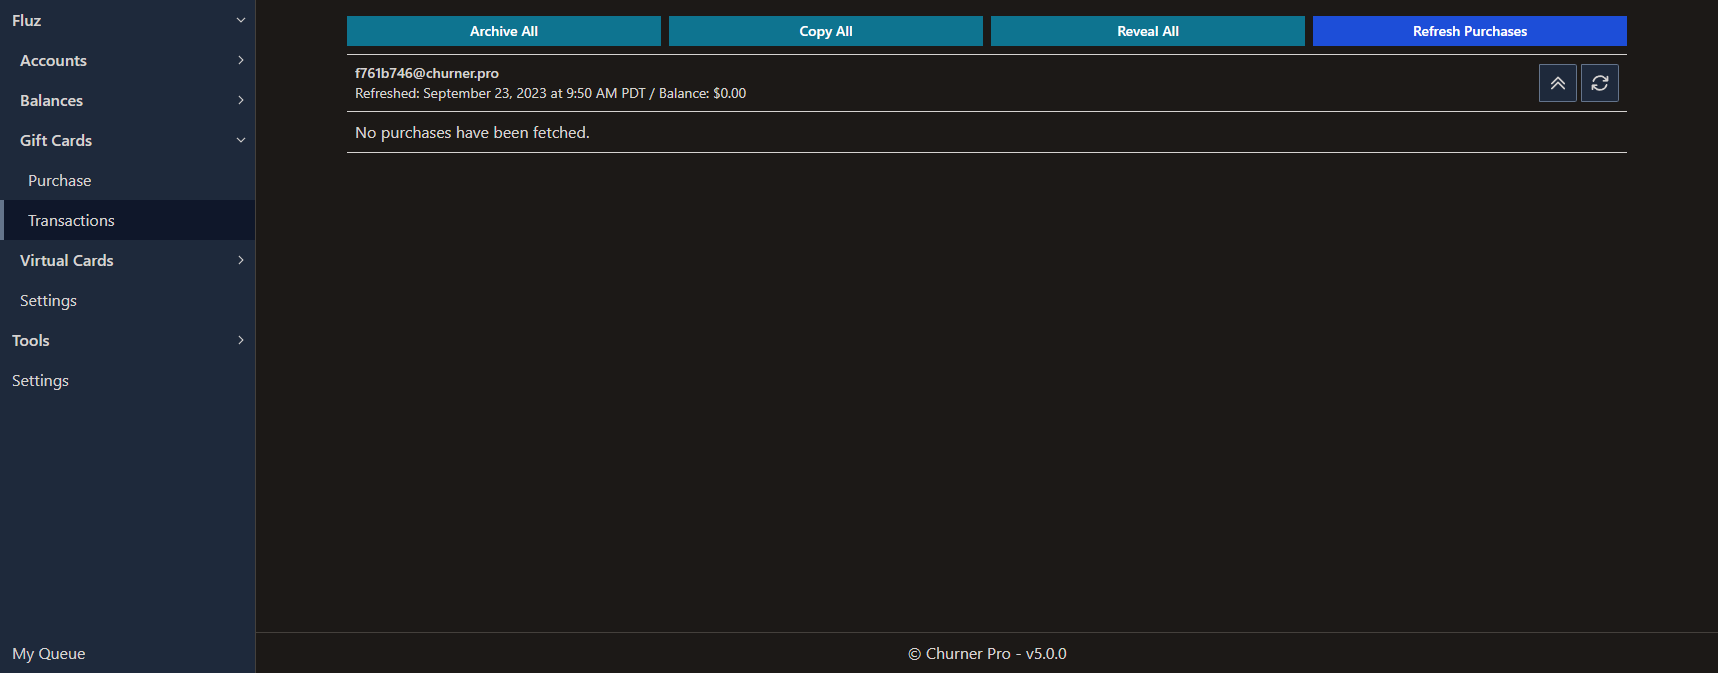
After refreshing, by clicking Refresh Purchases to refresh all accounts or the Arrow Loop icon to refresh a single account, you'll see a list of non-archived purchases.
In order to access the redemption links you must click Reveal All to reveal purchases for all accounts or the Reveal link next to each purchased card.
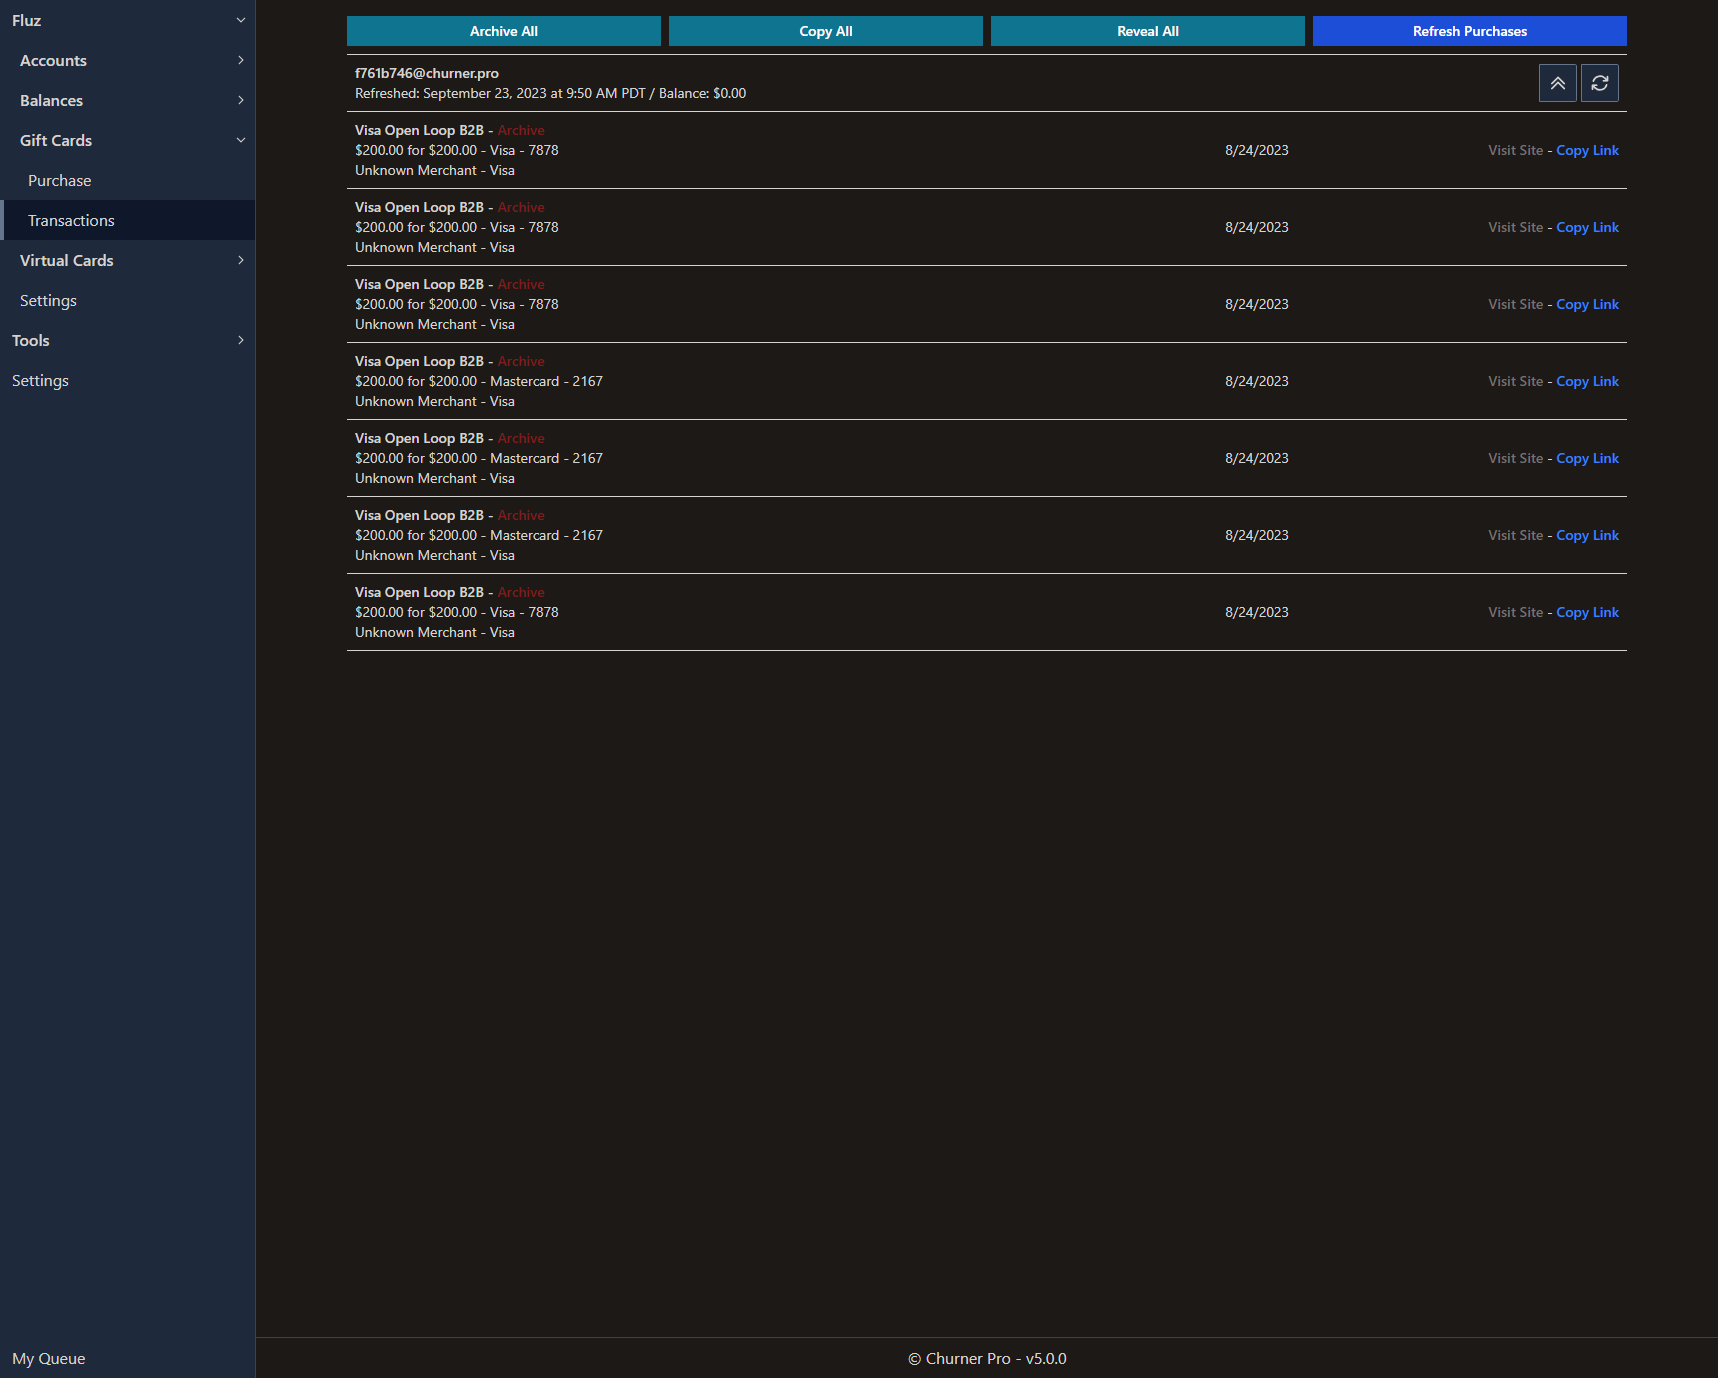
Click Visit Site to access your gift card. The color of the link will change to indicate that you have previously visited the site. Click Copy Link to copy the gift card's access URL.
To export card data, click the Copy All button at the top of the page.
Balance
Overview
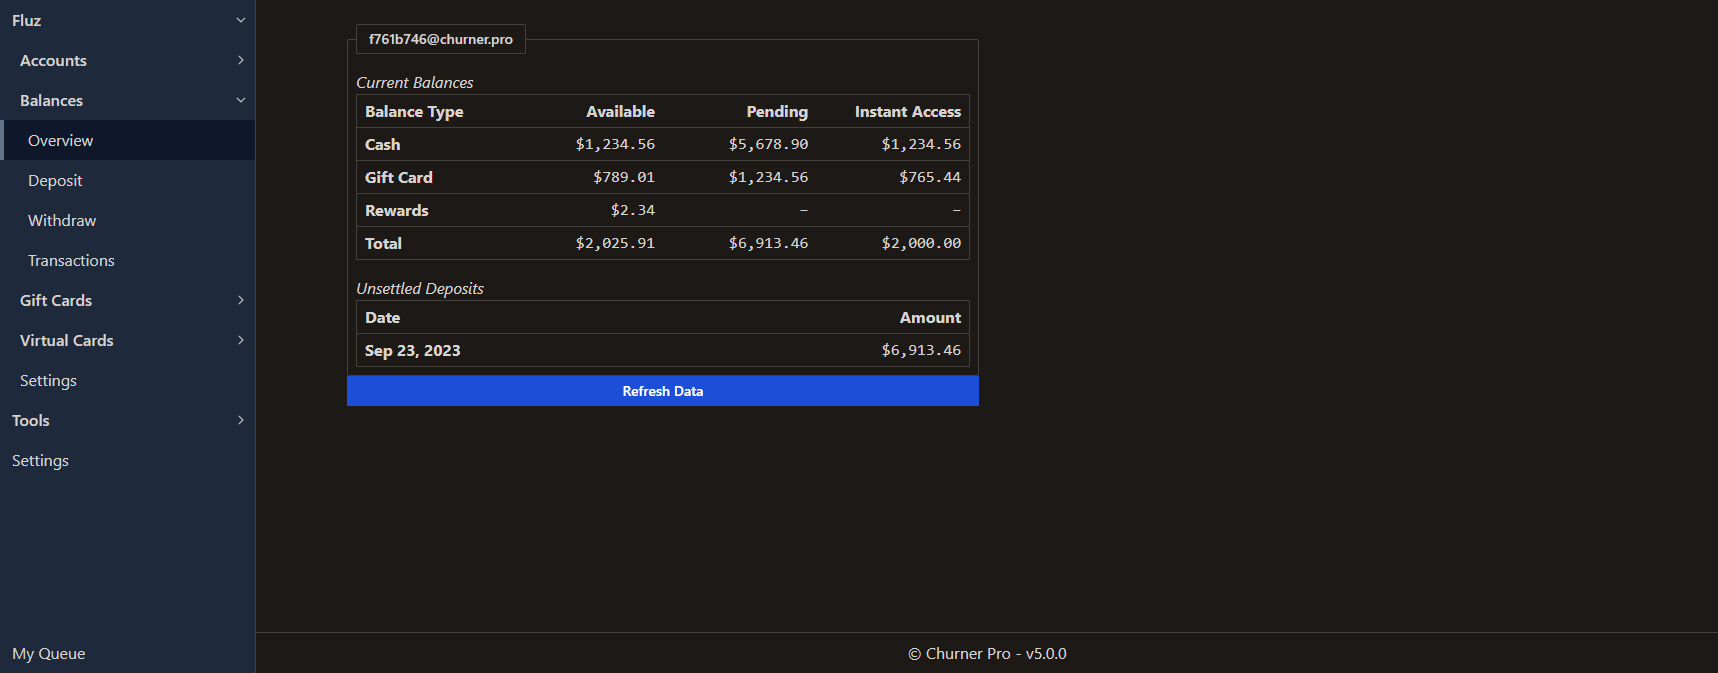
The balances overview shows the various states of your balances. Available funds can be used for Fluz purchases or, in the case of Cash and Gift Card balances, withdrawan. Pending balances are awaiting final settlement. Instant Access balances have been granted to you and are, necessarily, part of your Pending balance.
Each account's balance overview also displays the total amount of pending transactions that will clear on each day.
Deposit
Churner Pro allows you to configure multiple cash balance deposits and process them sequentially. For each deposit, you can choose your card, amount, desired category, and whether you wish to delete the card from the system at the end of processing. In order to assist in processing multiple deposits, there are a few configuration options at the top of the page.
When you first visit Balances > Deposit, you'll see the configuration controls without any configured deposits.
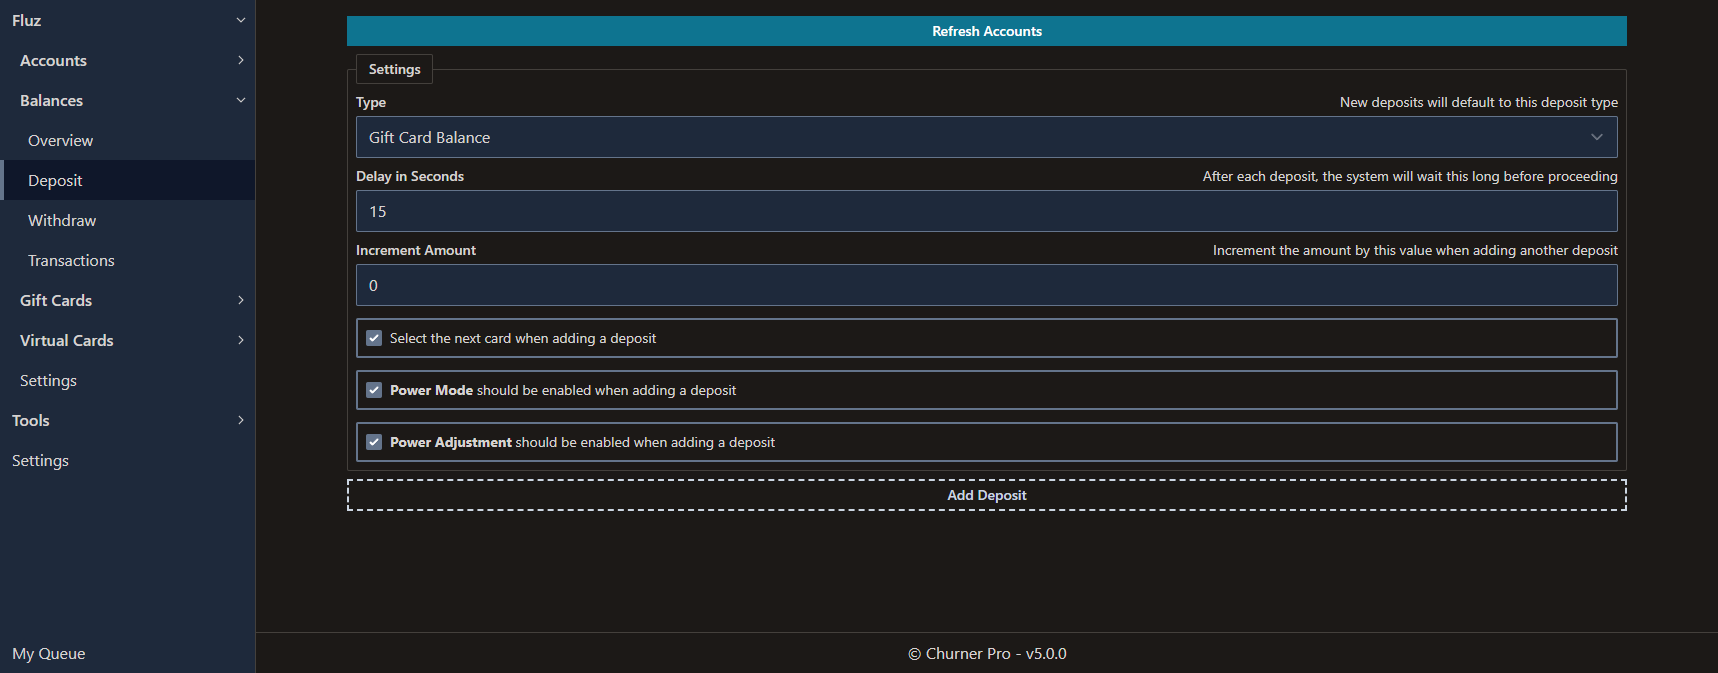
The Type dropdown controls the default deposit type of each deposit that you add. The Delay in Seconds input controls how long to wait between deposits. The Increment Amount input controls how much you want to add to each additional deposit you configure.
Select the next card when adding a deposit is helpful when you're planning on making deposits with cards that you have arranged sequentially on Accounts > Dashboard. The next two checkboxes provide defaults for the Power Mode and Power Adjustment controls for each configured deposit.
Configuring a deposit can be somewhat complex and comes with a lot of options. The following list of controls specifies which each one does.
- Type
- Controls the type of balance that the deposit will affect, either Gift Card Prepayment or Cash Balance
- Account
- The account to which the deposit will be made
- Card
- The card that will be charged for the deposit
- Power Mode
- Check this box to specify a total amount of charges to make, including fees, for the deposit configuration
- Power Adjustment
- Check this box to round the final deposit such that the total charges made will exactly match your entered amount
- Total Charges
- The total amount you desire for the sum of all deposits and associated fees
- Maximum Deposit
- When computing deposits, no single deposit will exceed this amount
- Category
- When depositing to Gift Card Balance, only, you may select a merchant category that the charges will process as
- Decrement the maximum amount when calcdlating deposits
- Your amounts will slowly reduce based on Fluz's configured fixed amounts
- Delete the selected card when processing is complete
- The card will be deleted from the system when all deposits complete
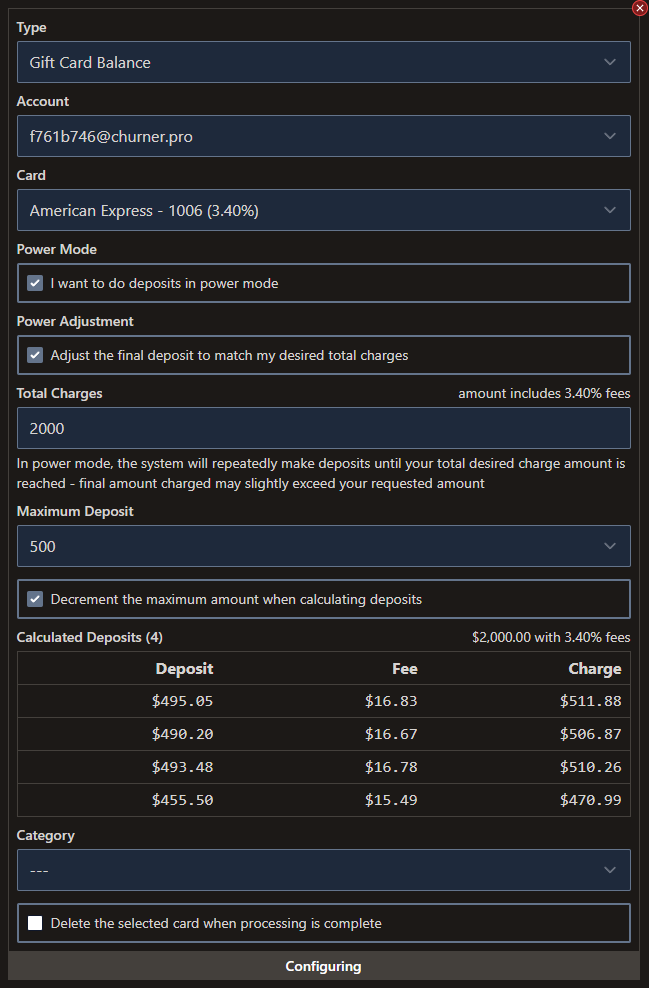
If you are using Power Mode to make deposits, your deposit amounts will be randomized to ensure that you are not making duplicate deposits to any single card. Amounts will vary from the Fluz suggested amounts by up to 1.0% in either direction. Importantly, all calculations will be handled for you.
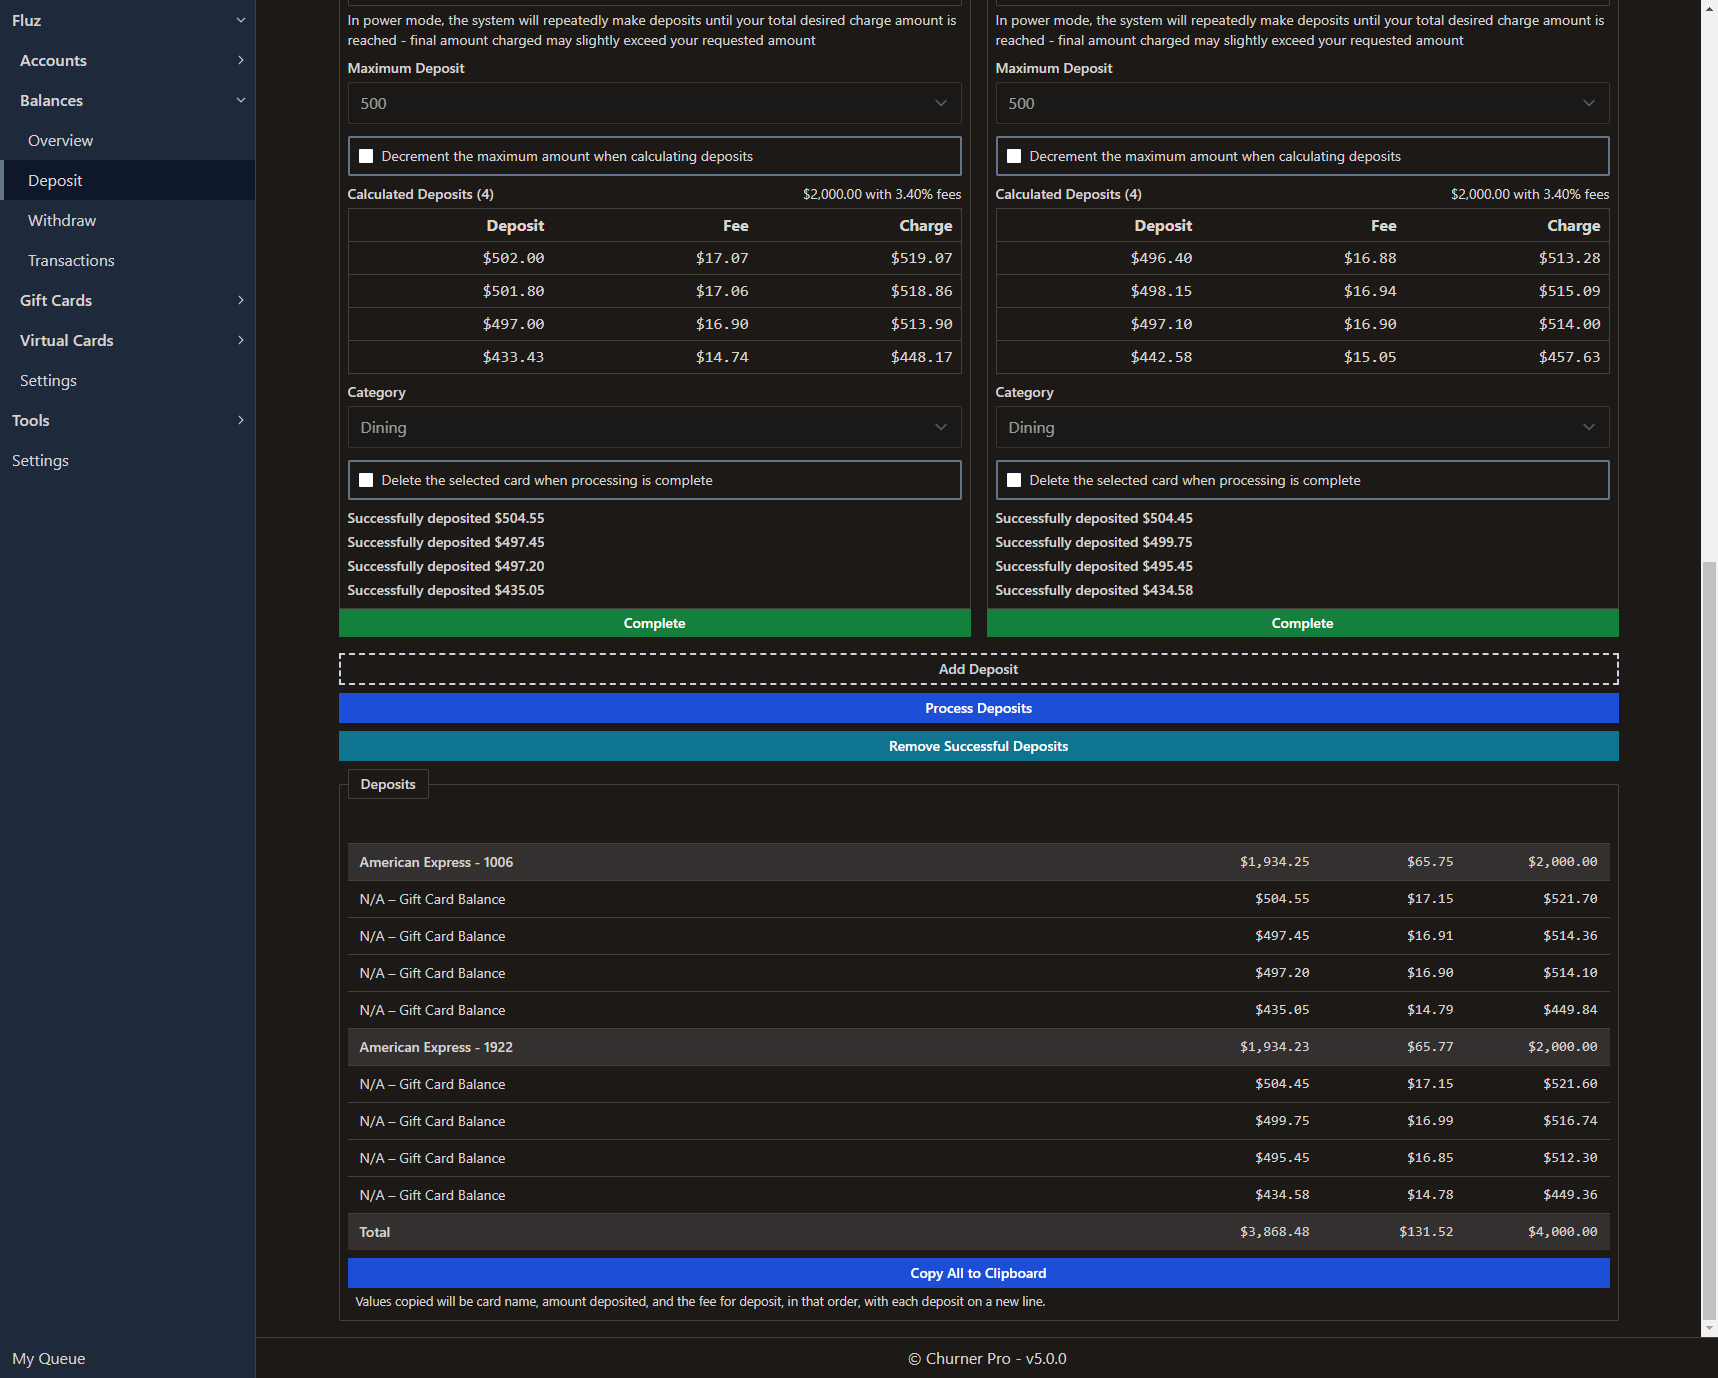
At the bottom of the screen, you'll see notice a list of pending deposits by card. Use this to review what deposits will be made when you're ready to process them.
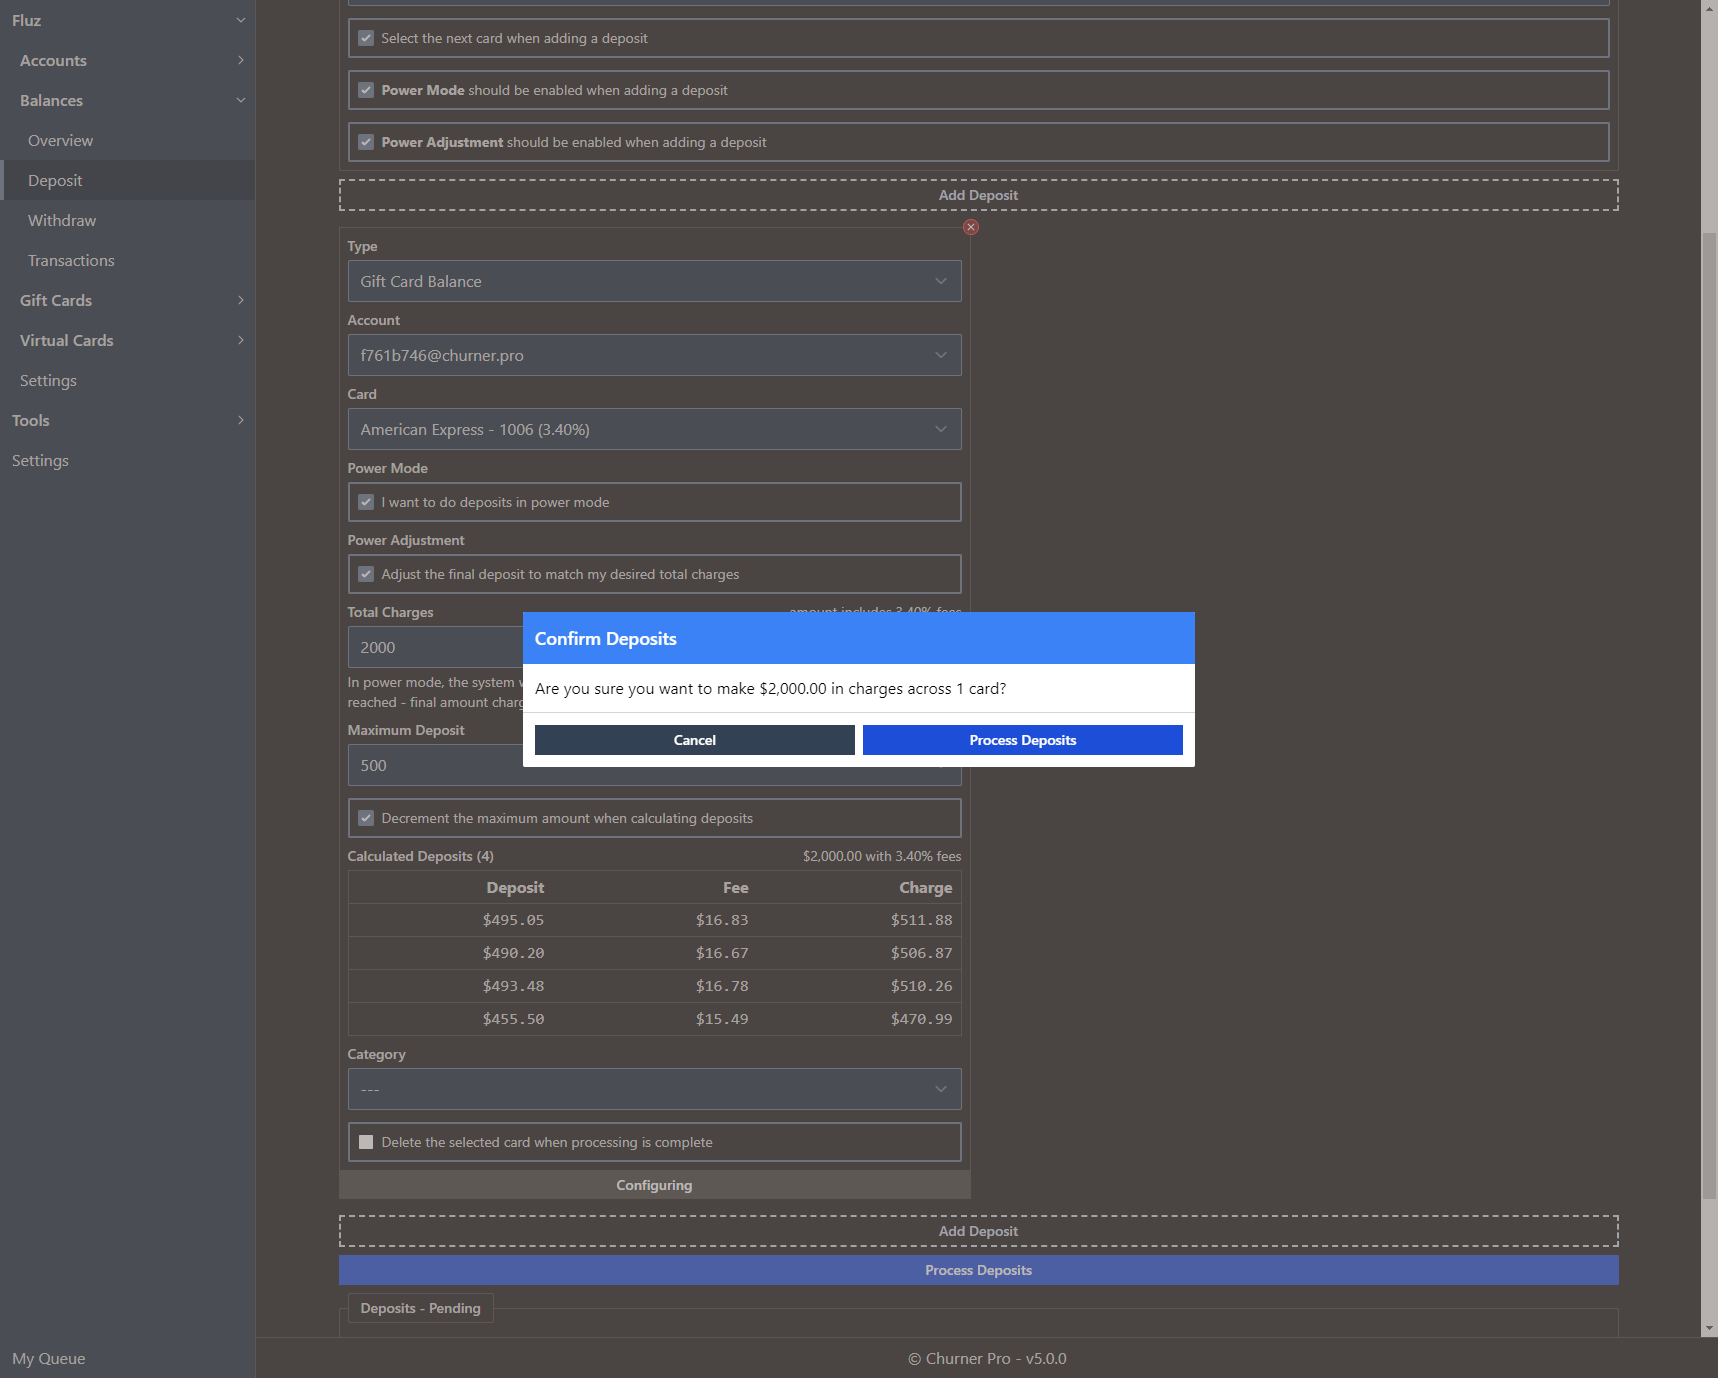
When you press Process Deposits, you'll be asked to confirm your configuration before proceeding.
If no errors are detected, each card will be added to the selected Fluz accounts. A configuration can be in one of the following states:
- Configuring
- Pending
- Processing
- Error
- Complete
If an error is encountered, Churner Pro will cease processing deposits to allow you to evaluate what went wrong and whether you wish to proceed. As with card addition, you can view all deposits currently being processed in My Queue.
After your deposits are complete, there is a button at the bottom of the deposits table that will copy information about your deposits including the card used, the amount deposited, and the total fee.
Withdraw
You may wish to withdraw your Fluz cash and rewards balance to your bank account. When you first load Balances > Withdraw, you'll see the status of your account, including your existing balance, your daily, weekly, and monthly limits, and a dropdown where you can control where your balance is withdrawn to.
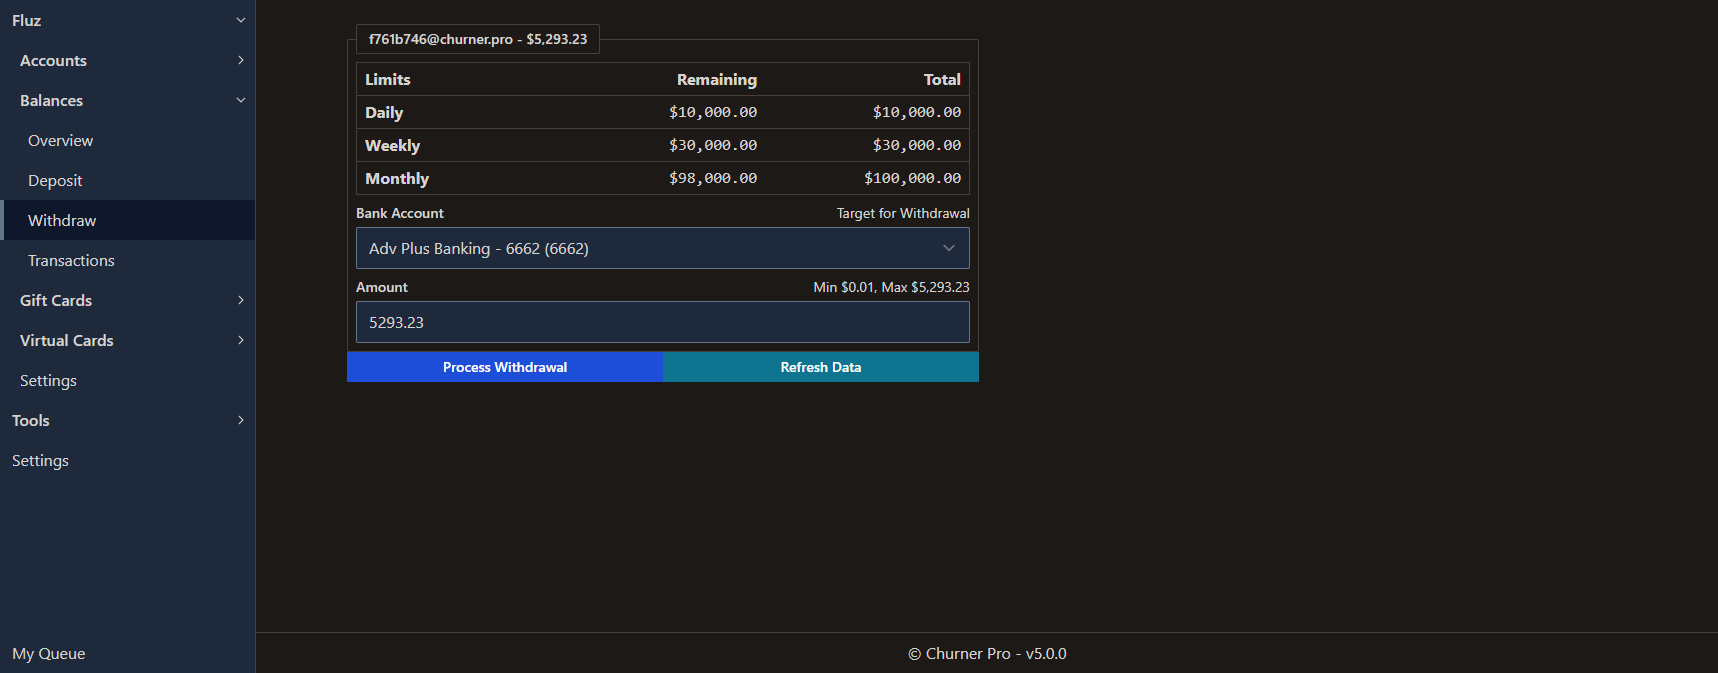
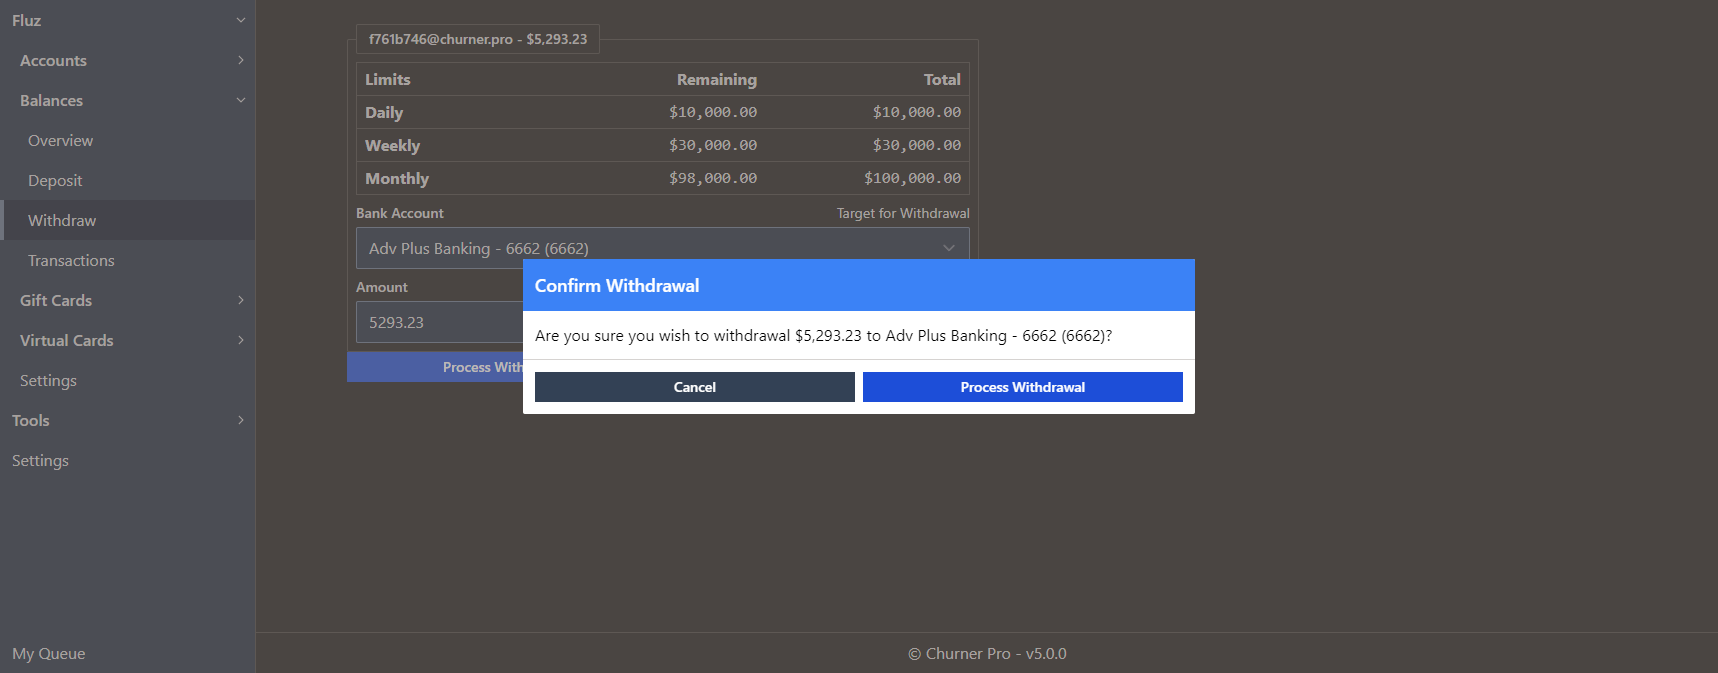
The functionality here is as simple as it looks. Choose your desired bank account, enter the amount you wish to withdraw, and press the Process Withdrawal button. You must then confirm your withdrawal.
Transactions
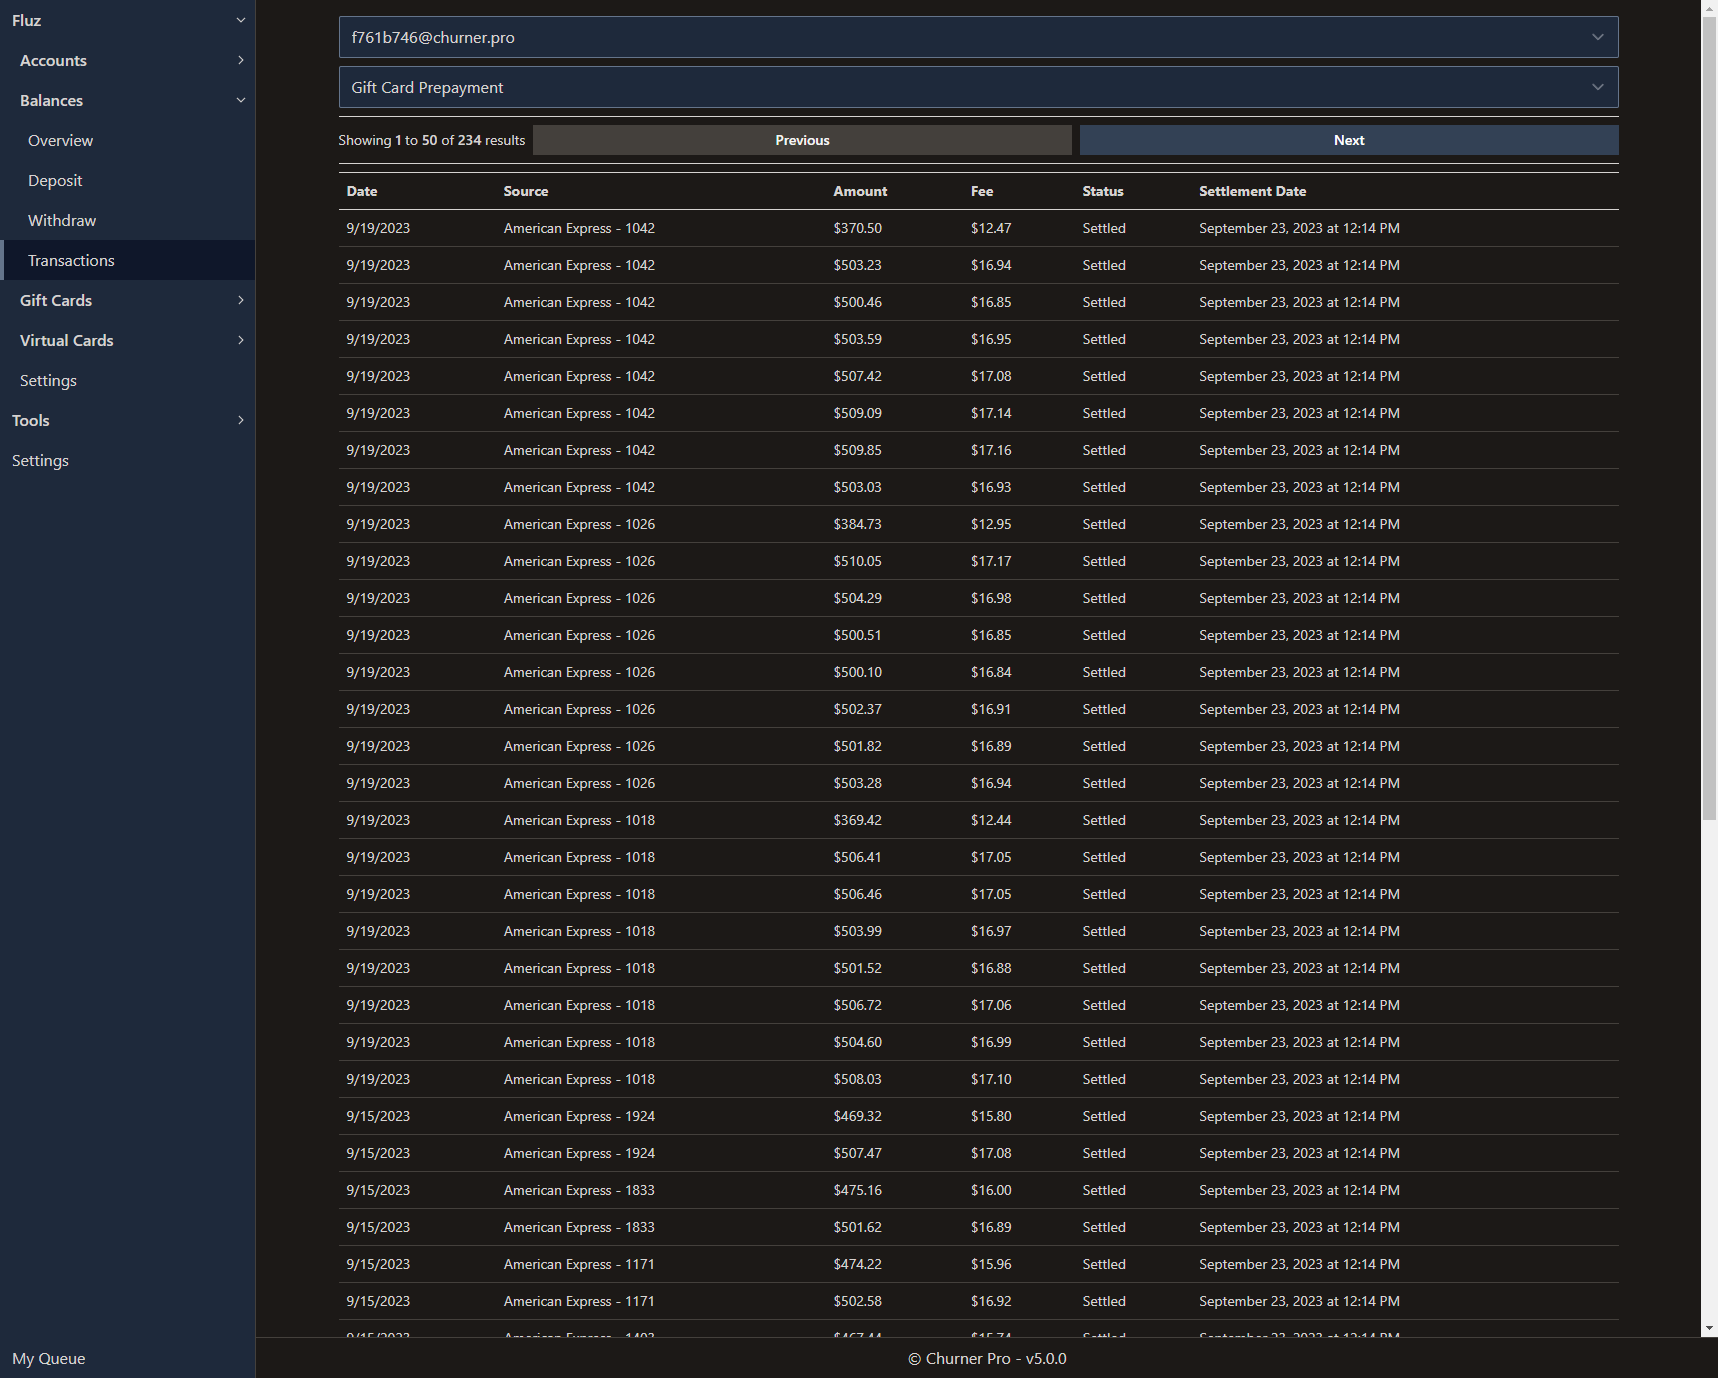
You can view a list of transactions for any of your configured accounts, filtered by type and paginated in lists of 50 items. The following is an example of the data that populates the page.
Virtual Cards
Purchase
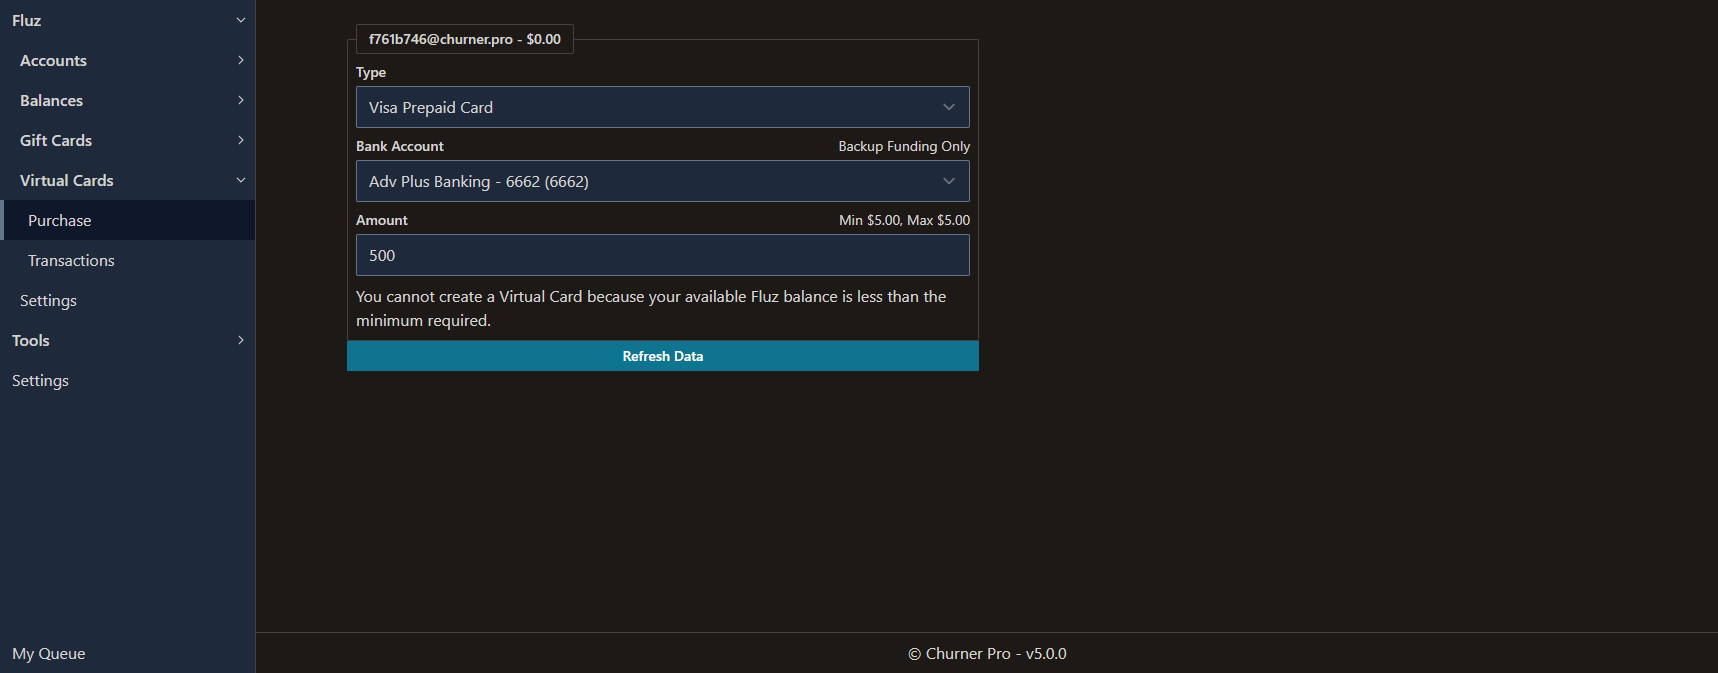
If you have access to Fluz Virtual Cards, you can retrieve the details of your active card or create a new active card from this screen. The creation process involves choosing a Type, the backing Bank Account, and an Amount. Please note, you are limited to creating virtual cards up to the limit of your available balance as the cards are designed to always use your Fluz balance and never fall back to your bank account.
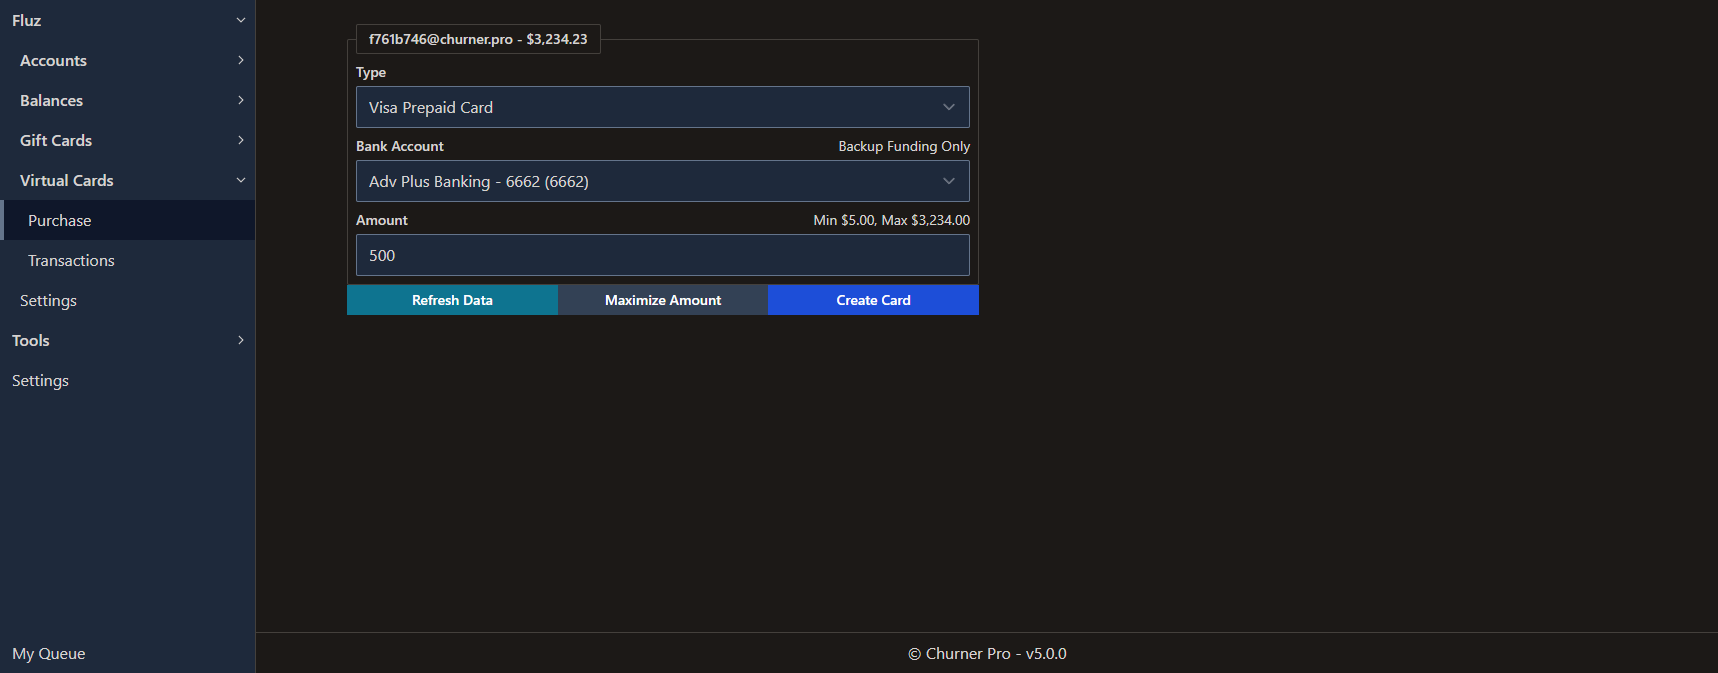
If you do not have a linked bank account or have insufficient balance to create a virtual card, you will encounter an error.
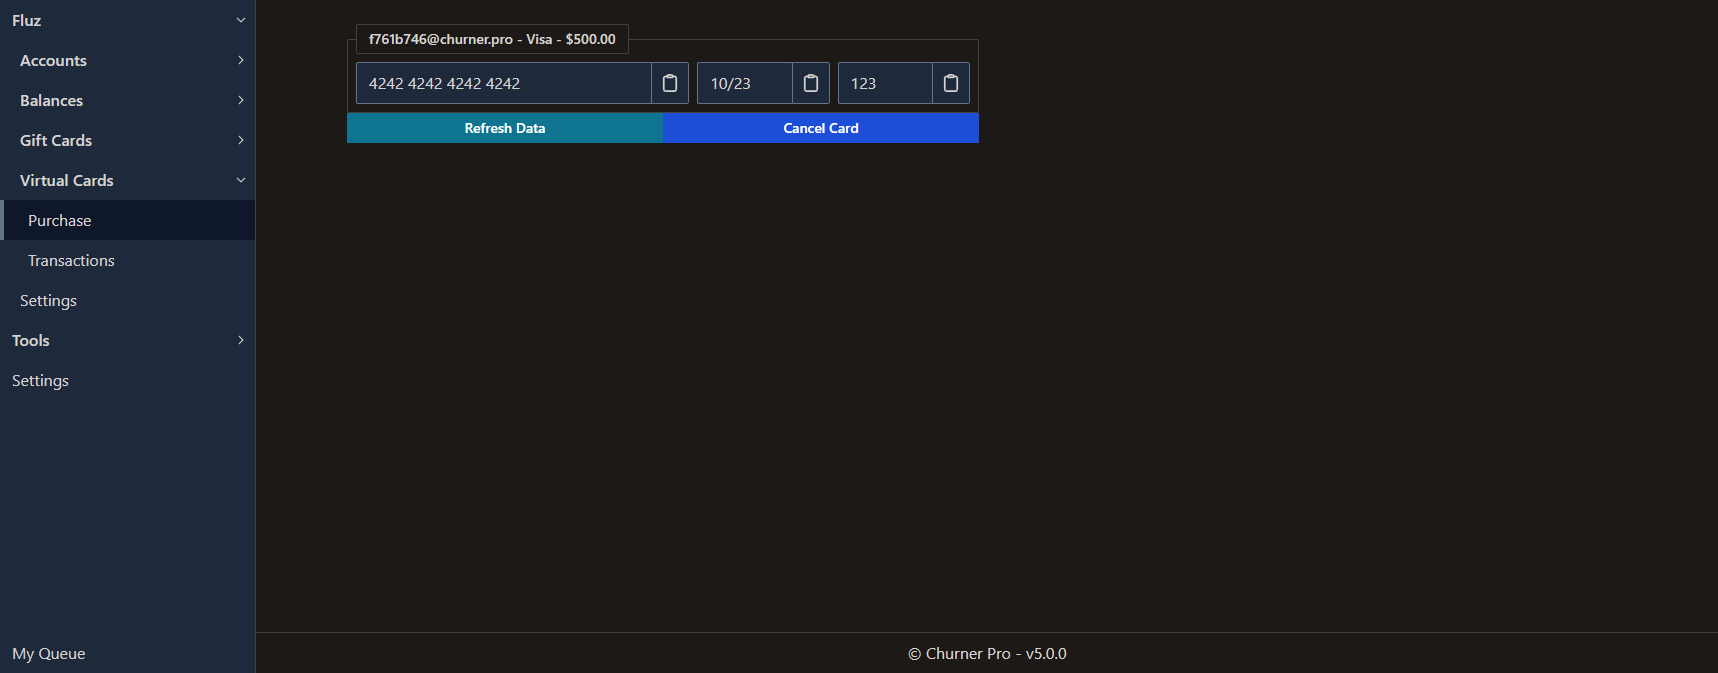
After creating a virtual card, you will see the card details, including the limit of the card, in an easily copyable interface.
Transactions
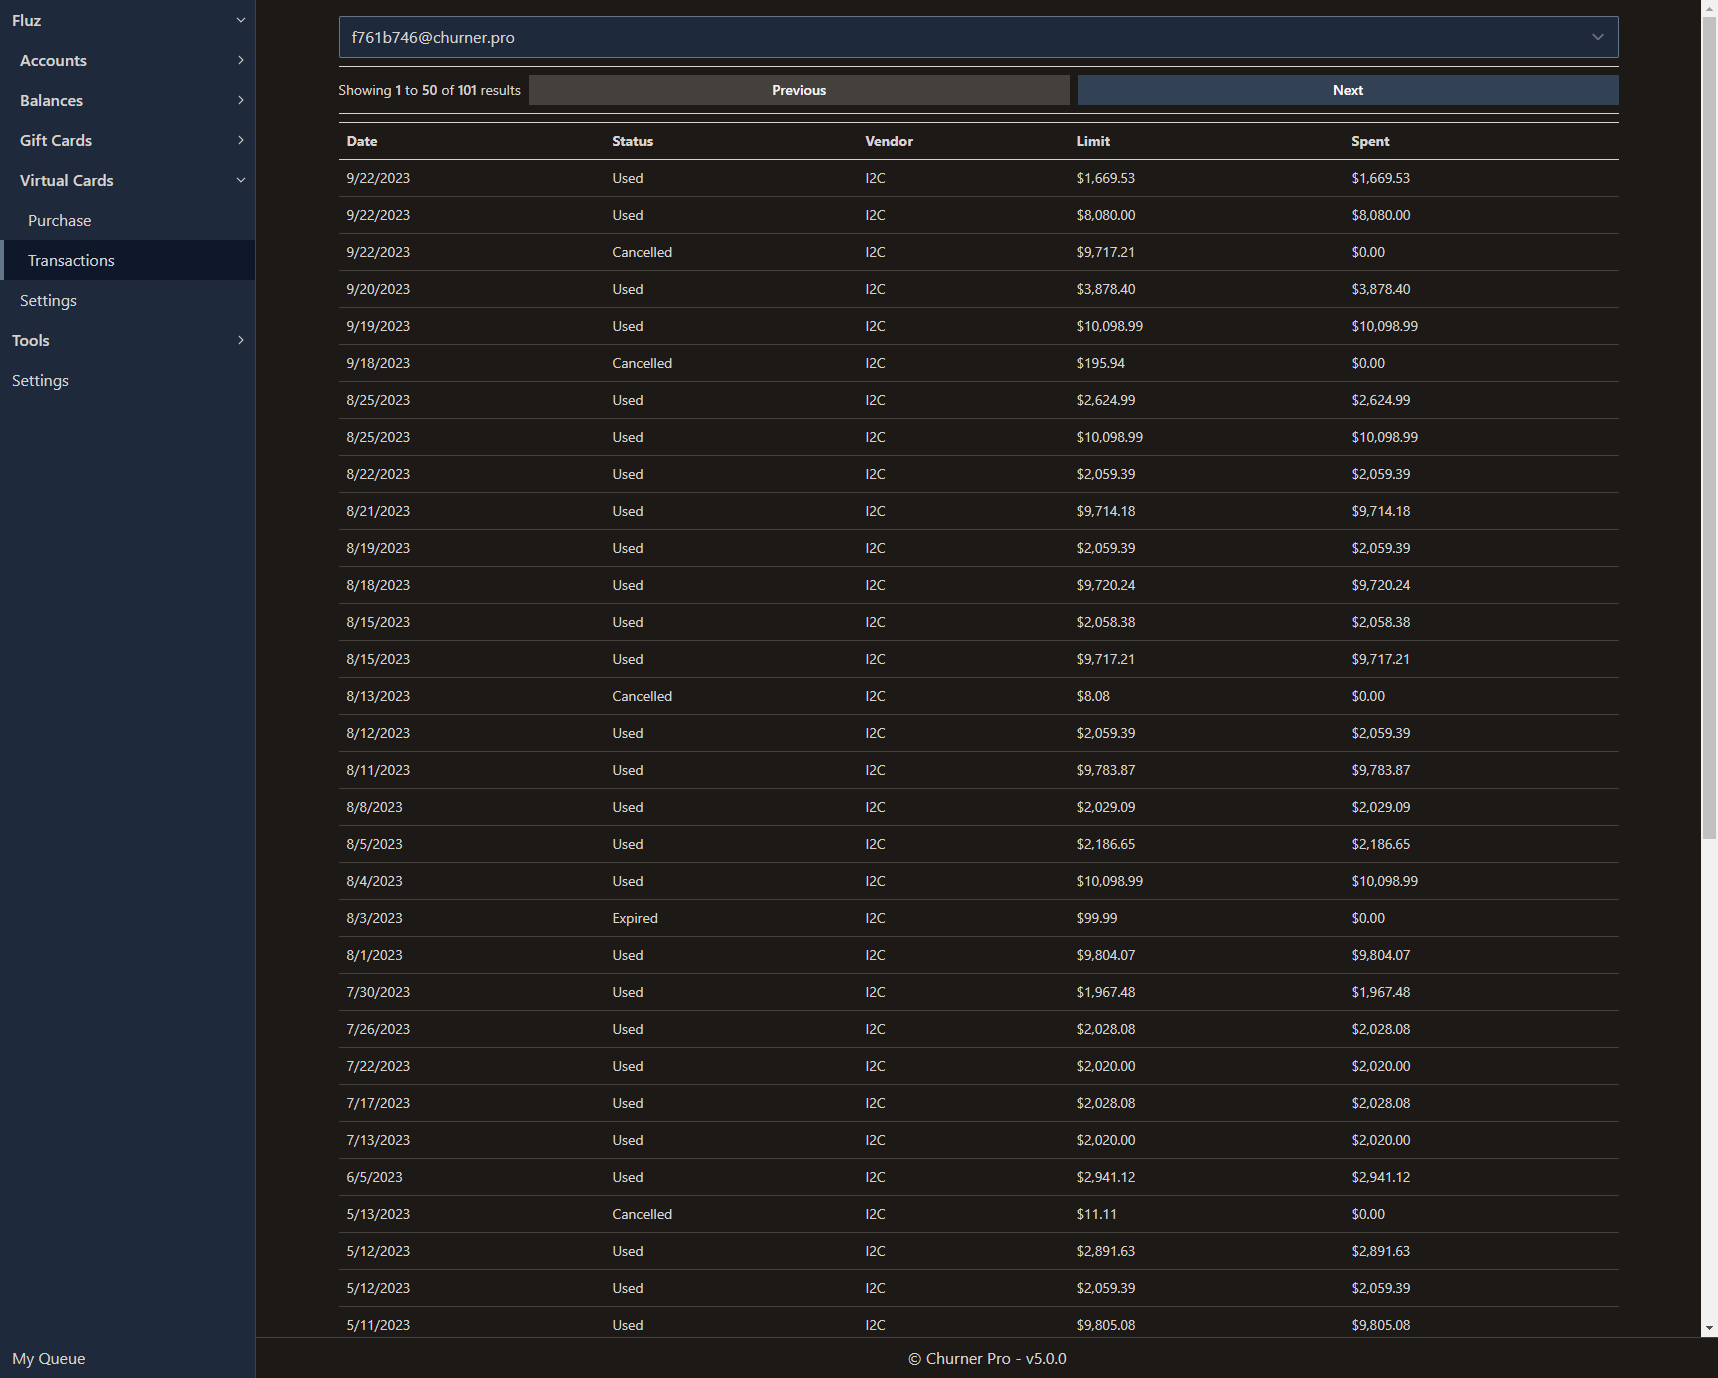
As with balance affecting deposits, you can see a list of all Virtual Card transactions segregated by account.
Tools
American Express
Card Activation
American Express authorized user and employee cards require activation within sixty days of receipt or they are removed from the card account. Churner Pro can perform bulk activation of your cards for you.
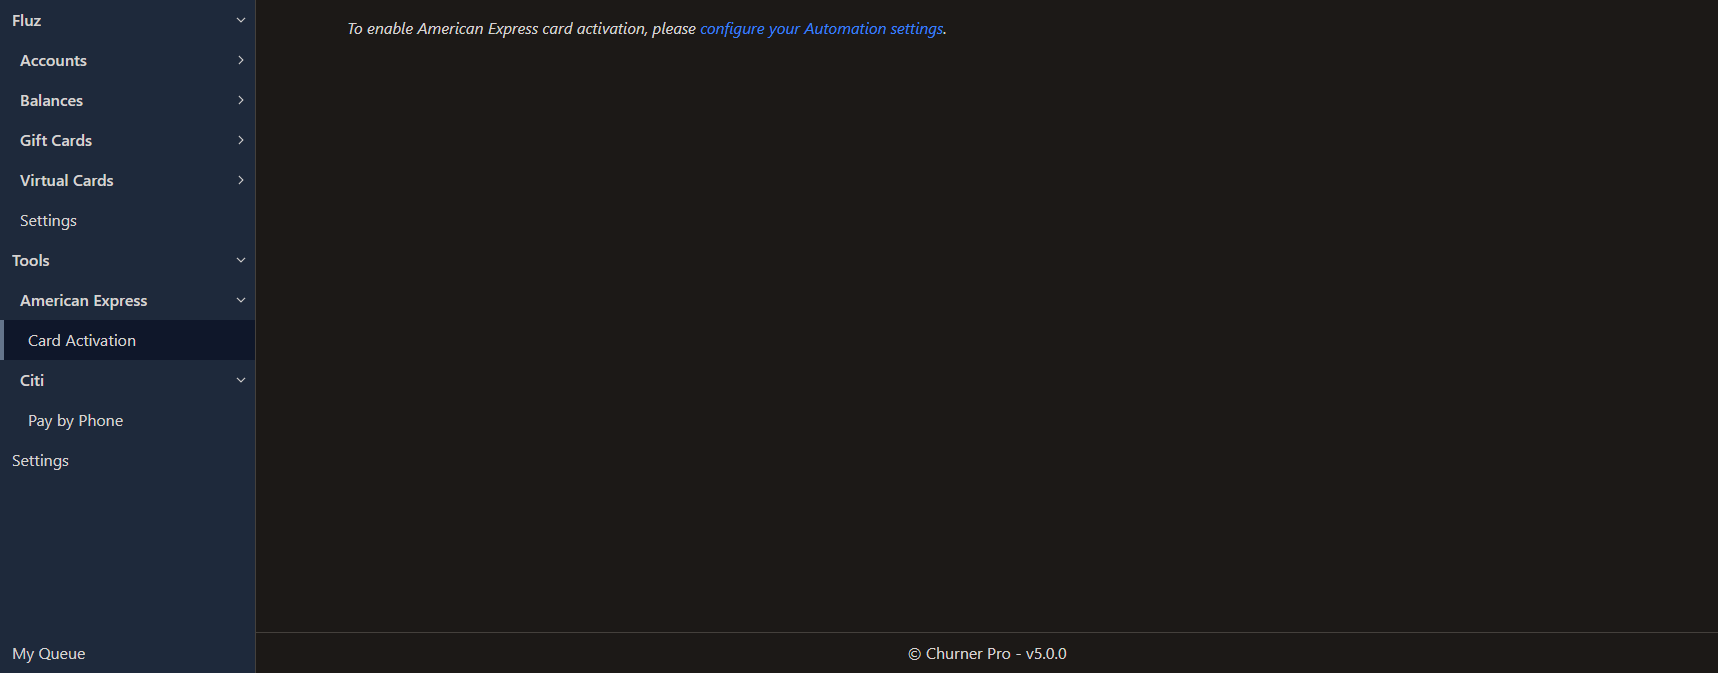
First, ensure that you have configured the Chrome executable location on the Settings page. If you have not, you'll be presented with the following error.
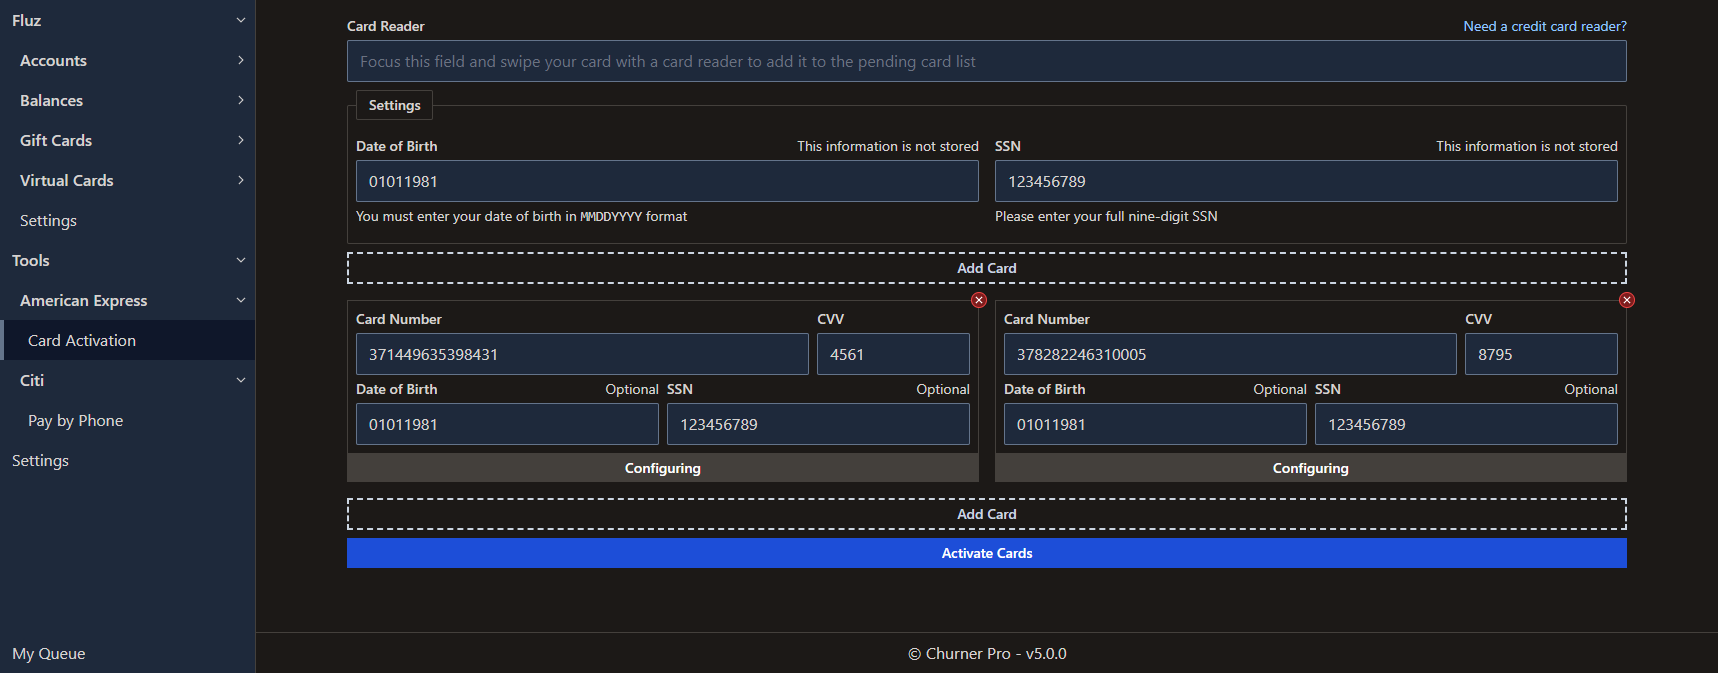
This interface works very similarly to Fluz > Balances > Add Cards interface. You must specify the date of birth and Social Security number for your card users. You can configure this globally or per card. You can enter card details manually or use the card reader.
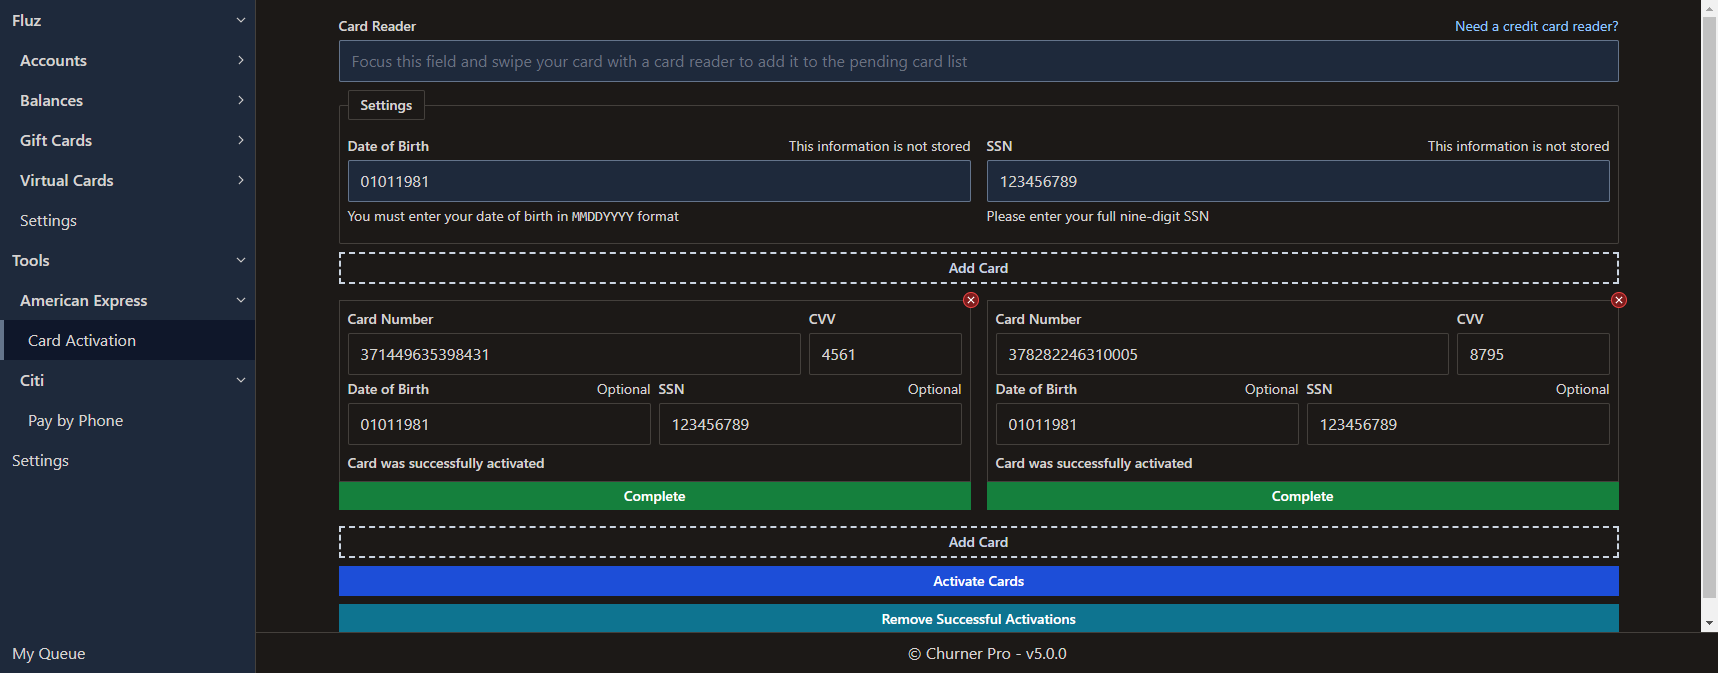
Assuming activation is successful, you'll see an informational message as such:
Citi
Pay by Phone
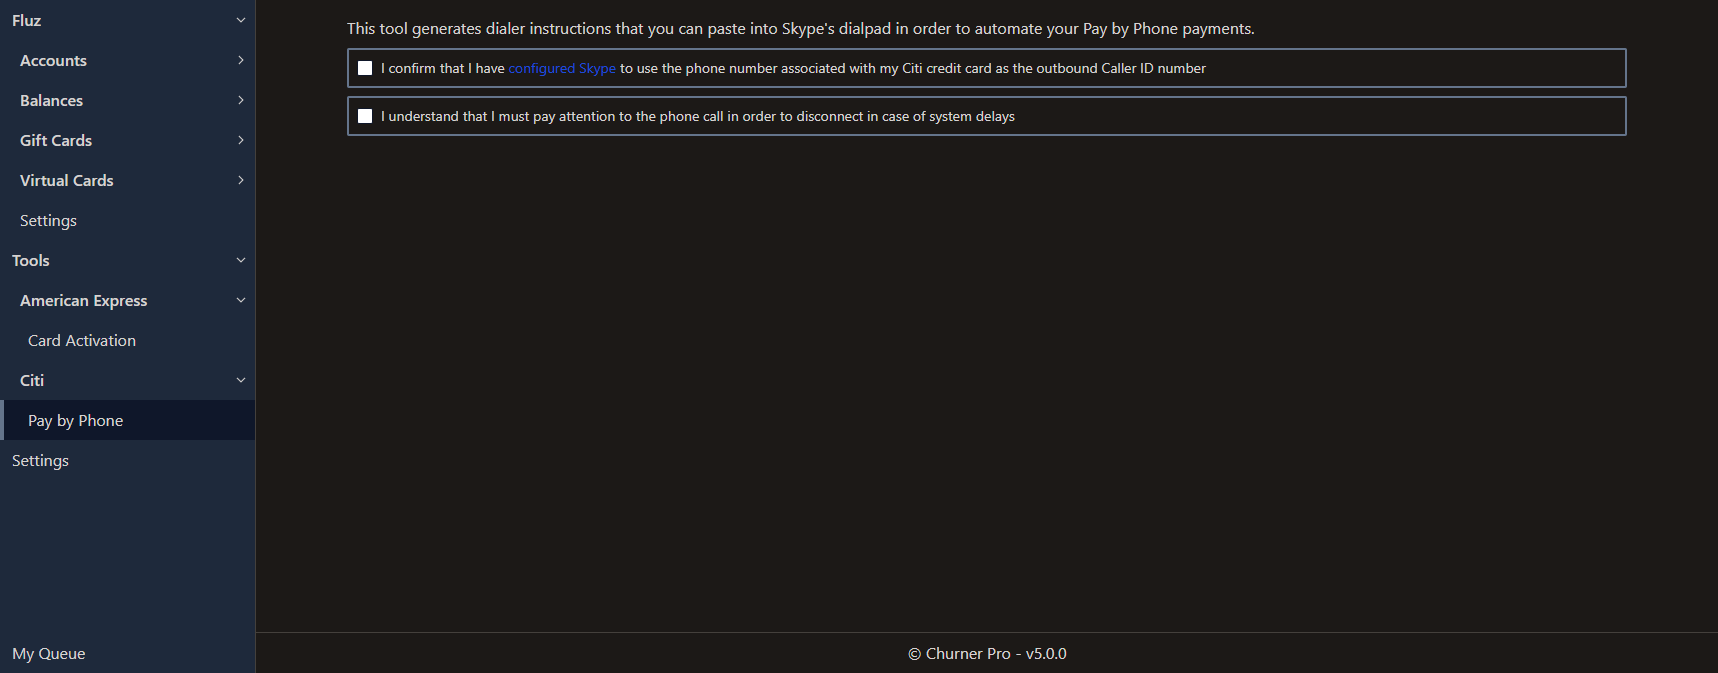
Churner Pro offers a utility that allows you to easily pay your Citi credit cards by phone using multiple debit cards. When you initially visit the tool, you'll be prompted to confirm you have configured your Skype Caller ID appropriately and that you understand you must listen to the payment process in order to appropriately respond in case of errors.
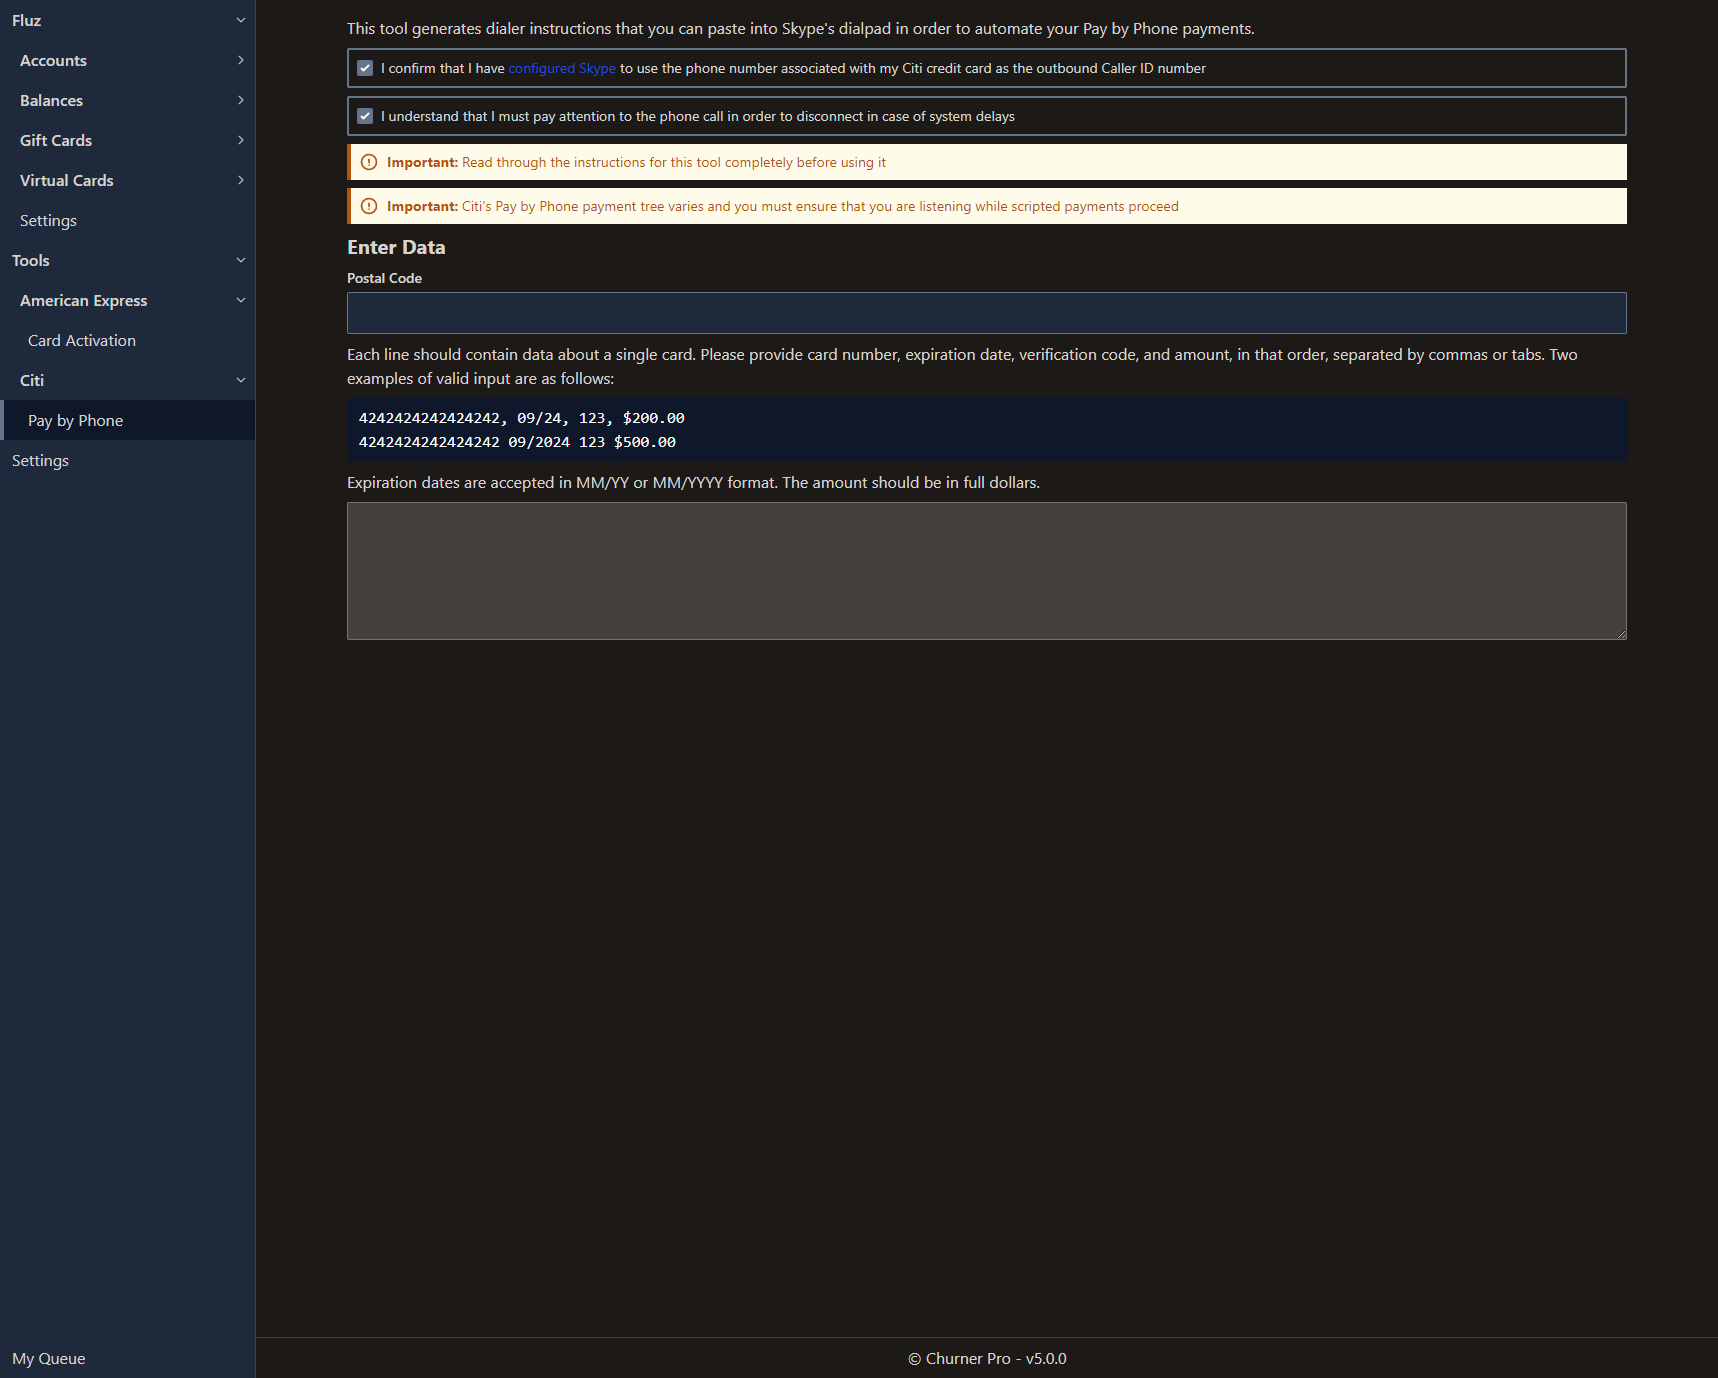
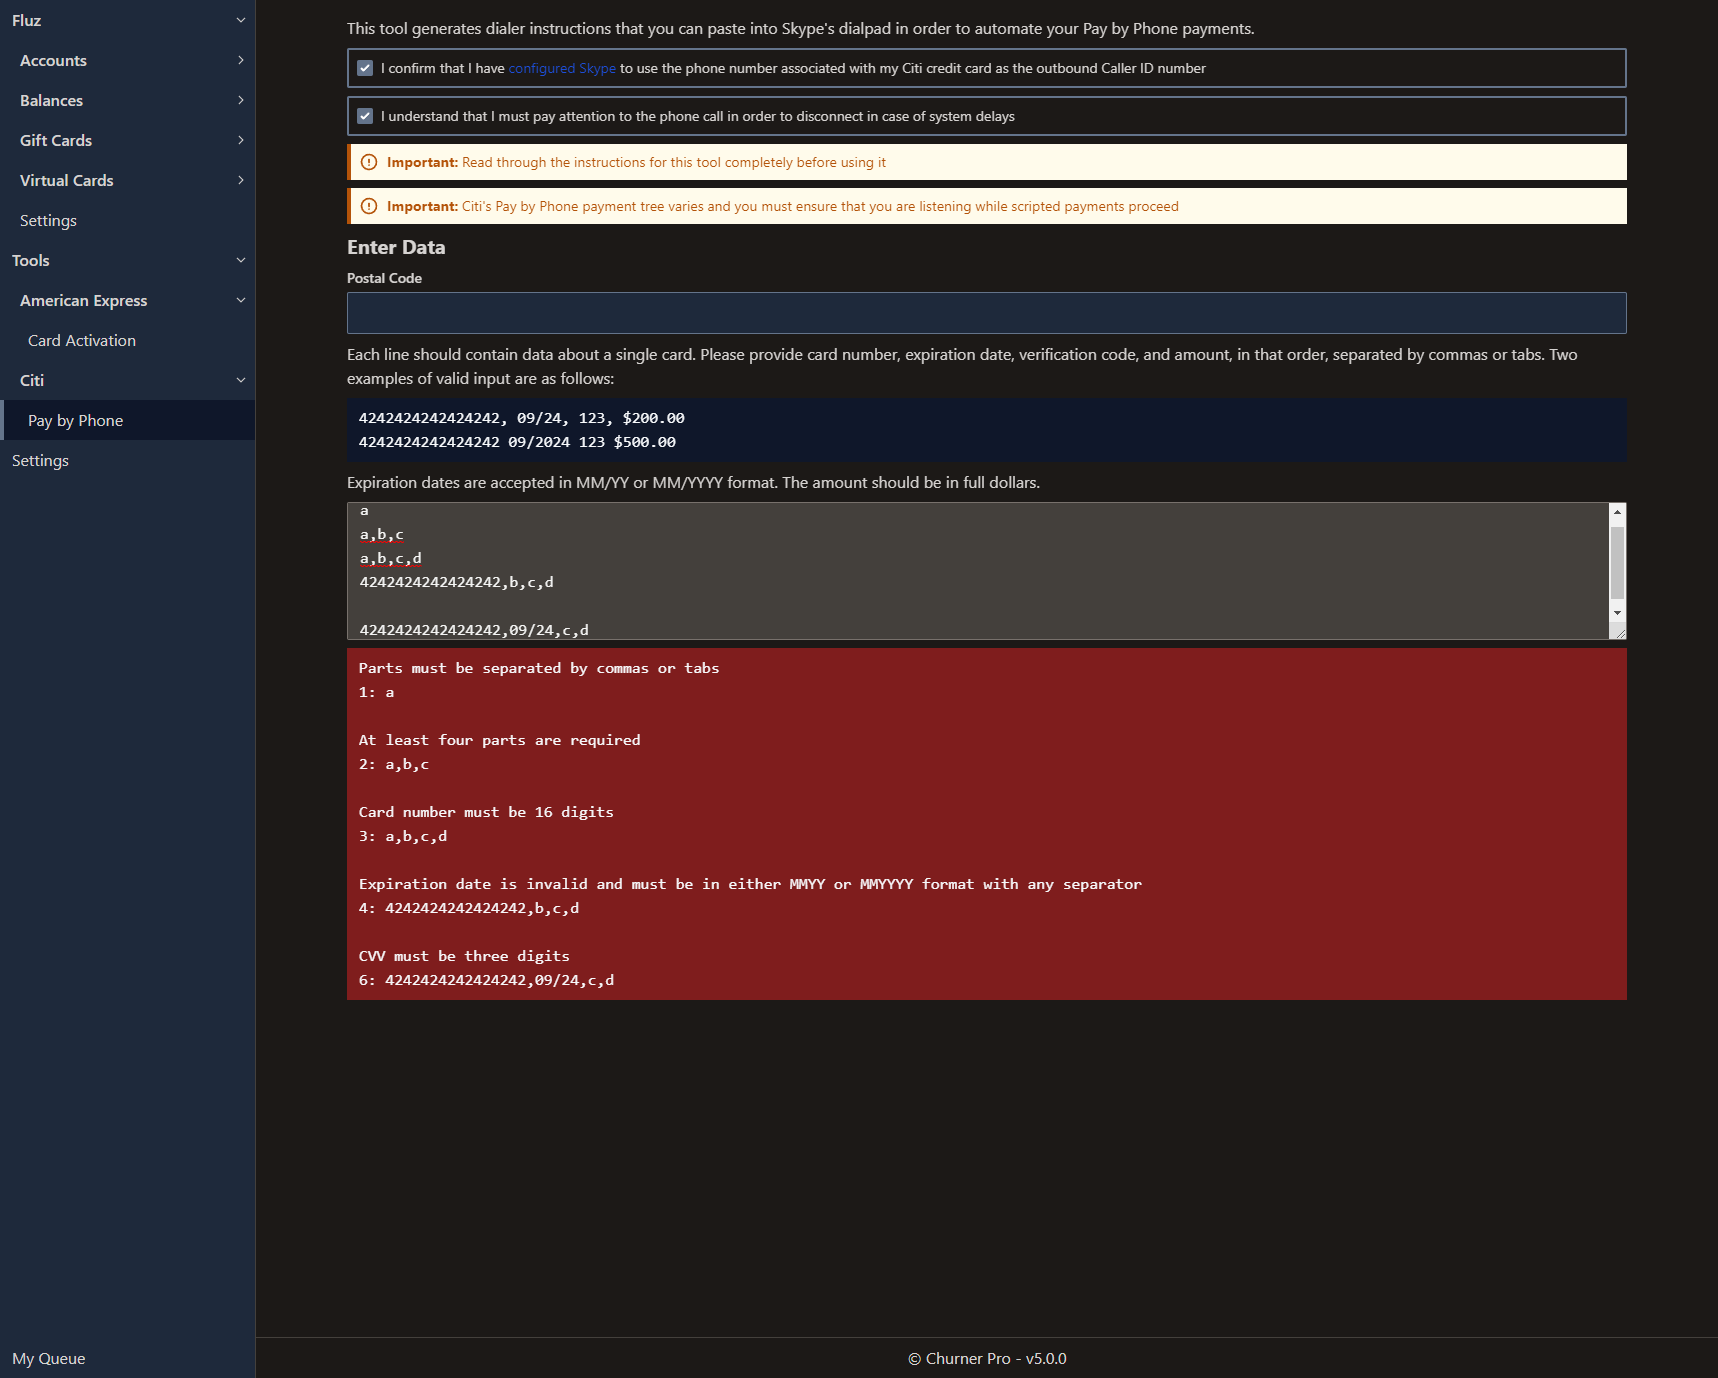
After confirming, you'll be presented with inputs into which you can enter your postal code and card data. There are examples directly above the field that you can follow to ensure that your data is in the correct format.
If there are any errors with your data entry, Churner Pro will display error messages indicating what you need to fix on each line.
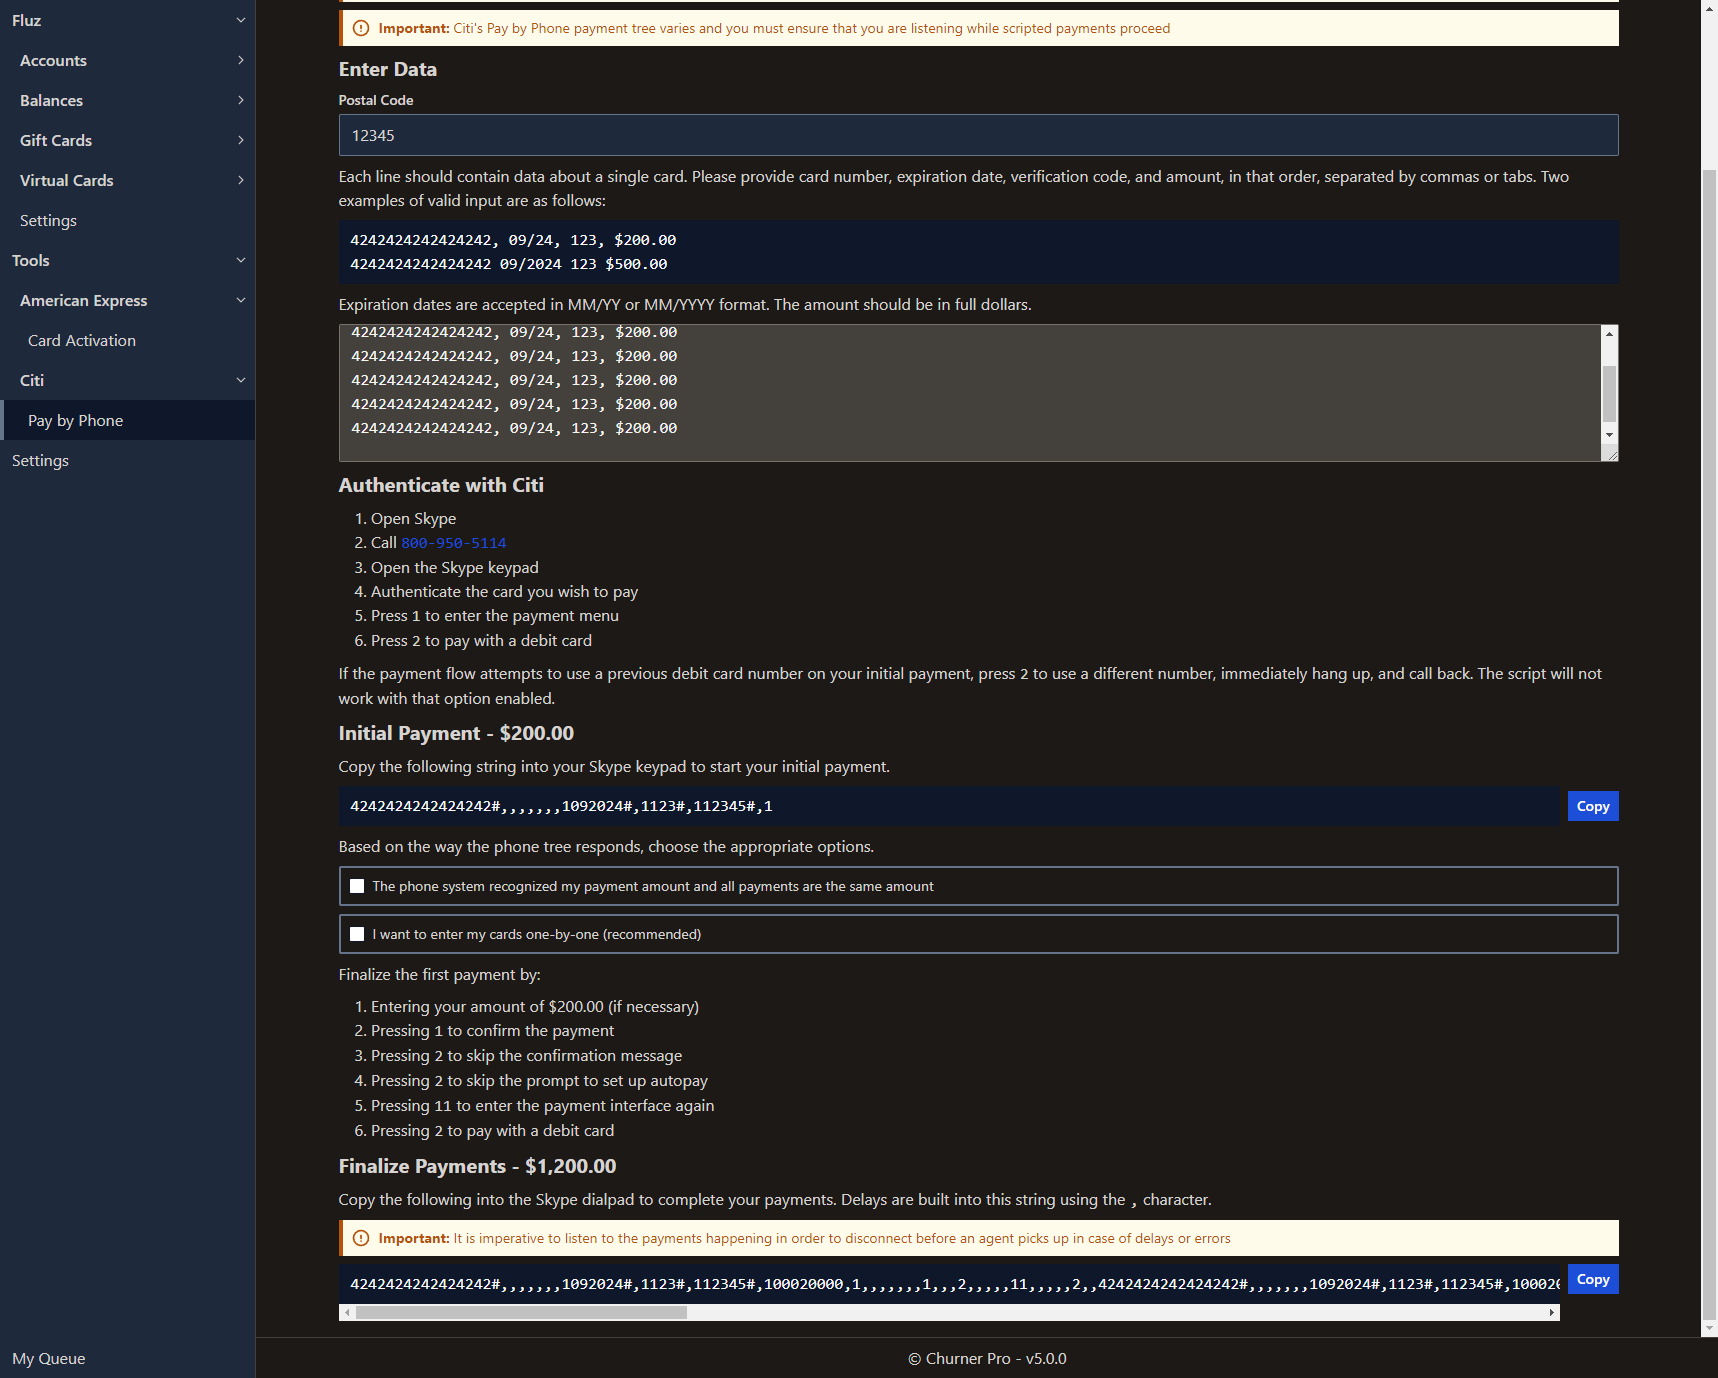
After successful data entry, you'll be presented with instructions on how to proceed with payment. Please ensure that you read through the instructions before starting your first payment.
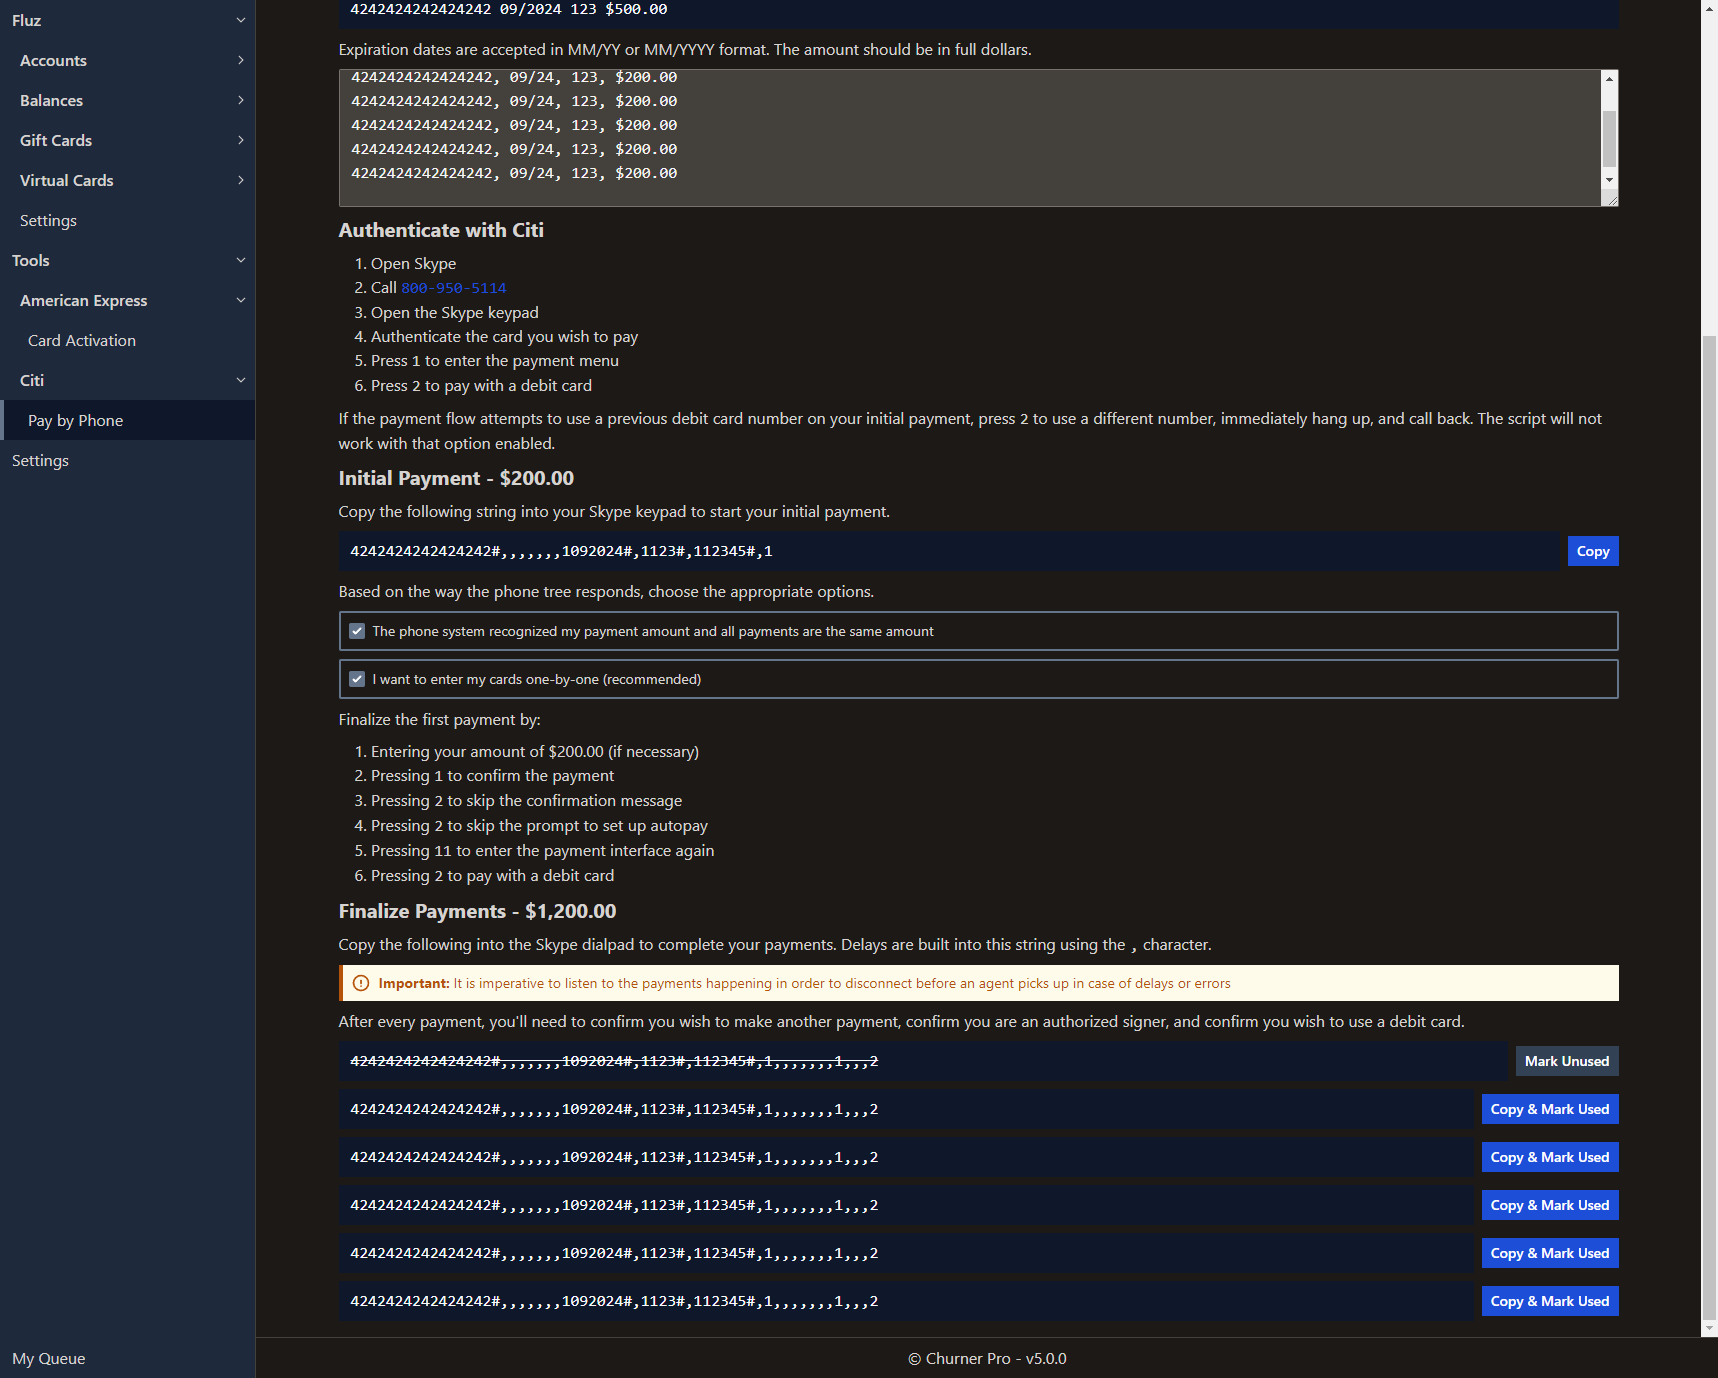
You can choose to use a single dialer string that will input all of your cards with minimal intervention or input your payments individually. The latter is recommended, at least for the first few payment sessions. If you choose to work with individual payments, you'll see something like the following.
Settings
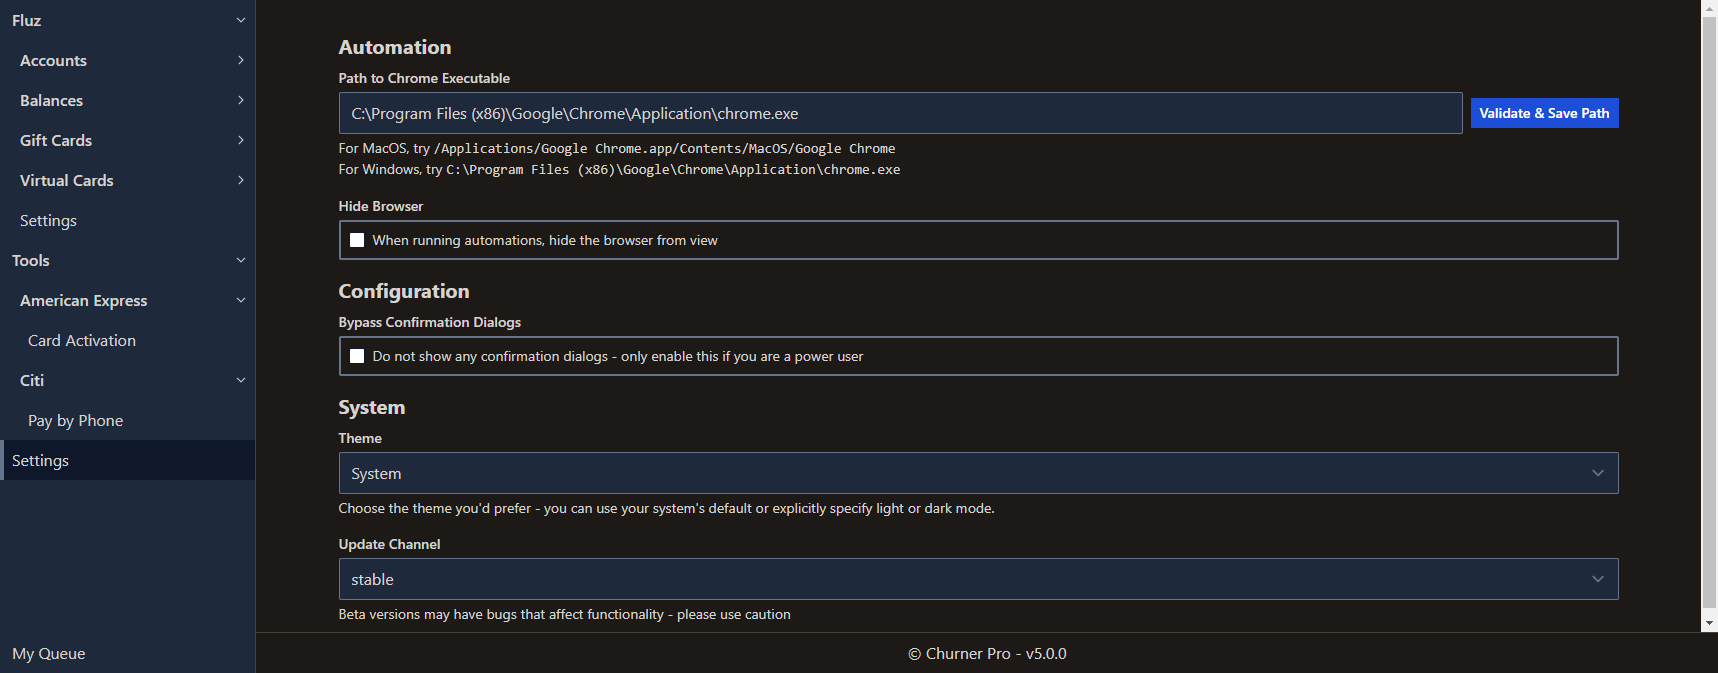
Churner Pro offers several universal settings. Most of these should be self-explanatory, but the Automation settings require some special processing. In order to enable browser automation, you must find your Chrome executable filepath and enter it into the field. Then, you must click Validate & Save Path. If you wish to use the American Express > Card Activation tool or activate cards before they are added to Fluz, you must configure this setting. Sensible defaults for the two supported platforms are provided and should usually work.
